On the Back
The back panel of the Nikon D200 is stud-
ded with more than fifteen controls, many
of which serve more than one function.
Where other cameras can force you to
access a menu to make many basic settings,
with the D200, just press the appropriate
button, turn the command dial or use the
multi-selector, and make the adjustment
you want. I’ve divided this crowded back
panel into four color-coded sections.
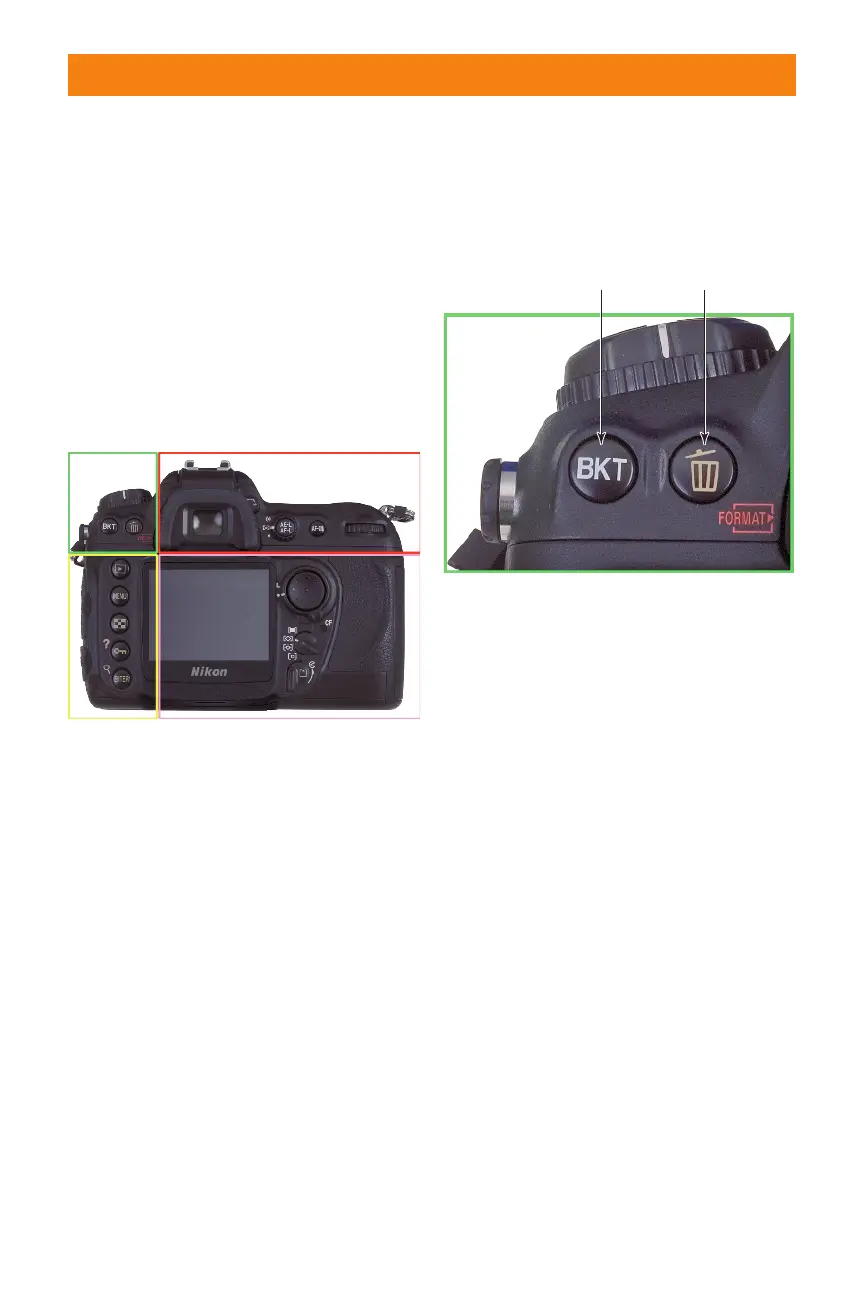
Upper left
The upper-left corner of the back panel
includes just two buttons:
✦ Bracketing (BKT) button. Hold
the bracketing button while spin-
ning the main command dial (to
select the bracketing function) and
the sub-command dial (to choose
the type of bracketing to be
applied).
✦ Delete/Format #2. To erase the
image shown on the LCD, press
this button, and press a second
time to respond to the “Delete.
Yes?” prompt. This button also
serves as the Format #2 button to
reformat a memory card when you
hold it down for a few seconds
simultaneously with the Mode/
Format #1 button.
Upper right
A few important controls are located on the
upper-right corner of the D200. They
include:
✦ Viewfinder eyepiece. The rubber
eyecup shields the viewfinder from
extraneous light, much like a lens
hood — a necessary component
because light entering the
viewfinder can affect the exposure
meter. The eyecup is removable
and can be replaced by a cap to
block that extra light when you use
the camera on a tripod.
✦ Diopter adjustment control.
Rotate this knob to adjust the
diopter correction for your eyesight.
✦ Metering mode dial. Rotate this
dial to select among center-
weighted, matrix, and spot meter-
ing options.
Chapter 1 ✦ Exploring the Nikon D200 21
1.9 Key components on the back panel of
the D200.
Bracket Delete/Format #2
1.10 Key components on the upper-left
corner of the back panel of the D200.
06_037482 ch01.qxp 9/18/06 1:38 PM Page 21
 Loading...