16
En
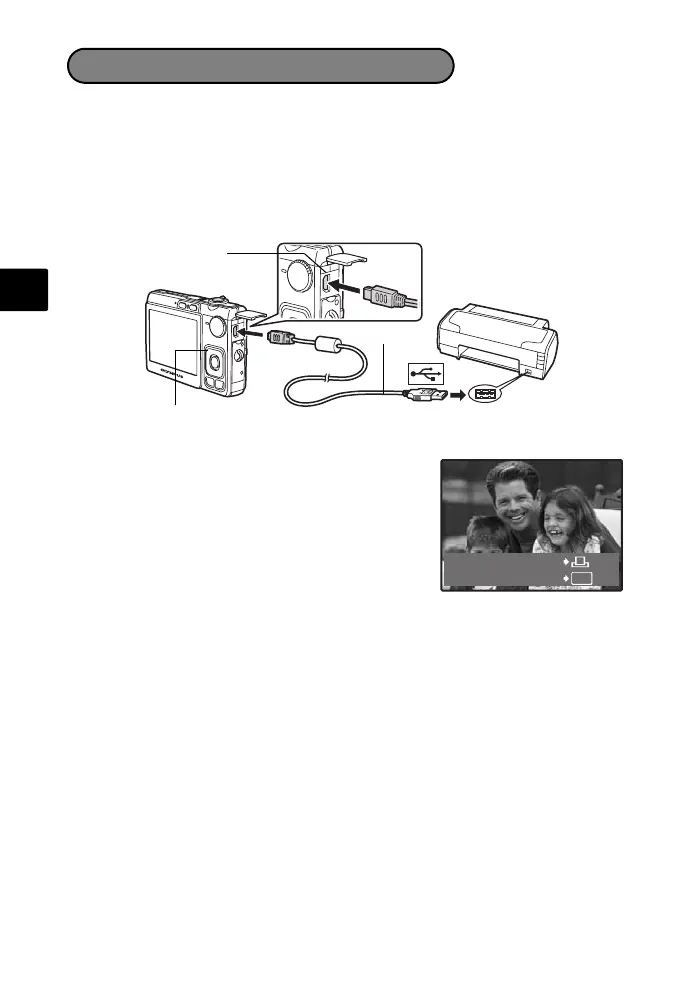
Using the provided USB cable, you may connect your camera directly to a
PictBridge compatible printer to make prints. You can print a picture with simple
operations.
1 In playback mode, display the picture you want to print out on the monitor.
2 Connect one end of the provided USB cable into the camera’s multi-
connector and the other end into the printer’s USB connector.
3 Press the OF/< button.
Printing starts.
When you are finished, disconnect the USB cable
from the camera with the picture selection screen
displayed.
Direct Printing (PictBridge)
Multi-connector
USB cable
OF/< button
OK
PC / CUSTOM PRINT
EASY PRINT START
d4339_e_basic_00_bookfile.book Page 16 Tuesday, December 12, 2006 11:09 AM