Tighten distributor
in
its mount and recheck
timing.
If
the relative position
of
the timing marks
doesn’t remain steady, the distributor
may be defective. This can be caused by pitted
or
misaligned
breaker points, incorrect breaker point spring tension,
worn
or
loose
breaker plate, or
a
worn
distributor shaft
or
bushing.
Distributor: The distributor contains and opens the
breaker points at the proper time, contains an
automatic spark advance mechanism, and distributes
the spark to the proper cylinder.
Testing: Remove the distributor and test
it
on a
commercial tester. Following the equipment
manufacturer’s instructions, check the centrifugal
advance mechanism and cam dwell angle. The cam
dwell angle should be
51
+3
degrees.
Do
not set
breaker gap by cam dwell. With the proper point gap,
if cam dwell is outside the above limits, check for worn
distributor cam.
Thoroughly inspect €he breaker points and check to
be sure
€he
movable contact turns freely on its pivot.
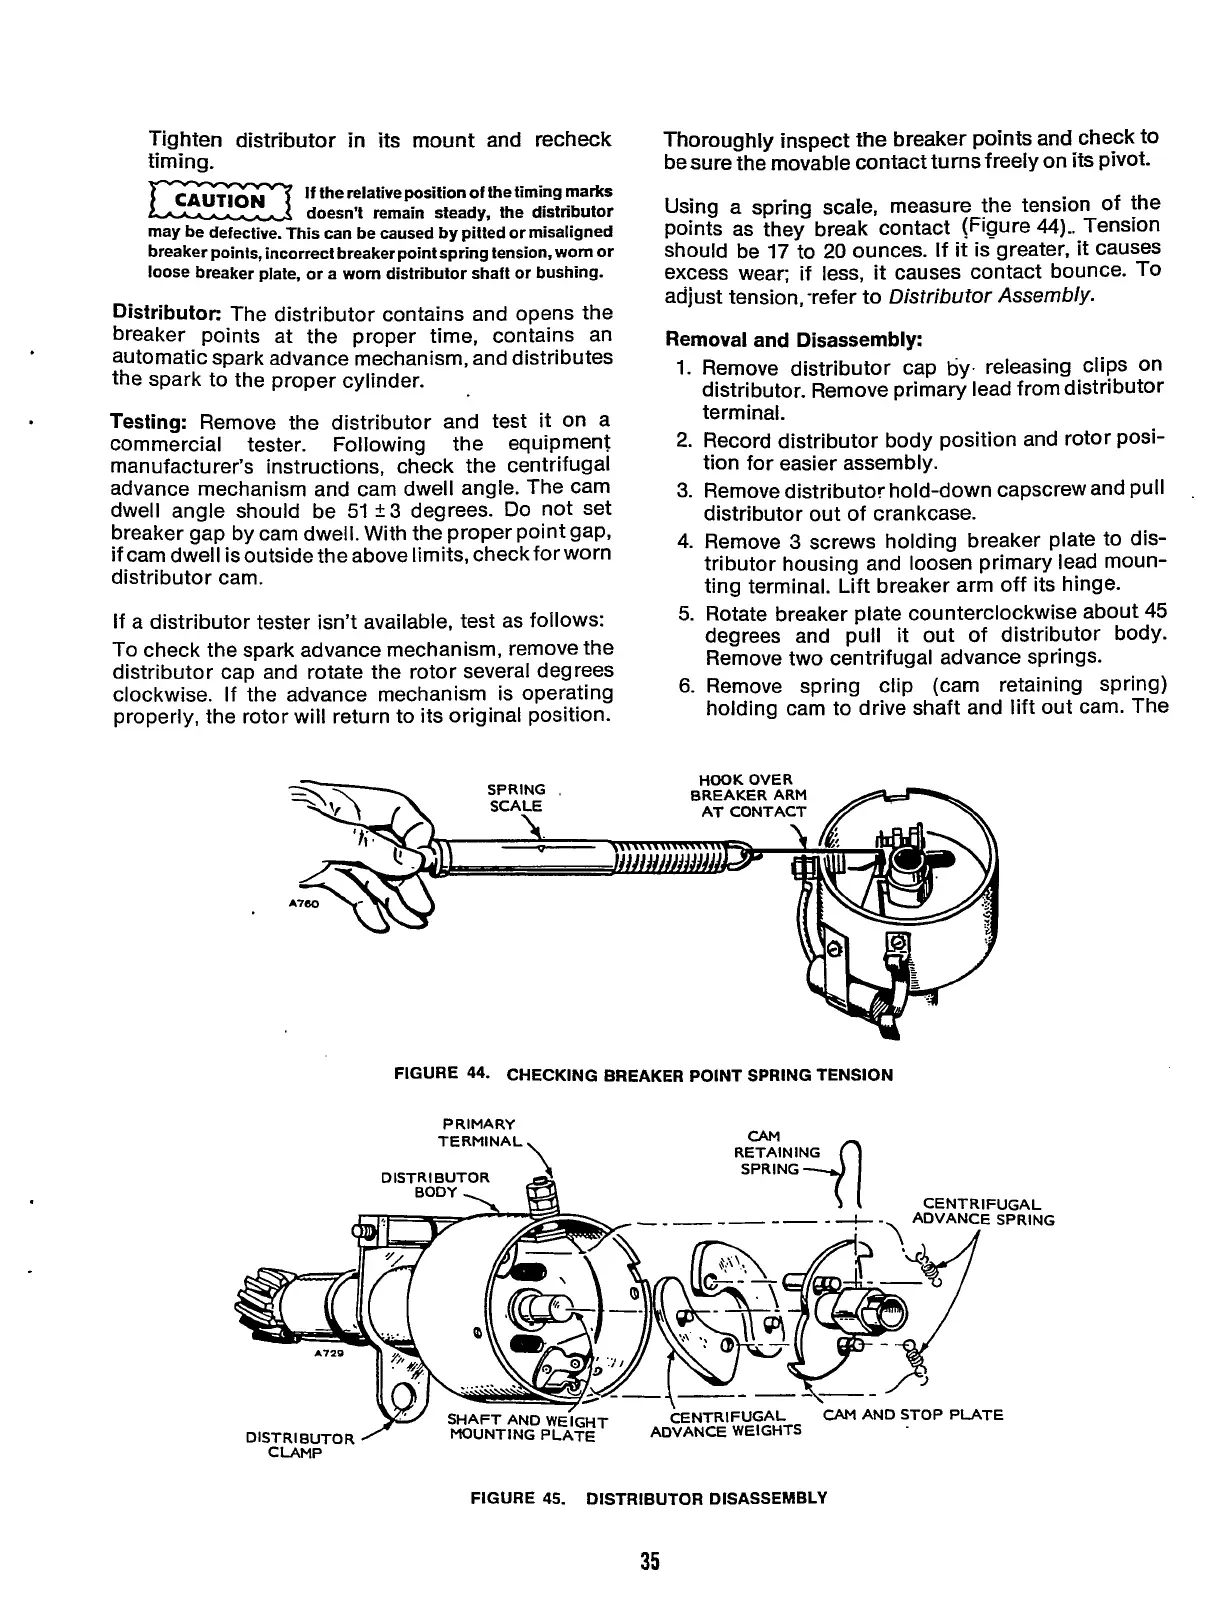
Using
a
spring scale, measure the tension of the
points as they break contact (Figure
a)..
Tension
should be
17
to
20
ounces. If
it
is greater,
it
causes
excess wear;
if
less,
it
causes contact bounce. To
adjust tension, -refer to
Distributor
Assembly.
Removal
and
Disassembly:
1.
Remove distributor cap by. releasing clips On
distributor. Remove primary lead from distributor
terminal.
2.
Record distributor body position and rotor pOSi-
tion for easier assembly.
3.
Remove distributor hold-down capscrew and pull
distributor out of crankcase.
4.
Remove
3
screws holding breaker plate to dis-
tributor housing and loosen primary lead moun-
ting terminal. Lift breaker arm off its hinge.
.
If a distributor tester isn’t available, test as follows:
To check the spark advance mechanism, remove the
distributor cap and rotate the rotor several degrees
clockwise.
If
the advance mechanism is operating
properly, the rotor will return to its original position.
5.
Rotate breaker plate counterclockwise about
45
degrees and pull
it
out of distributor body.
Remove two centrifugal advance springs.
6.
Remove spring clip (cam retaining spring)
holding cam to drive shaft and lift out cam. The
HOOK
OVER
BREAKER ARM
AT CONTACT
FIGURE
44-
CHECKING BREAKER POINT SPRING TENSION
PRIMARY
TERMINAL
CENTRIFUGAL
DISTRIBUTOR
DlSTRlBUTOR
CLAMP
FIGURE
45.
DISTRIBUTOR DISASSEMBLY
35
Redistribution or publication of this document,
by any means, is strictly prohibited.
 Loading...


