7.
8.
weights are now free and can be lifted out (Figure
451).
To
remove drive shaft, grind or file off peened-
Over end of pin holding drive gear to shaft. Drive
out pin, then remove gear and pull shaft out
through distributor body.
If
necessary, press two bronze bearings out of
distributor body.
3.
Set centrifugal advance weights into place and
install cam. Be sure pivots on cam fit into hole
in
each weight. Secure cam with spring clip and
install weight springs.
4.
Install and secure breaker plate.
5.
Mount breaker arm on its pivot and place control
spring end between end of terminal stud and
square metal washer. Then tighten primary ter-
minal.
Repair:
Clean all components except the condenser,
breaker points and bushings in light cleaning solvent.
Inspect the centrifugal advance component for signs
of wear and replace any that appear worn or
otherwise damaged, Inspect the cam and shaft for
wear or score marks. If either is scored, replace it.
’
To
check bearing wear, set the drive shaft into the
body and measure the side play at the top of the cam
with a dial indicator. Mount the indicator on the
distributor body, and measure the side play by pulling
the shaft directly away from the indicator with a force
of about five pounds. Side play should be less than
.005
inch. If not, the bearings must be replaced.
ONAN
does not recommend field replacement of
bronze shaft bearings unless the required equipment
is available. This can be done by an authorized service
station.
Distributor Assembly:
Install shaft assembly with upper drive shaft
thrust washer
in
distributor body. Install lower
drive shaft thrust washer and drive gear. Install a
pin through drive gear and shaft and peen it into
place.
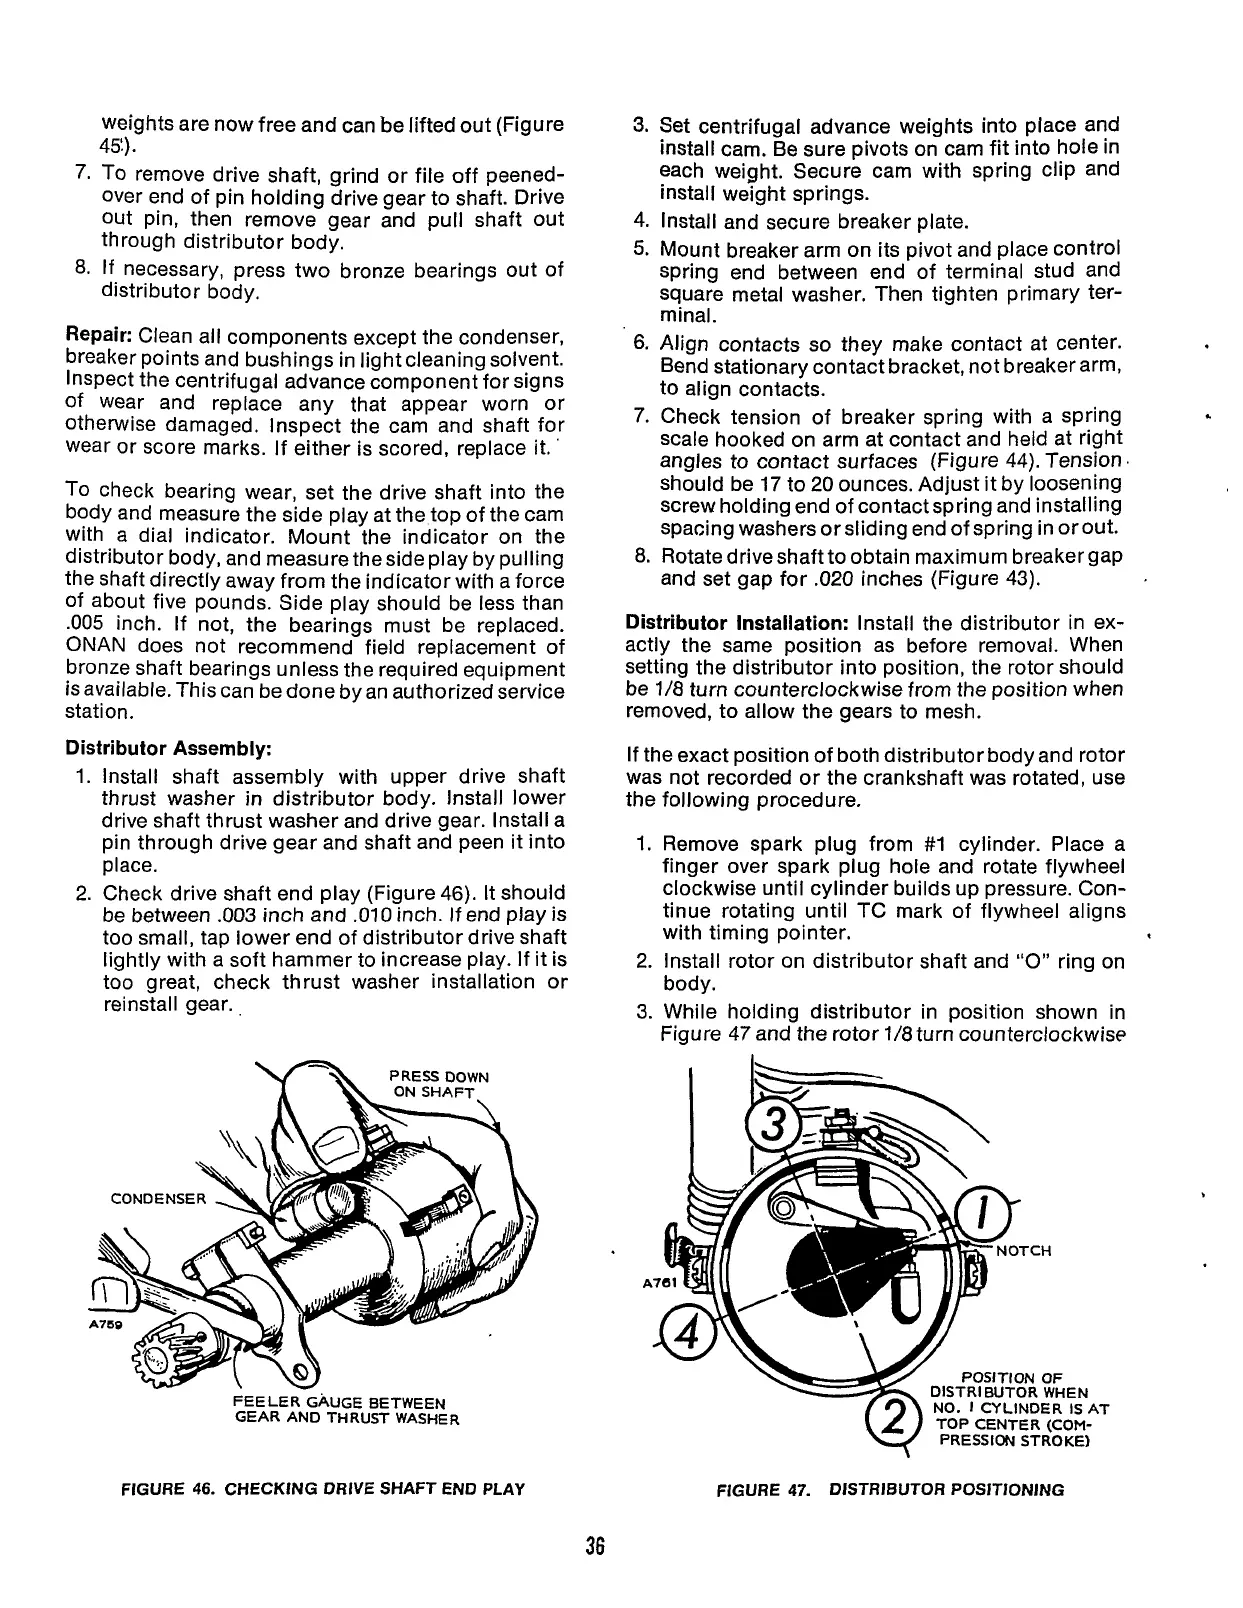
Check drive shaft end play (Figure
46).
It should
be between
.003
inch and
.010
inch. If end play is
too small, tap lower end of distributor drive shaft
lightly with a soft hammer to increase play. If
it
is
too great, check thrust washer installation or
reinstall gear.,
PRESSDOWN
ON SHAFT
FEELERGAUGE
BETWEEN
GEAR
AND THRUST WASHER
6.
Align contacts
so
they make contact at center.
Bend stationary contact bracket, not breaker arm,
to align contacts.
7.
Check tension of breaker spring with a spring
scale hooked on arm at contact and held at right
angles to contact surfaces (Figure
44).
Tension
should be
17
to
20
ounces. Adjust it by loosening
screw holding end of contactspring and installing
spacing washers orsliding end of spring in or out.
8.
Rotate drive shaft to obtain maximum breaker gap
and set gap for
.020
inches (Figure
43).
Distributor Installation:
Install the distributor in ex-
actly the same position as before removal. When
setting the distributor into position, the rotor should
be
118
turn counterclockwise from the position when
removed, to allow the gears to mesh.
If the exact position of both distributor body and rotor
was not recorded or the crankshaft was rotated, use
the following procedure.
1.
Remove spark plug from
#1
cylinder. Place a
finger over spark plug hole and rotate flywheel
clockwise until cylinder builds up pressure. Con-
tinue rotating until TC mark of flywheel aligns
with timing pointer.
2.
Install rotor on distributor shaft and
“0”
ring on
body.
3.
While holding distributor in position shown in
Figure
47
and the rotor
1/8
turn counterclockwise
POSITION
OF
DlSTRl
BUTOR
WHEN
NO.
I
CYLINDER
IS
AT
TOP CENTER (COM-
PRESSION STROKE)
FIGURE
46.
CHECKING DRIVE
SHAFT
END
PLAY
FIGURE
47.
DISTRIBUTOR POSITIONING
36
Redistribution or publication of this document,
by any means, is strictly prohibited.
 Loading...


