Seite / Page 11
38628, Edition / Ausgabe 2012-05, Version 5
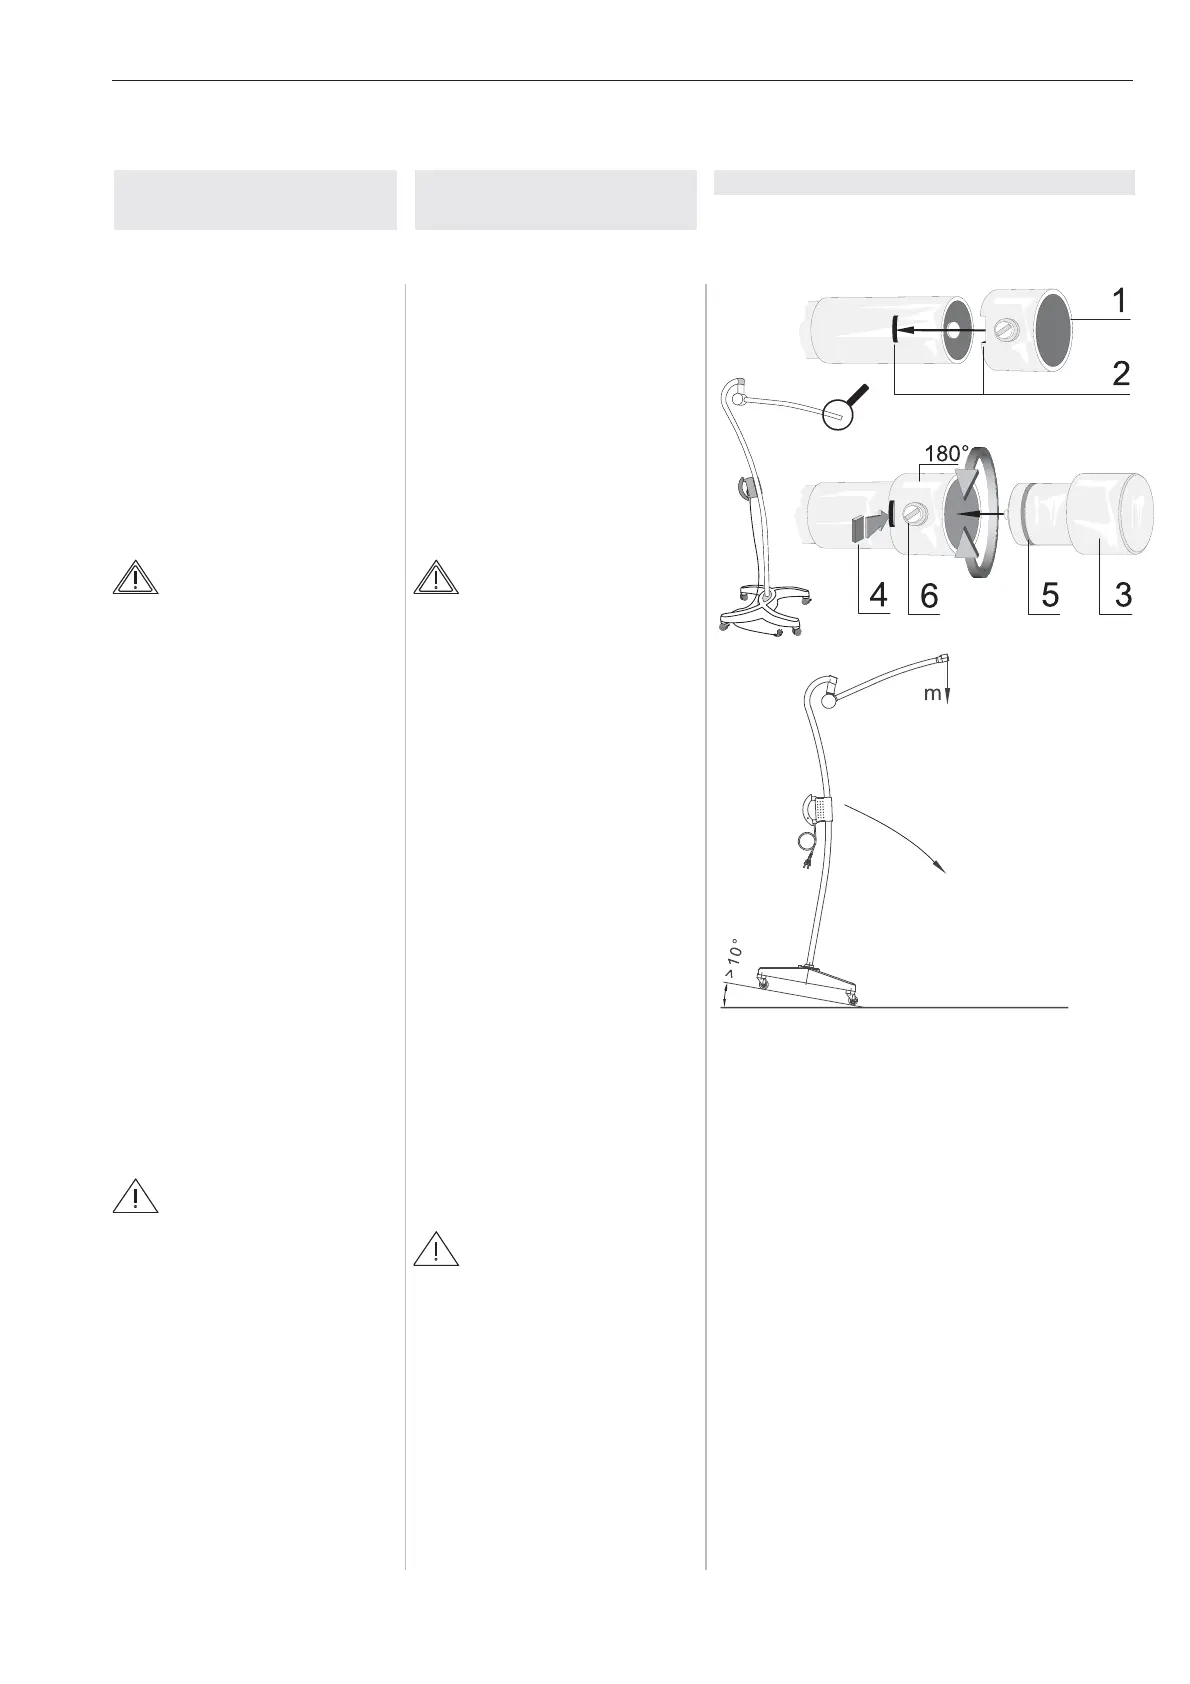
DeutschEnglish Figure / Abbildung
Figure / Abbildung 7
1 Plastic sleeve
Kunststoffhülse
2 Slot
Schlitze
3 End-device
Endgerät
4 Securing segment
Sicherungssegment
5 Groove
Nut
6 Brake screw
Bremsschraube
6 Mounting the
end-device Fig. 7
1. Pull out the plug and secure it
from being inserted again.
2. Take out the protective cover
from the spring arm opening.
3. Push the plastic sleeve (1) on
the spring arm in such a way
that the slots (2) get cover-
ed.
WARNINIG - Danger of
injury:
The spring arm, which is pressed
downwards, can jump backwards
and result in injuries. During the
installation of the end-device, no-
body should be present within
swiveling range of the spring arm.
4. Push in the end-device (3)
and the securing segment
(4) completely into the slots
(2), so that the securing seg-
ment is guided in the groove
(5).
5. Rotate the plastic sleeve (1)
through 180 degrees and turn
in the brake screw (5) till the
end-device (3) is braked.
6. Check the secure seating of
the end-device (3).
CAUTION - Damage to the
equipment:
After the end-device has been in-
stalled, perform tilt test in accor-
dance with DIN EN 60601-1.
6 Endgerät
montieren Abb. 7
1. Netzstecker ziehen und gegen
Wiedereinstecken sichern.
2. Schutzkappe aus der Feder-
armöffnung nehmen.
3. Kunststoffhülse (1) so auf
den Federarm schieben, daß
die Schlitze (2) zur Deckung
kommen.
WARNUNG - Verletzungs-
gefahr:
Der nach unten gedrückte Feder-
arm kann hochschnellen und zu
Verletzungen führen.
Während der Montage des Endge-
rätes dürfen sich keine Personen
im Schwenkbereich des Federar-
mes aufhalten.
4. Endgerät (3) einschieben und
Sicherungssegment (4) voll-
ständig in den Schlitz (2) ein-
stecken, so daß das Siche-
rungssegment in der Nut (5)
geführt wird.
5. Kunststoffhülse (1) um 180-
Grad drehen und Brems-
schraube (5) solange eindre-
hen bis das Endgerät (3) ge-
bremst wird.
6. Sicheren Sitz des Endgerätes
(3) prüfen.
VORSICHT - Schäden am
Gerät:
Nach der Montage des Endgerätes
Kipptest gemäß DIN EN 60601-1
durchführen.
 Loading...