EasyManua.ls Logo

Parkside PABH 20-Li C3 User Manual

Parkside PABH 20-Li C3
105 pages
To Next Page IconTo Next Page
To Previous Page IconTo Previous Page
Page #11 background imageLoading...
Page #11 background image
PABH 20-Li C3
GB
CY
 7
Before use
Charging the battery pack
(seefig.A)
CAUTION!
Always unplug the appliance before you
remove the battery pack from or connect the
battery pack to the charger.
NOTE
The recommended ambient temperature
range for using tools and batteries is between
–5°C and 50°C.
Never charge the battery pack if the ambient
temperature is below 10°C or above 40°C.
If a lithium-ion battery is to be stored for an
extended period, the charge level should be
checked regularly. The optimum charge level
is between 50% and 80%. The storage climate
should be cool and dry, and the ambient
temperature should be between 0°C and
50°C.
Connect the battery pack
to the high-speed
charger (see fig. A).
Insert the mains plug into the mains socket.
The control LED
lights up red.
The green control LED
indicates that the
charging process is complete and the battery
pack is ready for use.
Switch off the charger for at least 15 minutes
between successive charging sessions. Also
disconnect the power plug from the mains
power socket.
Checking the battery charge level
Press the battery charge level button to
check the status of the battery (see also main
diagram). The status/remaining charge will be
shown on the battery display LED as follows:
RED/ORANGE/GREEN = maximum charge
RED/ORANGE = medium charge
RED = low charge – charge the battery
Inserting/removing the battery pack
Inserting the battery pack
Push the rotation direction switch
into the
middle position (lock). Push the battery pack
into the handle until it clicks into place.
Removing the battery pack
Press the release button
and remove the
battery pack .
Using the appliance
NOTE
Push the rotation direction switch into the
middle position before carrying out any work
on the power tool (e.g. maintenance, tool-
changing, etc.) as well as during carriage
and storage of the power tool. Unintentional
activation of the On/Off switch can result
in injury.
Selecting a tool
For hammer drilling, you will need an SDS-plus
drilling tool.
For standard drilling in wood, metal, ceramics
and plastic, you can use an appropriate
SDS-plus drilling tool or a tool with a hexagonal
shank.
For screwing, use the screwdriver bits
that you can attach using the quick-release
chuck .

Table of Contents

Other manuals for Parkside PABH 20-Li C3

Question and Answer IconNeed help?

Do you have a question about the Parkside PABH 20-Li C3 and is the answer not in the manual?

Parkside PABH 20-Li C3 Specifications

General IconGeneral
Battery Voltage20 V
Chuck Capacity10 mm
Max Drilling Diameter in Wood30 mm
Battery TypeLithium-Ion
Chuck TypeKeyless

Summary

Introduction to the Cordless Hammer Drill

Intended Use of the Hammer Drill

Defines the product's purpose and applications for drilling and hammering in various materials.

Depicted Components Overview

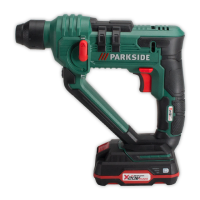
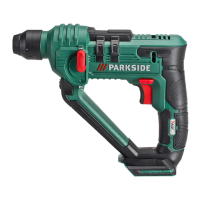
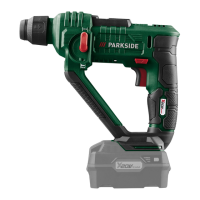
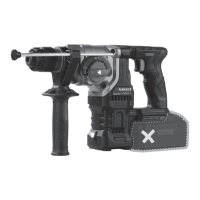
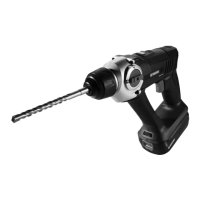
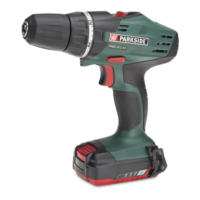
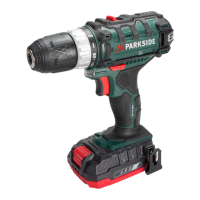
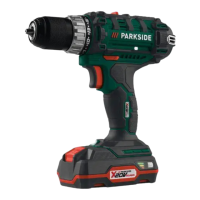
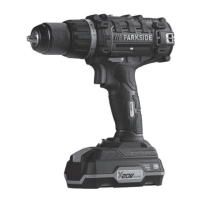
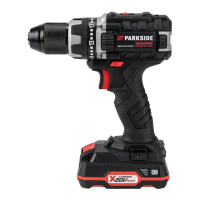
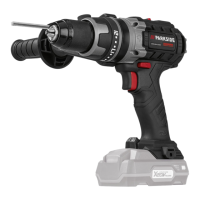
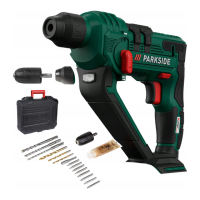
Identifies all parts of the tool and accessories with corresponding numbers for easy reference.

Package Contents Checklist

Lists all items included in the product packaging to verify delivery completeness.

Technical Specifications

Provides key technical data like voltage, speed, stroke rate, and drill diameter.

General Power Tool Safety Warnings

Work Area Safety Guidelines

Guidelines for maintaining a safe and clean environment during operation to prevent accidents.

Electrical Safety Precautions

Precautions to prevent electric shock and ensure safe electrical connections and tool usage.

Personal Safety Advice

Advice on protecting the operator from injury, including proper use of Personal Protective Equipment (PPE).

Power Tool Use and Care Best Practices

Best practices for using and maintaining the power tool to prevent accidents and ensure longevity.

Cordless Tool Usage and Handling

Charging the Battery Pack

Instructions for safely charging the rechargeable battery pack using the correct charger.

Checking Battery Charge Level

How to determine the remaining charge on the battery pack using the indicator.

Inserting and Removing the Battery Pack

Step-by-step guide for attaching and detaching the battery from the tool.

Service, Maintenance, and Disposal

Maintenance and Cleaning Guide

Guidance on keeping the tool clean and in good working order for optimal performance.

Disposal of Tool and Battery

Instructions on how to properly dispose of the tool and battery pack environmentally.

Specific Safety Guidelines

Charger Safety Guidelines

Specific safety rules and precautions for using the battery charger.

Hammer Drill Safety Instructions

Essential safety precautions and warnings specific to operating the hammer drill.

Original Accessories and Attachments

Recommendations for using compatible accessories to ensure safety and performance.

Before Use Procedures

Charging the Battery Pack

Detailed steps for charging the battery pack using the provided charger.

Checking Battery Charge Level

Method to check the current charge status of the battery.

Inserting/Removing Battery Pack

How to correctly insert and remove the battery from the tool.

Tool Changing Procedures

Changing a Tool

Instructions for quickly and easily changing drill bits or accessories without extra tools.

Fitting SDS Tool/Quick-Release Chuck

Guide to attaching SDS tools or the quick-release chuck to the tool holder.

Removing SDS Tool

Steps to safely detach SDS tools from the holder.

Operation and Controls

Select Operating Mode

How to choose between hammer drilling and drilling/screwing modes using the switch.

Setting Rotation Direction

Adjusting the tool's rotation direction for drilling or unscrewing.

Switching On and Off

Procedures for starting and stopping the power tool operation.

Advanced Operation and Settings

Set Drill/Hammer Speed

How to adjust the speed for optimal drilling or hammering by varying trigger pressure.

Run-on Brake Function

Explanation of the brake mechanism that stops the chuck and prevents tool run-on.

Maintenance and Disposal

Maintenance and Cleaning

How to keep the cordless hammer drill clean and in good working order.

Disposal of Tool and Battery

Proper methods for disposing of the appliance and its battery environmentally.

Kompernass Handels GmbH Warranty

Warranty Conditions

Details on the terms, duration, and requirements for the product warranty.

Warranty Period and Statutory Claims

Information on the warranty duration and consumer statutory rights.

Scope of Warranty Coverage

What the warranty covers and what it excludes, including limitations on usage.

Warranty Claim Procedure

Service Contact Information

Contact details for service and support in Great Britain and Cyprus.

Importer Information

Address of the importer for reference.

Original Declaration of Conformity

Ordering Replacement Battery

Telephone Ordering

Instructions for ordering replacement batteries via telephone.

Related product manuals