11 GB
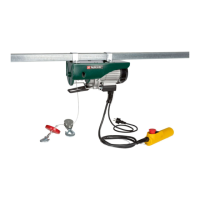
Winding/unwinding the cable
(Fig. J)
Winding the cable: Press the control
switch [8] upwards according to the arrow
indication .
Unwinding the cable: Press the control switch
[8] downwards according to the arrow
indication .
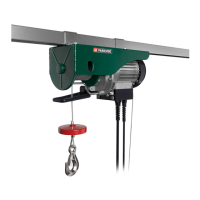
Lifting loads
Lower the steel cable [] so you can handle it
comfortably.
Fasten the load to the hook [] []. Use
additional bungee cords where necessary.
The load’s centre of gravity must be beneath
the product.
Wind up the steel cable [] until it is only taut.
Then fully lift the load.
Maximum/minimum length
levers
NOTE
u The maximum/minimum length levers [
]
[
]
are not intended to regularly stop the
product. Always attempt to stop the product
before it triggers one of these levers.
Minimum cable length lever
When the steel cable [] is fully wound up, the
minimum cable length lever [] will be triggered.
The steel cable cannot be wound up any further. It
can only be unwound.
Maximum cable length lever
When the steel cable [] is fully unwound, the
maximum cable length lever [] will be triggered.
The steel cable cannot be unwound any further. It
can only be wound up.
Emergency off switch
(Fig. J)
In case of an emergency, press the
emergency off switch [7] to stop lifting or
lowering operation.
The product is then locked. To unlock the
product, turn the emergency off switch [7]
slightly clockwise (in the direction of the
arrow) until it pops out.
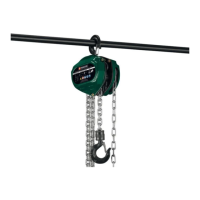
Set-up as block and tackle
Accessories
The following tools are needed for the safe and
proper use of the block and tackle function:
2 spanners (8 mm)
2 spanners (13 mm)
m
WARNING
u Do not use any accessories not
recommended by Parkside.
Setting up the product as a block and tackle
distributes the load to 2 pulleys. This allows twice
the weight to be lifted. However, the maximum
lifting height and speed are reduced by half.
Fasten the hook [] to the intended mounting
opening []. The steel cable [] now forms a
loop (Fig. C).
Dismantle the pulley [] of the extra hook:
Remove the 3 screws (Fig. F).
 Loading...