39
GB
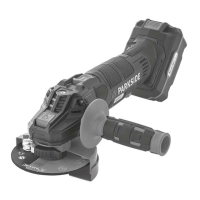
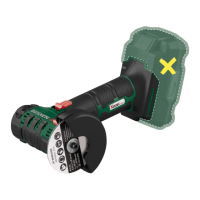
Removing the attachment
1. If necessary, remove the disc for better
access, see “Installing/changing disc”.
2. Release the attachment (11) by pushing
the notch (17) away from the guard
cover (7).
3. Unscrew the attachment (11) from the
guard cover (7).
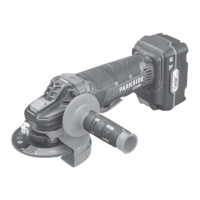
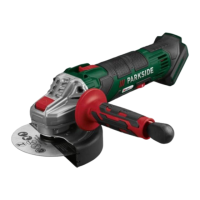
Installing/changing disc
1. Press the spindle stop button (9).
2. Turn the mounting spindle (14) until the
spindle lock xed the mounting spind-
le. Keep and continue to hold down
the spindle lock button (9)
3. Release the clamping nut (13) with the
chuck key (10). You can release the
spindle lock button (9).
4. Set the desired disc onto the mounting
ange (
12). label on the disc
should always face the device.
If the rotary direction is in-
dicated on your disc, ensure
that it corresponds to the
rotary direction of the angle
grinder when mounting. This
is indicated on the device
below the spindle stop but-
ton (9) (
).
Ensure that the ange ( 12) is
placed on the device in such a way
that the recesses in the ange grip
into the edge of the device. The
mounting spindle (14) must turn simul-
taneously when you turn the ange.
5. Set the clamping nut (13) on the moun-
ting spindel (14) again. The at side of
the clamping nut must face the attach-
ment tool if the thickness of the disc
receptor is < 5 mm.
If the thickness of the disc receptor is
≥ 5 mm, turn the clamping nut.
See illustration
.
6. Press the spindle stop button (9) and
turn the mounting spindle (14), until the
spindle toggle button holds the spind-
le ange in a xed position. Pull the
clamping nut (13) tight again using the
chuck key (10). You can let go of the
spindle lock button (9).
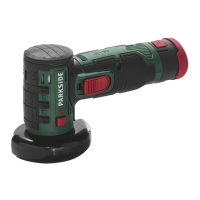
Installing/changing the
wire brush
1. Press the spindle stop button (9).
2. Turn the mounting spindle (14) until the
spindle stop button holds the mounting
spindle in a xed position. Keep the
spindle stop button (9) depressed.
3. Release the wire brush with a combina-
tion wrench (not included in the scope
of delivery). You can now release the
spindle stop button (9).
4. Place the desired wire brush onto the
mounting spindle.
5. Press the spindle stop button (9) and
rotate the wire brush on the mounting
spindle (14). Tighten the wire brush
using a combination wrench. You can
now release the spindle stop button (9).
Operation
Caution! Risk of injury!
- Remove the battery before carrying out
any work on the device.
- Only use cutting/grinding discs and ac-
cessories recommended by the manufac-
turer. Using other attachment tools and
other accessories can represent a risk of
injury for you.
- Only use accessory parts which bear
information about the manufacturer, type
 Loading...