ADJUSTING THE TORQUE – cont’d
1–4 For driving small screws
5–7 For driving medium sized screws
into soft materials
8–10 For driving screws into soft &
medium-density materials
9–13For driving screws into hardwood
14–16 For driving large screws
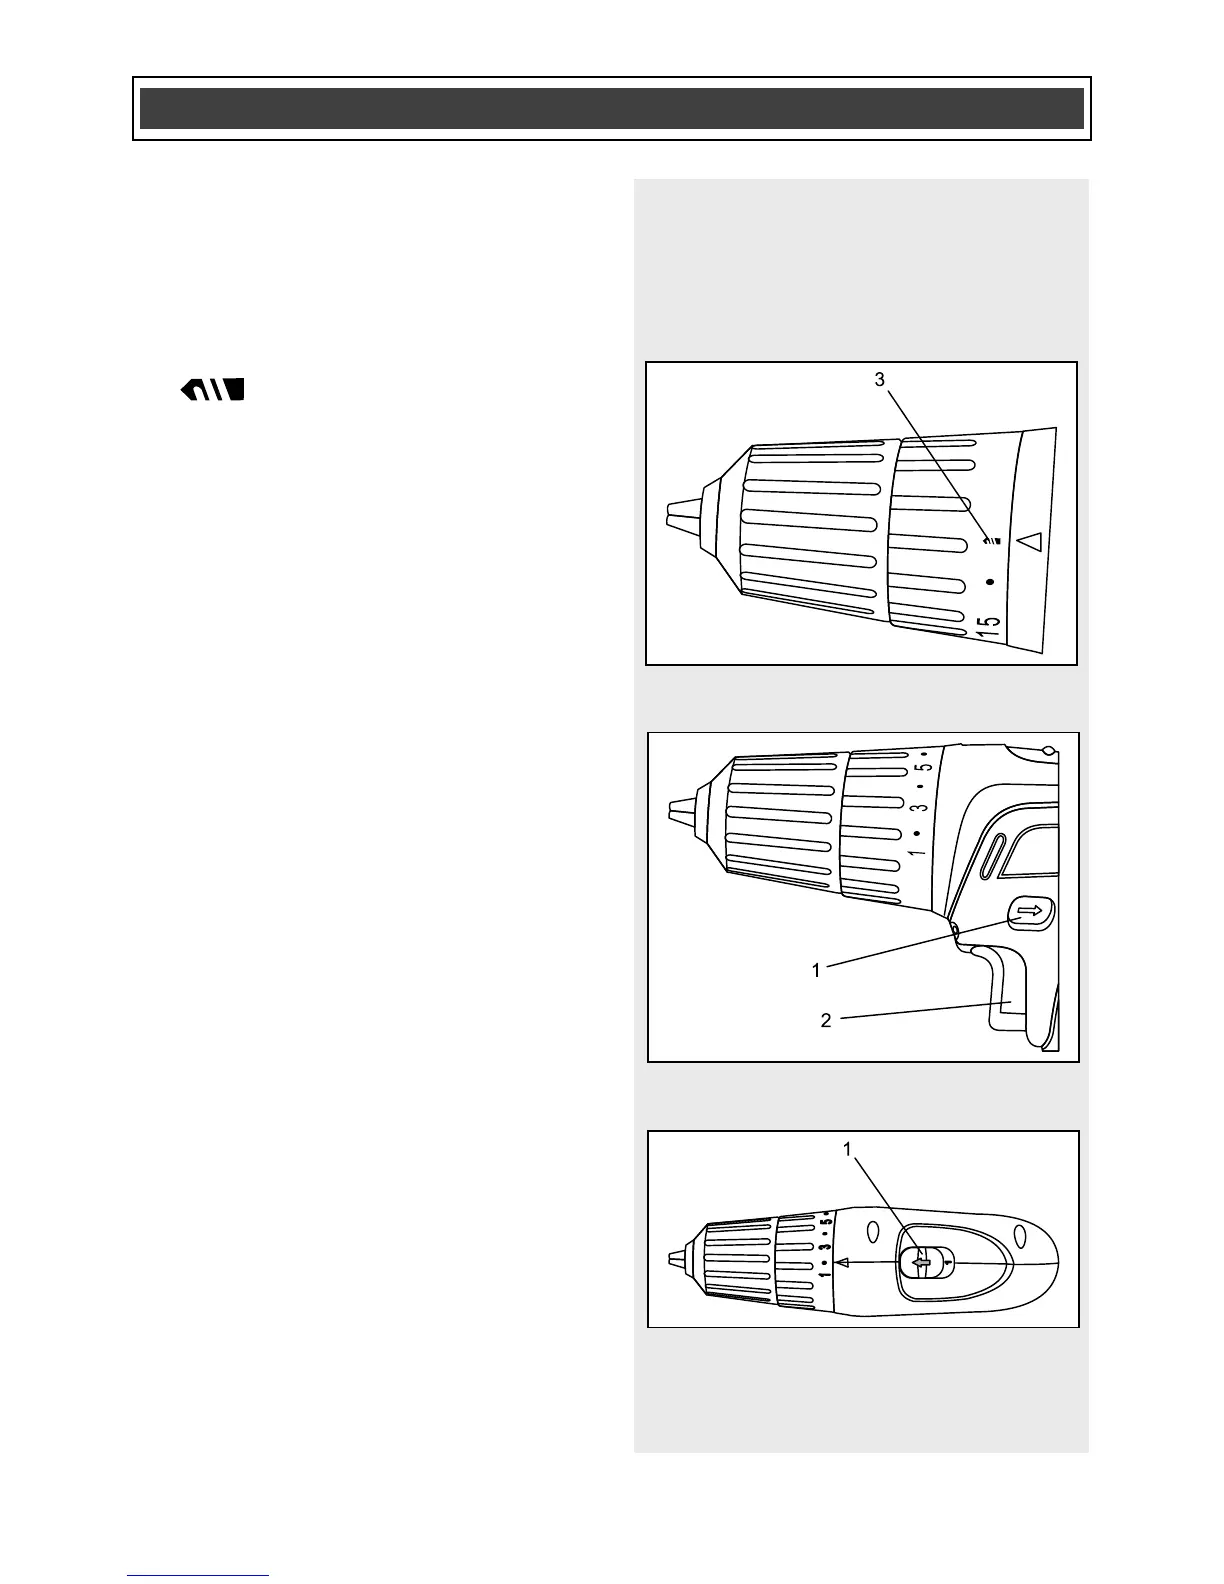
For drilling. This position is
marked with a drill bit icon (3) on the
torque adjustment ring (Fig. 7).
FORWARD/REVERSE SWITCH
The forward/reverse switch (1) is
conveniently mounted above the trigger
switch (2) (Fig. 8). To make the drill rotate
clockwise for drilling or driving screws,
push the forward/reverse switch to the left.
To make the drill rotate counter-clockwise
for removing screws, push the
forward/reverse switch to the right.
NOTES:
a) Never change the position of the
forward/reverse switch while chuck is
turning.
b) The trigger switch will NOT function with
the forward/reverse switch in the middle
position.
TWO-SPEED GEAR BOX SWITCH
Set the speed-control switch (1) to the
desired speed (Fig. 9). Slide the speed-
control switch FORWARD for low-speed
operation. Slide the speed control-switch
BACK for high-speed operation.
NOTES:
a) Use low-speed setting for drilling large
holes and for driving screws.
b) Use high-speed setting for drilling
smaller holes.
c) Do NOT change the speed-control
switch position while drill is turned ON.
Damage to the gears may result.
 Loading...