INSTALLING A BATTERY IN THE
OSCILLATING TOOL
1. Remove the discharged battery (1)
from the tool by pressing on the
battery release button (2) on the top of
the battery (Fig. 4).
2. Pull the battery out of the tool handle.
3. Slide the fully charged battery into the
matching cavity in the tool handle
where the discharged battery has
been removed.
NOTE: Make sure the two keys (3) in the
battery stem align with the matching key
ways (4) in the handle. The battery release
button will “click” into place when the
battery is fully installed.
WARNING: Do not immerse the
battery pack in water. Sudden cooling
could cause the hot battery to explode or
leak.
INSTALLING ACCESSORIES
All accessories are installed on the
oscillating tool in a similar manner. For the
purposes of describing the accessory
installation, the half circle blade is used.
DANGER: Always remove the
battery from the tool before installing or
removing accessories or sandpaper.
Failing to remove the battery may result
in the tool accidentally being started
and causing serious injury to the
operator.
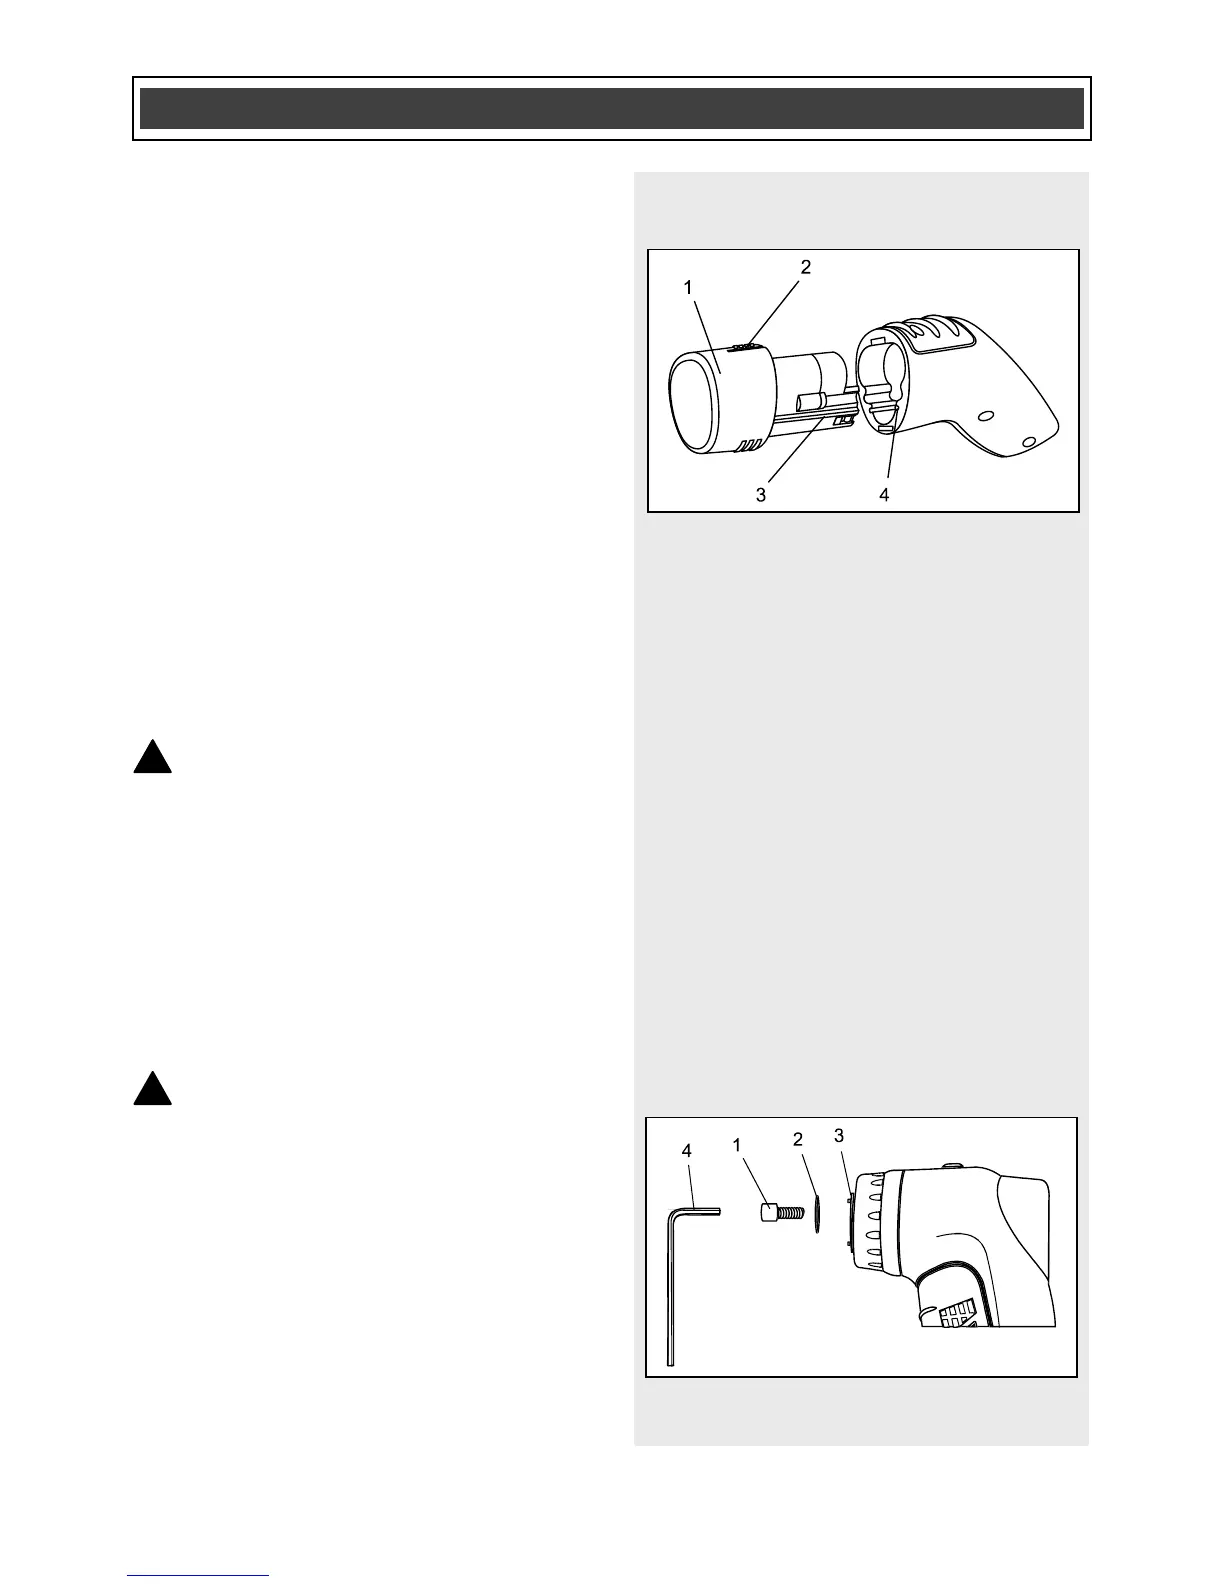
1. Remove the screw (1) by turning it
counter clockwise and the washer (2)
from the accessory holder (3). Use the
5 mm Hex key (4) if the screw is too
tight (Fig. 5).
 Loading...