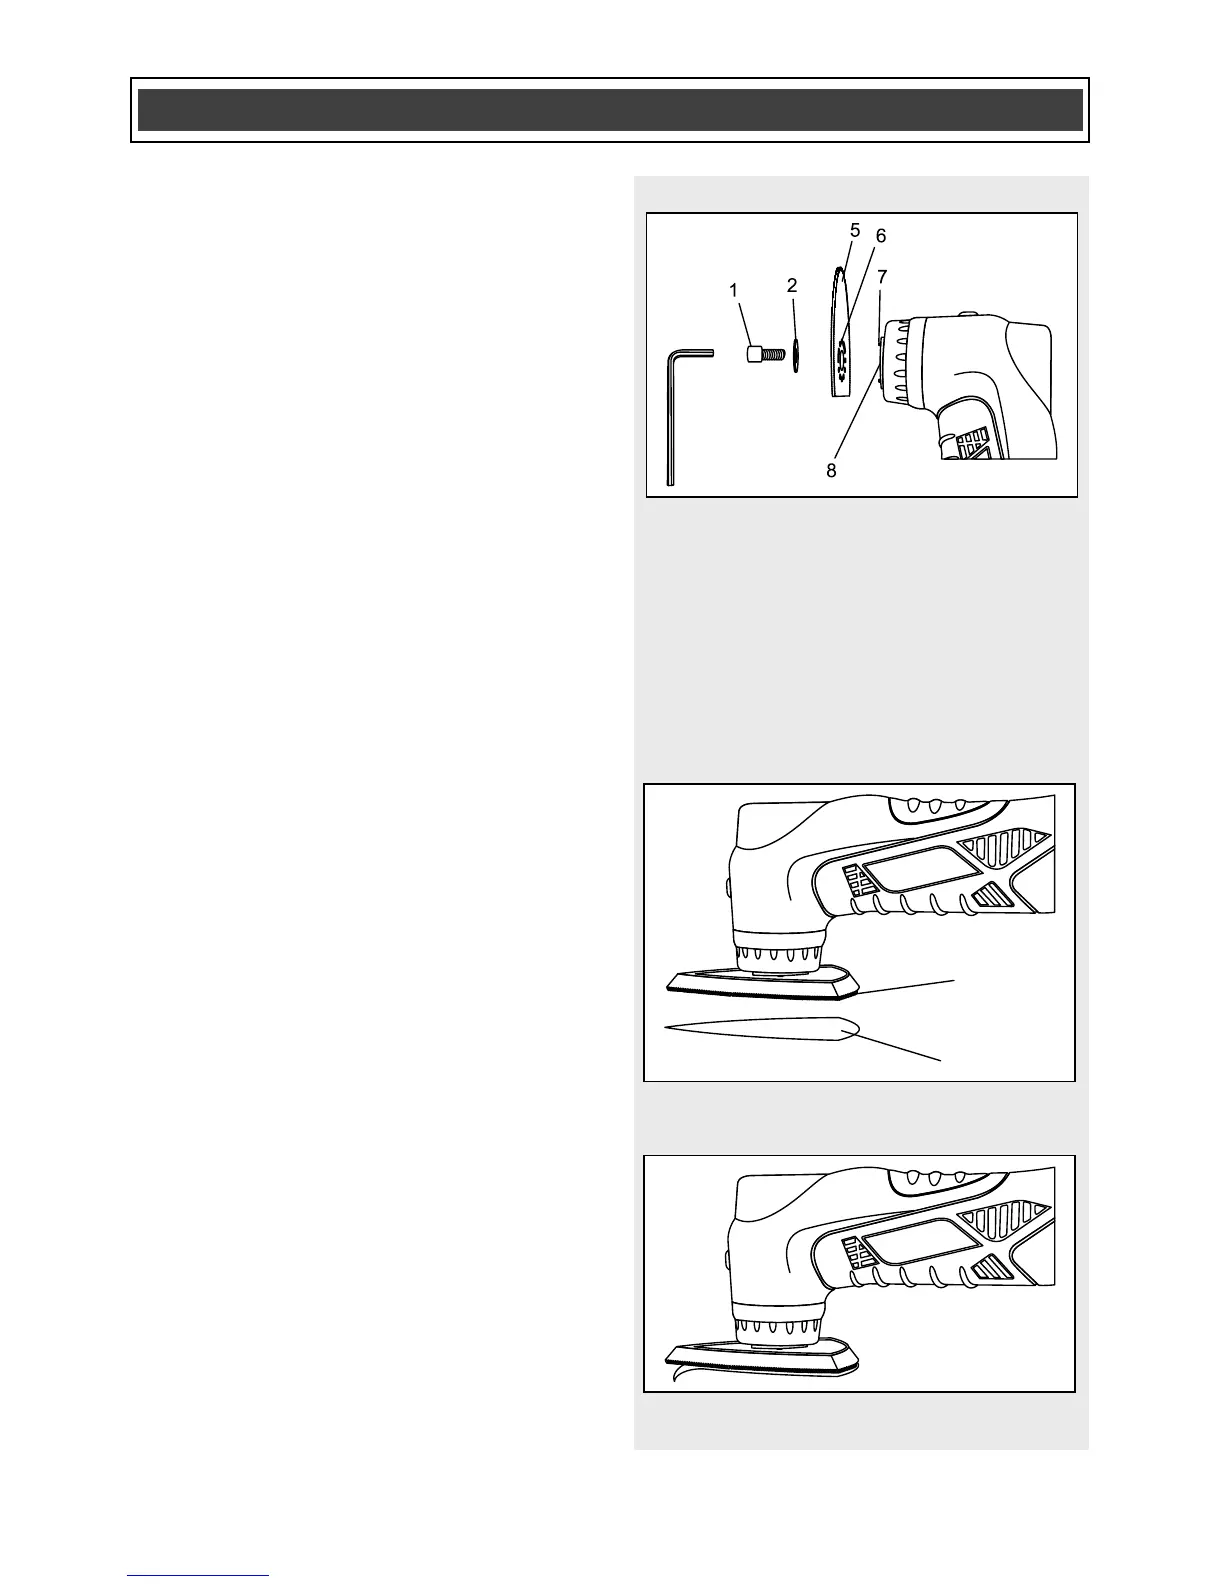
INSTALLING ACCESSORIES – cont’d
2. Place the blade (5) on the accessory
holder (Fig. 6).
NOTES:
a) Make sure the alignment holes (6) in
the blade fit over the alignment pins
(7) in the accessory holder.
b) The blade can be mounted at various
angles left or right of center if
required.
3. Place the screw (1) through the
washer (2) and the blade and into the
accessory holder threaded hole (8).
Turn the screw clockwise until it is
finger tight.
NOTE: Check to make sure the holes in
the blade are still mated with the alignment
pins on the accessory holder.
4. Firmly tighten the screw with the 5 mm
hex key.
INSTALLING SANDPAPER
1. Firmly press the sandpaper (1) onto
the hook & loop pad (2) (Fig. 7).
NOTES:
a) Place the sandpaper so the holes in the
sandpaper line up with the matching holes
in the hook & loop pad.
b) Press the sandpaper firmly onto the
hook & loop pad.
2. To remove the sandpaper, simply peel
the sandpaper way from the hook &
loop pad (Fig. 8).
 Loading...