7
Instructions
The following instructions only apply to right-handed doors. For left-handed doors,
please read [Before installation] carefully and make necessary adjustments.
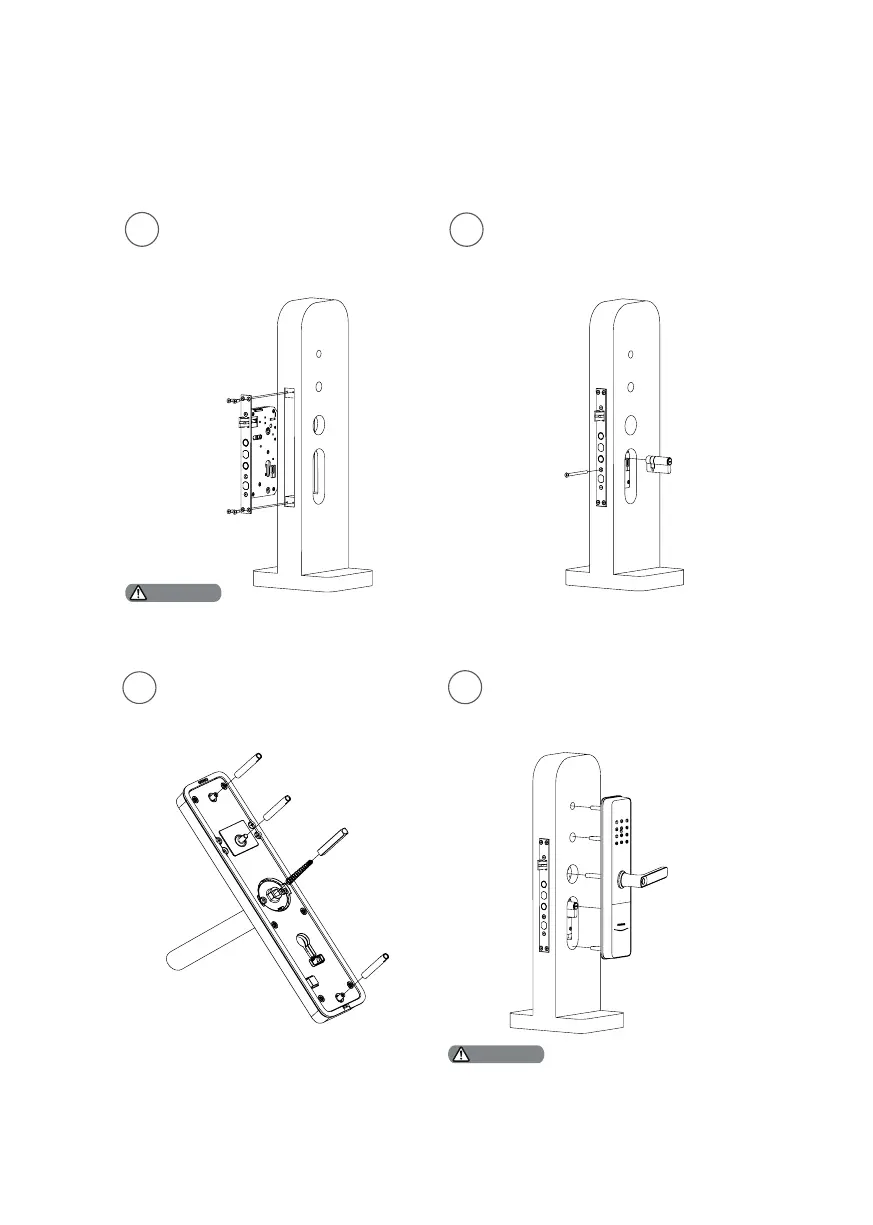
1
Mark the hole for drilling with drilling
template and drill the marked hole,
then mount the mortise into the hole
and fasten it with anchor screw.
Insert the gourd lock cylinder into
the corresponding position and
fasten it with screw.
2
The mortise cable should through the hole
showed on the picture.
Attention
3
4
Install the threaded pipes and place
the compressed spring and square
shaft into the hole of the lever.
Pull the connector through the
hole and align the square shaft
and threaded pipes on the front
escutcheon with the holes.
Anti-dismantling component should be ush
against the door or an alert would be triggered
when Philips easykey is electried.
Attention
 Loading...