7 - 3 BODY
THREE-POINT SEAT BELT
DESCRIPTION
Three-point automotive shoulder/lap belts are used
with bench and bucket seats. The seat belt is
anchored to a flange at the lower outboard end of
the seat back support frame. The seatbelt passes
through a D-ring mounted at the upper outboard
edge of the seat back support frame, into a
retractor assembly mounted to the seat back frame
approximately 6" below the D-ring. A seat belt latch
assembly is mounted at the lower center of the seat
back support frame.
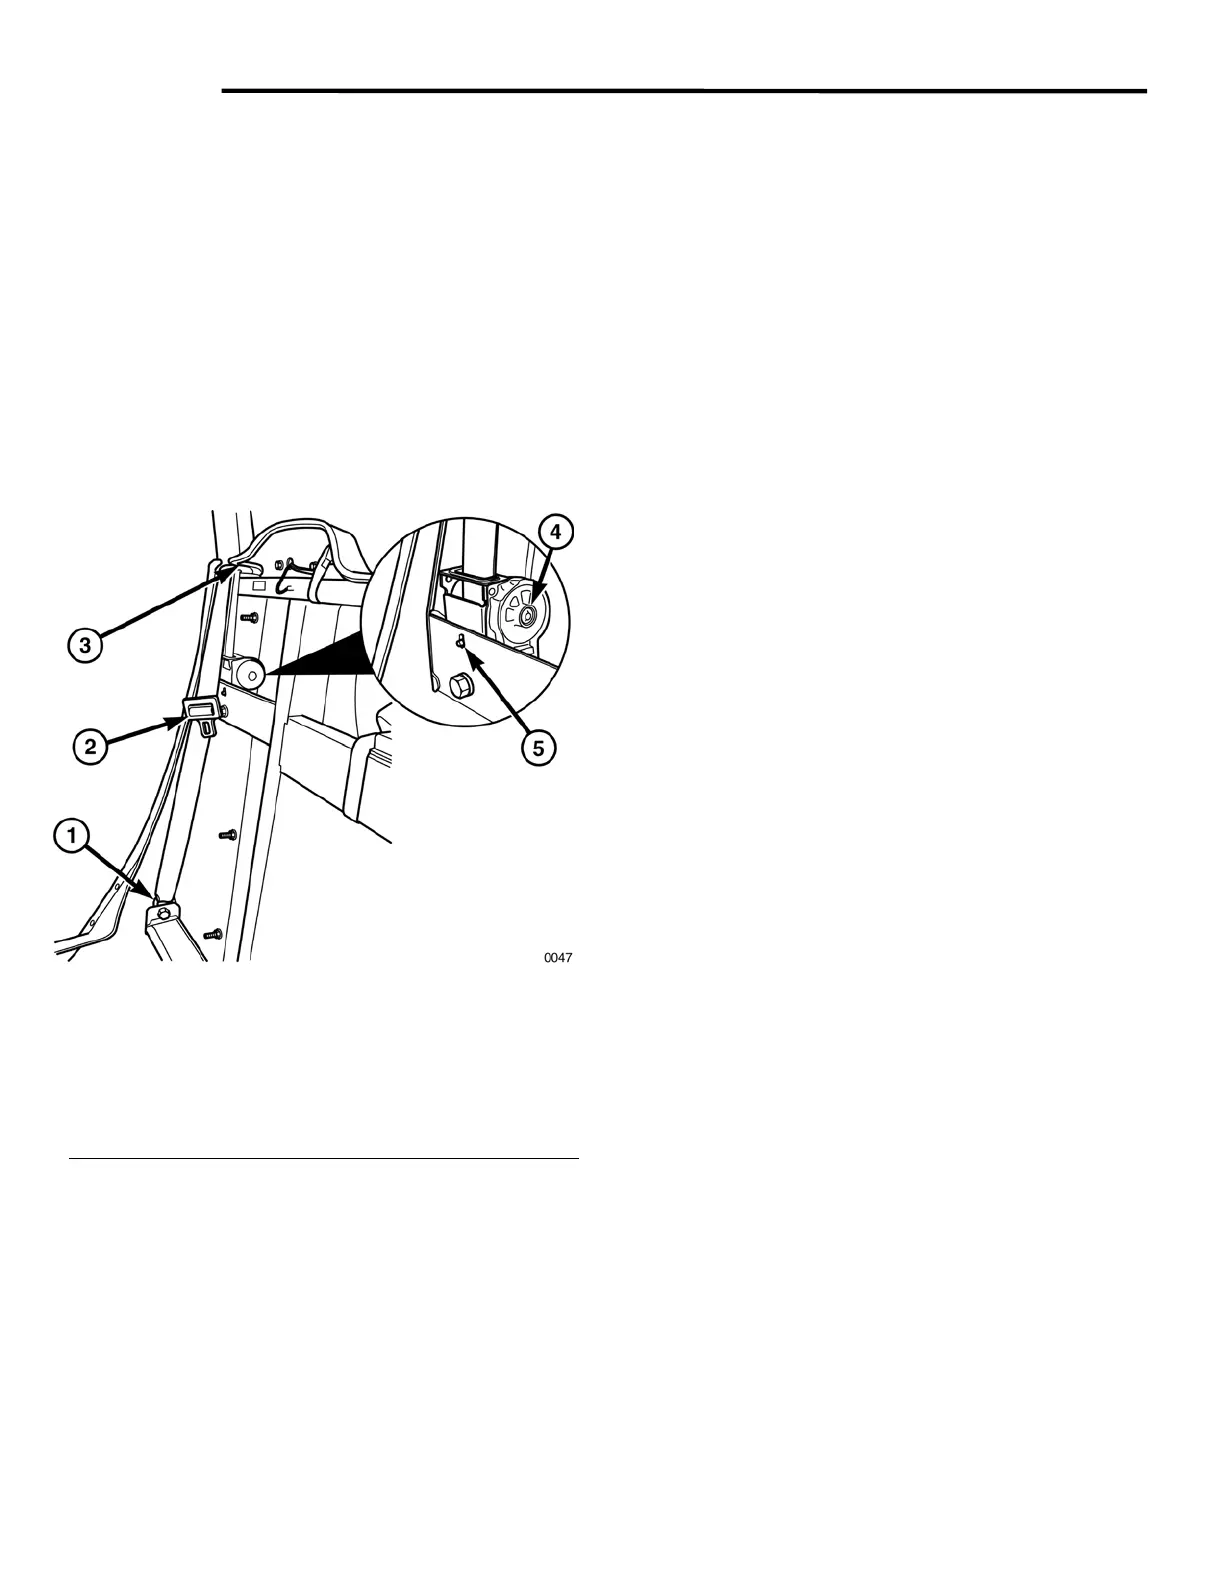
Fig. 1 Three-Point Seat Belt (Bench seat shown,
bucket seats similar)
1 - Seat belt anchor
2 - Buckle assembly
3 - D-Ring
4 - Retractor
5 - Locating tab
REMOVAL
1. Remove the lower seat cushion. See Bench
Seats in this section.
2. Turn the master disconnect switch OFF.
3. Remove the seat back assembly. See Bench
Seats in this section.
4. Remove body back panel. See Body Back
Panel in this section.
5. Remove bolt from D-ring to seat back support.
6. Remove bolt attaching retractor assembly to
seat back support.
7. Remove the body foot bracket that attaches the
seat back support and body support arm.
8. Remove seat belt assembly.
9. Remove bolt attaching seat belt latch assembly
to seat back support.
10. Remove seat belt latch assembly.
INSTALLATION
1. Attach seat belt latch assembly to seat back
support with mounting bolt. Tighten to 60 ft-lb.
2. Attach D-ring to seat back support, making sure
straight portion of D-ring faces forward. Tighten
mounting bolt to 60 ft-lb.
3. Attach seat belt/retractor assembly to seat back
support. Tighten mounting bolt to 60 ft-lb.
WARNING: TAB ON RETRACTOR ASSEMBLY
MUST ENGAGE LOCATING HOLE ON SEAT
BACK SUPPORT.
4. Feed seat belt end through D-ring, back to
front, and attach to flange at lower outboard
end of seat back support. Tighten mounting bolt
to 60 ft-lb.
5. Install body back panel. See Body Back Panel
in this section.
6. Reinstall body side panel. See Body Side Panel
in this section.
7. Install seat back assembly. See Bench Seats in
this section.
8. Turn the master disconnect switch ON.
9. Install lower seat cushion. See Bench Seats in
this section.
GEM Service Manual November 2007
 Loading...