7 - 11 BODY
FLOOR PANELS
(6 PASSENGER ONLY)
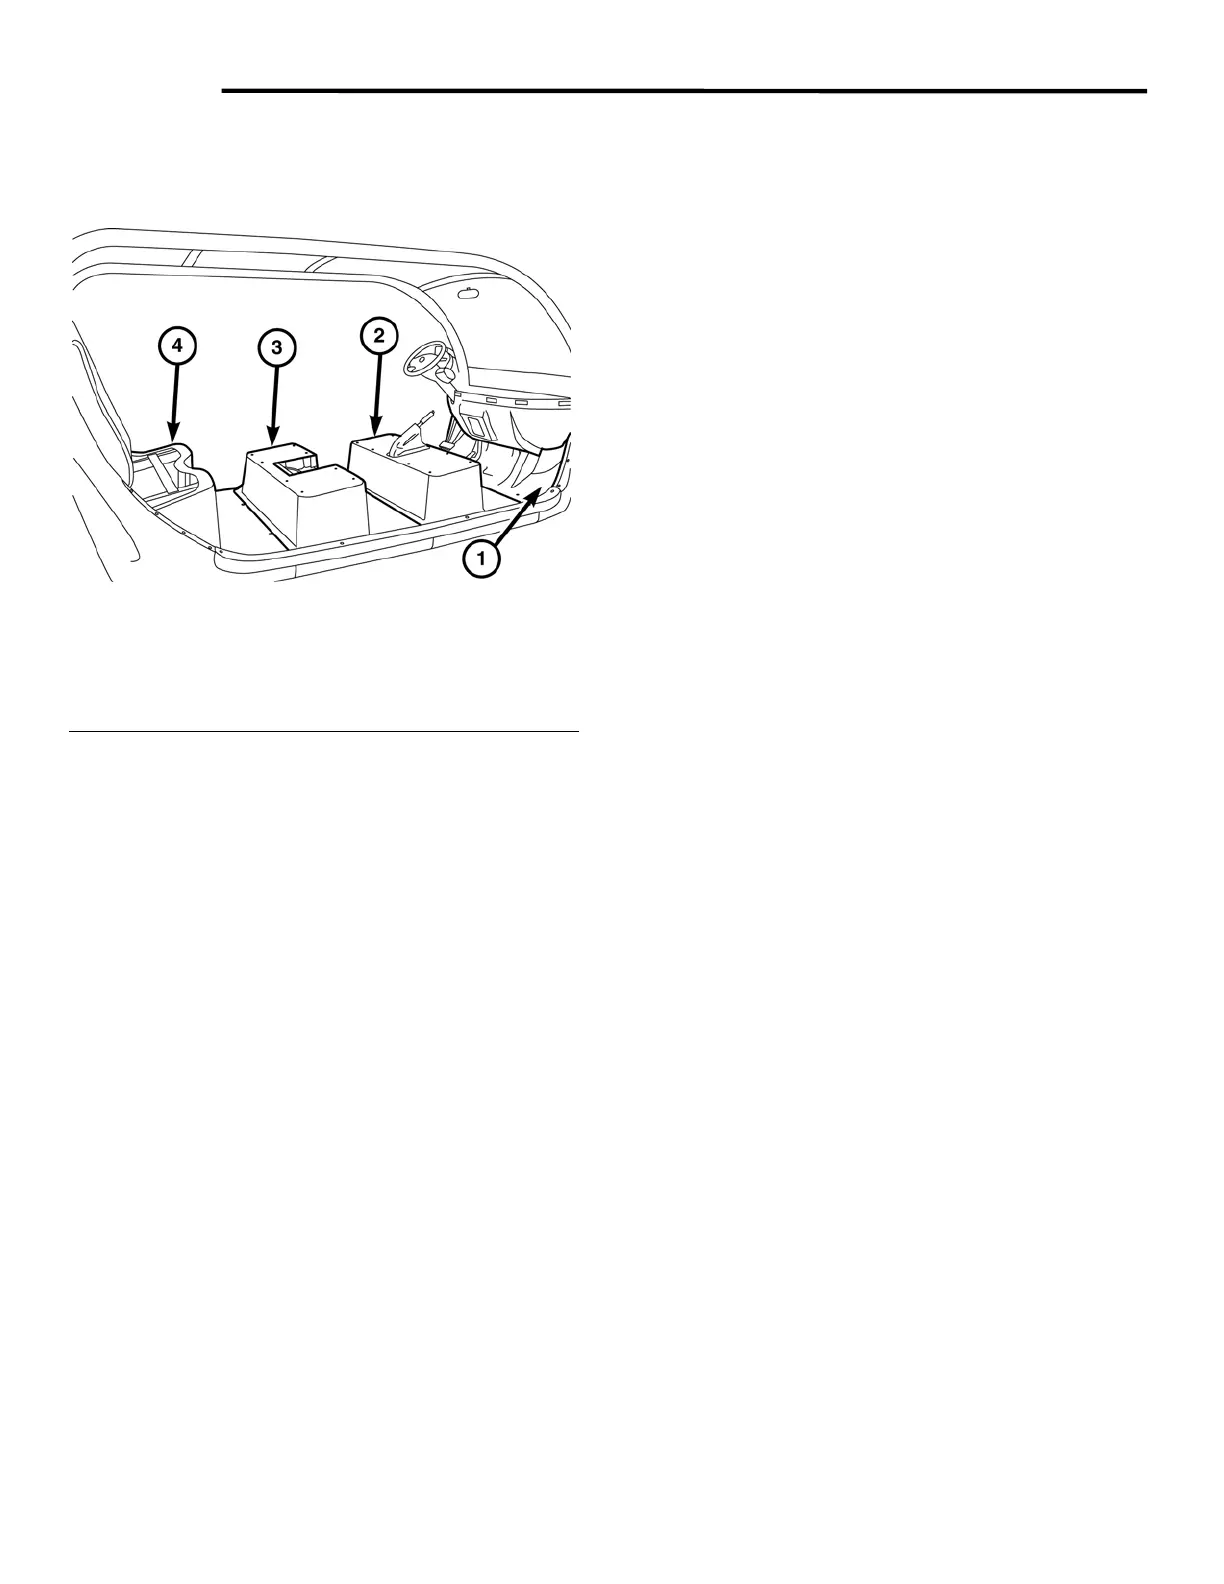
Fig. 5 Floor Panels
1 - Front
2 - Middle Front
3 - Middle Rear
4 - Rear
FRONT
1. Remove the front side panels. See Body Side
Panel in this section.
2. Remove the front floor mat.
3. Drill out (2) rivets.
4. Remove (2) bolts.
5. Remove floor panel.
6. To install reverse this procedure.
MIDDLE FRONT
1. Remove lower bolts and position aside front
side panels.
2. Remove the center side panels.
3. Remove the front and middle floor mats.
4. Remove the bolt from the seat belt D-Ring.
5. Remove the front seats. See bucket Seat in this
section.
6. Remove the park brake lever assembly. See
Park Brake Lever in Brake System.
7. Drill out (4) rivets.
8. Remove floor panel
9. To install reverse this procedure.
MIDDLE REAR
1. Remove the center side panels.
2. Remove the middle and rear floor mats.
3. Remove the bolt from the seat belt D-ring.
4. Remove the front seats. See Bucket Seat in
this section.
5. Remove the floor access panel.
6. Drill out (6) rivets.
7. Remove floor panel.
8. To install reverse this procedure.
REAR
1. Remove the rear side panels. See Body Side
Panel in this section.
2. Remove the rear floor mat.
3. Remove the rear seat. See Bench Seats in this
section.
4. Drill out (4) rivets.
5. Remove floor panel.
6. To install reverse this procedure. Install new
rivets and set in place with proper rivet tool.
GEM Service Manual November 2007
 Loading...