11
ADJUSTMENTS
NOTE: Once the angle of attack on the front systems
is set, verify once again to confirm the
adjustment.
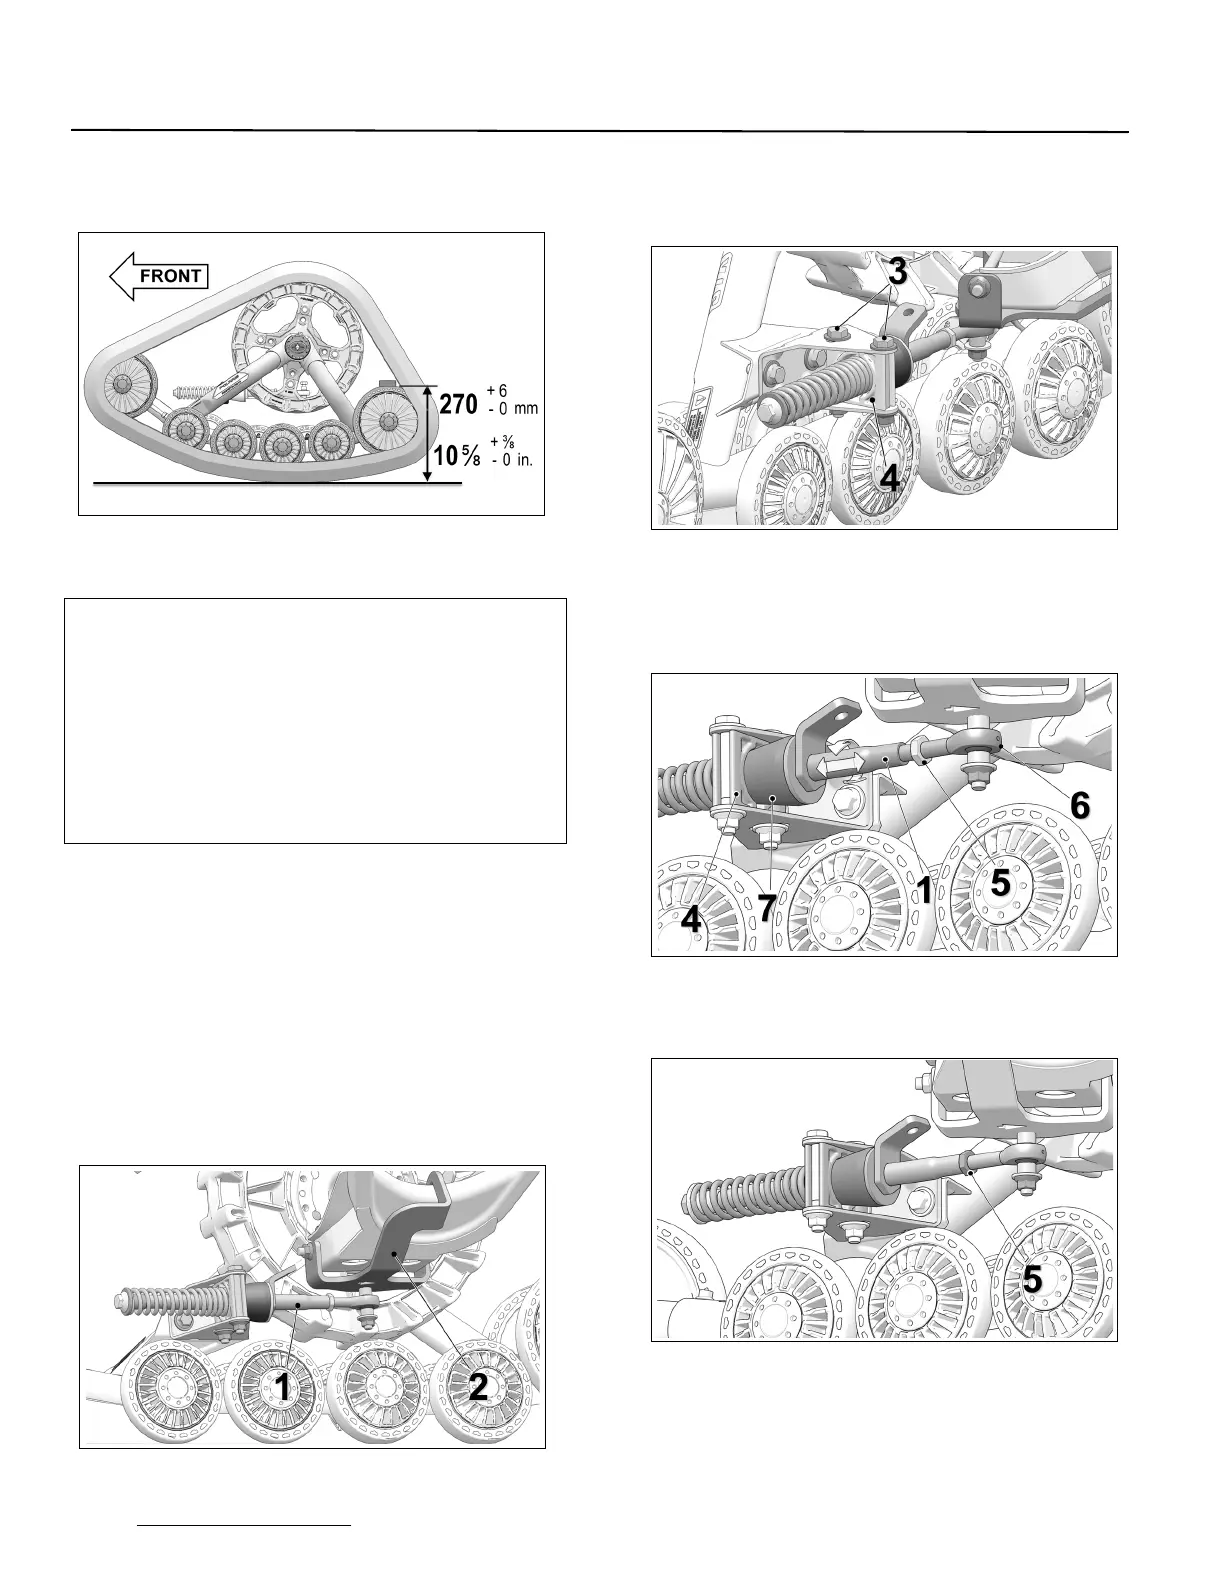
Figure 7
BASIC TUNING (Front Track Systems)
• An adjustment of more than 270 mm [10
⅝ in.],
measured with the flat bar, provides easier
steering but produces a wobbling effect at high
speed.
• An adjustment of less than 270 mm [10
⅝ in.],
measured with the flat bar, results in harder
steering and more stability at high speed.
ANGLE OF ATTACK - REAR SYSTEMS
To obtain the correct angle of attack on rear Track
Systems, perform the following:
• Stabilizing arm (
1
) must be attached to rear
anchor bracket (
2
) installed on vehicle. Figure 8.
NOTE: Actual Rear Anchor bracket (
2
) mounted on
vehicle may differ from the one in the illustration.
Figure 8
• Loosen anti-rotation bracket bolts (3) to allow
the anti-rotation retainer (4) to rotate on its axis.
See Figure 9.
Figure 9
• Loosen jam nut (5). Turn stabilizing arm (1) to
adjust length of rod end (6) so that rubber cone
(7) applies light pressure on anti–rotation
retainer (4). Figure 10.
Figure 10
• Re-tighten jam nut (
5
) to 40 N•m [30 lb-ft] of
torque when adjustment is complete. Figure 11.
Figure 11
CAUTION: Tighten the jam nut to the
recommended torque specification. Over-
tightening the nut might damage the rod end.
 Loading...