EasyManua.ls Logo

Polaroid DIGITAL MINI PORTRAIT User Manual

Polaroid DIGITAL MINI PORTRAIT
134 pages
To Next Page IconTo Next Page
To Previous Page IconTo Previous Page
Page #7 background image
English 7
takes approximately 90 seconds during
which a thumbnail of the print will appear
in the top right of the screen. The egg
timer icon on the screen indicates image
preparation. When the egg timer disap-
pears the user is free to take another
image.
Note: The DMP will only print one image at
a time. If you want to print a series of
images, you will have to wait for the DMP
to finish before commencing the next print.
Remember to change memory buffer again
if you wish to continue to store this image.
Pressing the capture button (1c) at this
stage will mean losing this stored image.
2.8 Removing a spent ribbon cartridge (illus-
tration 8 & 9)
a Open the ribbon cartridge door (1n).
b Remove the empty cartridge by lifting the
green tab (8), the cartridge will spring for-
ward.
c Grasp the cartridge by its tab and pull. The
cartridge should easily slide out (9).
Note: Remember that when replacing the
ribbon cartridge, the thermal paper in the
print tray will also need replacing (see sec-
tion 1.7).
3 Optimising your DMP
Ensure you get the best out of the DMP
product by reading through this section to
see how your system can be better
matched to your particular studio set up
and requirements.
The DMP can be used in a studio or a non-
studio environment.
3.1 Non-studio environment
The DMP comes with a factory set-up suit-
able for use in non-stuio environments with
the on-board strobe. Out of the box the
DMP is ready to point shoot and print,
however fine adjustments can be made to
d When printing is complete the print is
ejected out the front of the DMP (8).
2.6 Saving the captured image to memory
The system has three image buffers mak-
ing it possible to save a captured image
and continue to use the system by chang-
ing to another buffer for use.
a Enter the main menu by pressing the menu
on/off button (1e). You will see the main
menu displayed on screen.
b Highlight the image buffer icon (5a) using
the arrow buttons (1f), press OK (1g).
c Use the arrow buttons (1f) to highlight an
alternative image buffer for use. Ensure the
thumbnail of the image you want to tempo-
rarily store is not highlighted.
d Press the OK button (1g) to select the cho-
sen image buffer and the menu will close
returning you to the full screen image. If the
buffer is empty, the DMP will return to live
mode instead. Any image captured is now
stored on the selected memory buffer
Important: the system does not have the
capability of storing images when power is
switched off. For longer-term storage of
images your DMP can be connected to a
PC via the USB interface to store images.
PC software for archiving is available from
www.polaroid.com.
2.7 Retrieving a saved image
a Enter the main menu by pressing the menu
on/off button (1e). You will see the main
menu displayed on screen.
b Highlight the image buffer icon using the
arrow buttons (1f), press OK (1g).
c Use the arrow buttons (1f) to highlight the
thumbnail of the image you want to
retrieve.
d Press the OK button (1g) to select the cho-
sen memory buffer. The menu will close
and you will see the stored image dis-
played on screen ready to print.

Table of Contents

Question and Answer IconNeed help?

Do you have a question about the Polaroid DIGITAL MINI PORTRAIT and is the answer not in the manual?

Polaroid DIGITAL MINI PORTRAIT Specifications

General IconGeneral
TypeCompact
Digital Zoom4x
DisplayLCD
ConnectivityUSB
StorageSD Card
BatteryLi-Ion

Summary

Getting Started

System Contents

Lists all items included in the system box.

DMP Controls Overview

Details the function of each button on the DMP.

DMP Features and Identification

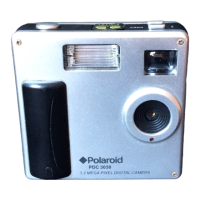
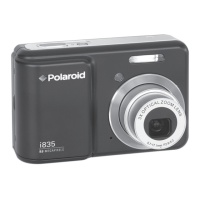
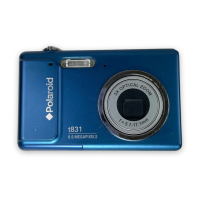
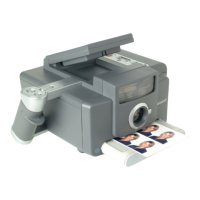
Identifies key physical features of the DMP.

Rear Panel Ports and Controls

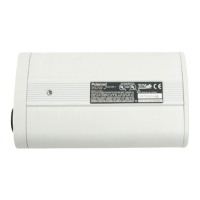
Describes the ports and buttons on the rear of the DMP.

Print Head Preparation

Explains how to prepare the print head for use.

Loading the Ribbon Cartridge

Instructions for inserting the ribbon cartridge.

Loading Photo Paper

Guide to loading the photo paper.

Navigating the System Menu

Overview of the DMP's system menu options.

Taking Pictures

Setting Up for Photography

Guidance on positioning the DMP and subject.

Subject Seating and Positioning

Recommendations for subject positioning and DMP height.

Powering On the DMP

Instructions on powering on the DMP.

Capturing an Image

Steps for taking a photograph with the DMP.

Printing Your First Photo

Guide to printing the first captured image.

Saving Images to Memory

How to store images in the DMP's internal memory.

Retrieving Saved Images

Steps to access stored images for printing.

Removing Ribbon Cartridge

Procedure for replacing the ribbon cartridge.

Optimising Your DMP Performance

Non-Studio Environment Setup

Tips for using the DMP outside a studio setting.

Studio Lighting Environment

How to use the DMP with studio lighting.

One Touch Colour Balance Calibration

Calibrating colour balance using a grey card.

Adjusting Skin Tone Settings

Adjusting skin tone presets for better results.

Using Head Size Guides

Using guides to frame subjects for specific photo types.

U.S. Immigration Head Size Guide

Specific guidance for INS head size photos.

Menu Lock Functionality

How to prevent accidental changes to settings.

Store and Reset Settings

Saving settings or restoring factory defaults.

Optimising Your Surroundings

Onboard Flash Settings

Configuring the DMP's built-in flash.

Advanced Studio Lighting Techniques

Details on using external lighting sources for better shots.

Exposure Correction Guide

Adjusting exposure for light or dark images.

Troubleshooting Common Issues

System Error Codes and Solutions

Understanding and resolving error messages.

Clearing Paper Jams

Steps to remove jammed paper from the DMP.

Cleaning the Thermal Print Head

Procedure for cleaning the print head for optimal quality.

Cleaning the Feed Roller

Instructions to clean the feed roller to prevent print marks.

DMP Safety and Handling Precautions

Important safety and handling guidelines for the DMP.

Additional Product Information

Polaroid Software Applications

Information on available software for archiving and badge making.

Media Specifications: Paper and Ribbon

Details on required paper and ribbon types.

Safety and EMC Compliance Statements

Electrical safety and electromagnetic compatibility information.

Digital Mini Portrait Warranty (Outside USA)

Warranty (U.S.A. only)

Repair and Service Information

General Electrical Safety Instructions

General safety precautions for operating electrical equipment.

Related product manuals