Polycom® RealPresence® Group Series Media Center Wall-Secured Setup Sheet Supplement
2
4
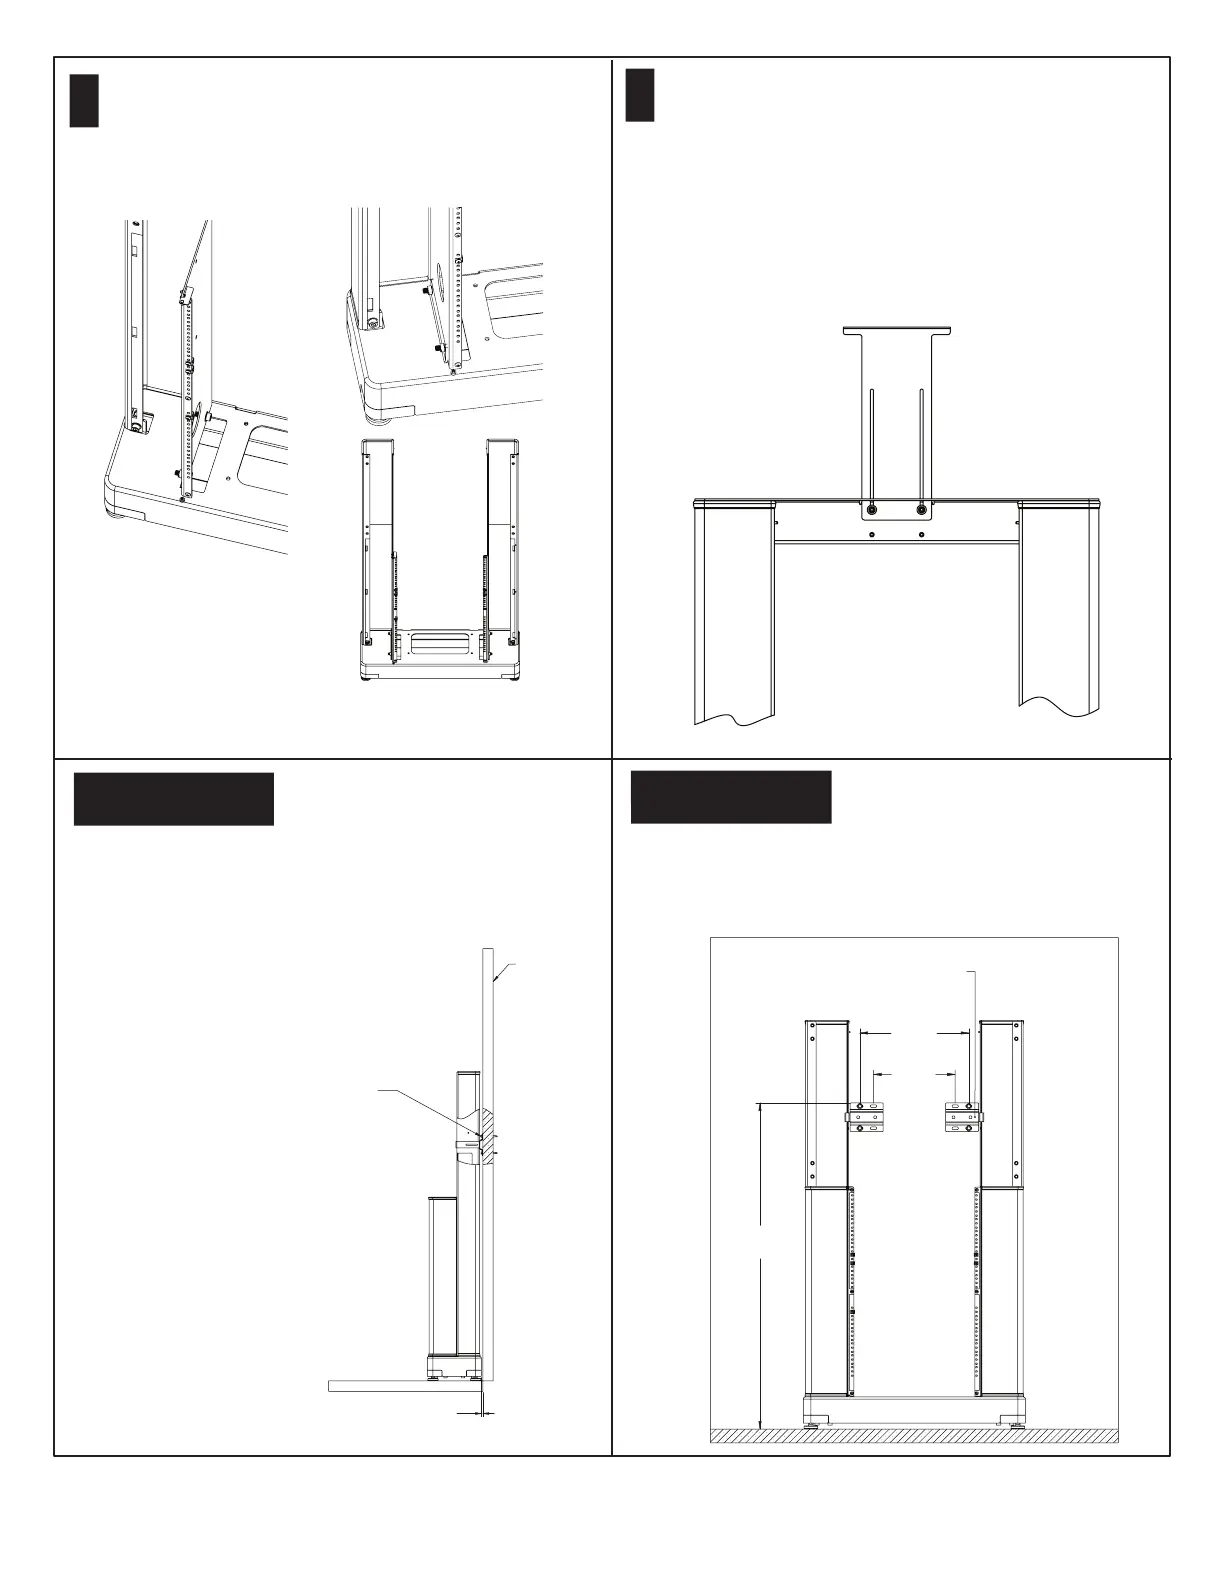
Place the left vertical support on the base, aligning the
holes in the base with the holes in the bottom of the
vertical support. Attach the vertical support to the base
using three M10 x 25 flanged socket head cap screws per
vertical support. Do not fully tighten. Repeat with the
right vertical support.
6b - Option 1
48”
(1219 mm)
(2) Wall Brace Bracket
1342-68996-001
16”
(407 mm)
12”
(305 mm)
Note: Skip this step for 84” displays.
Install the camera mounting bracket using two 1/4-20x5/8”
socket head cap screws, two flat washers, and two lock
washers.
Mount the bracket in its fully extended position and lightly
tighten the screws so it remains in position.
You will lower the bracket later, when the camera is
mounted.
5
Attach the Wall Brace Bracket as
shown in the next figure. Always use
recommended wall mounting hardware
appropriate for your room wall.
IMPORTANT: Each installed Wall Brace Bracket must be able to
withstand horizontal pull force (away from wall) of at least 250N
(57 lbs).
6a - Option 1
Note that some previously assembled items are not shown
for clarity.
There are two options to brace the Media Center frame.
Directly bracing the Media Center to the wall is the preferred
option.
Position the Media Center frame as shown.
Room Wall
.3”
(8 mm)
Use an appropriate combination of wall
mounting hardware supplied with kit.
Recommended for solid wall applications:
(4) 1/4 x 3.0” Hex Lag Screw 1601-12988-001
(4) 1/4“ Washer 1602-61465-001
Recommended for drywall applications:
(4) 1/4-20 x 2-1/2” Hex Head Bolt 1601-61806-001
(4) 1/4“ Washer 1602-61465-001
(4) 1/4-20 Toggle Anchor Insert 1650-28296-001
Before proceeding to the next step, perform steps 5 through
8 in the Polycom RealPresence Group Series Media Center
Setup Sheet.
 Loading...