6a
5b
Setting up the Polycom® RealPresence® Group Series Media Center
2
5a
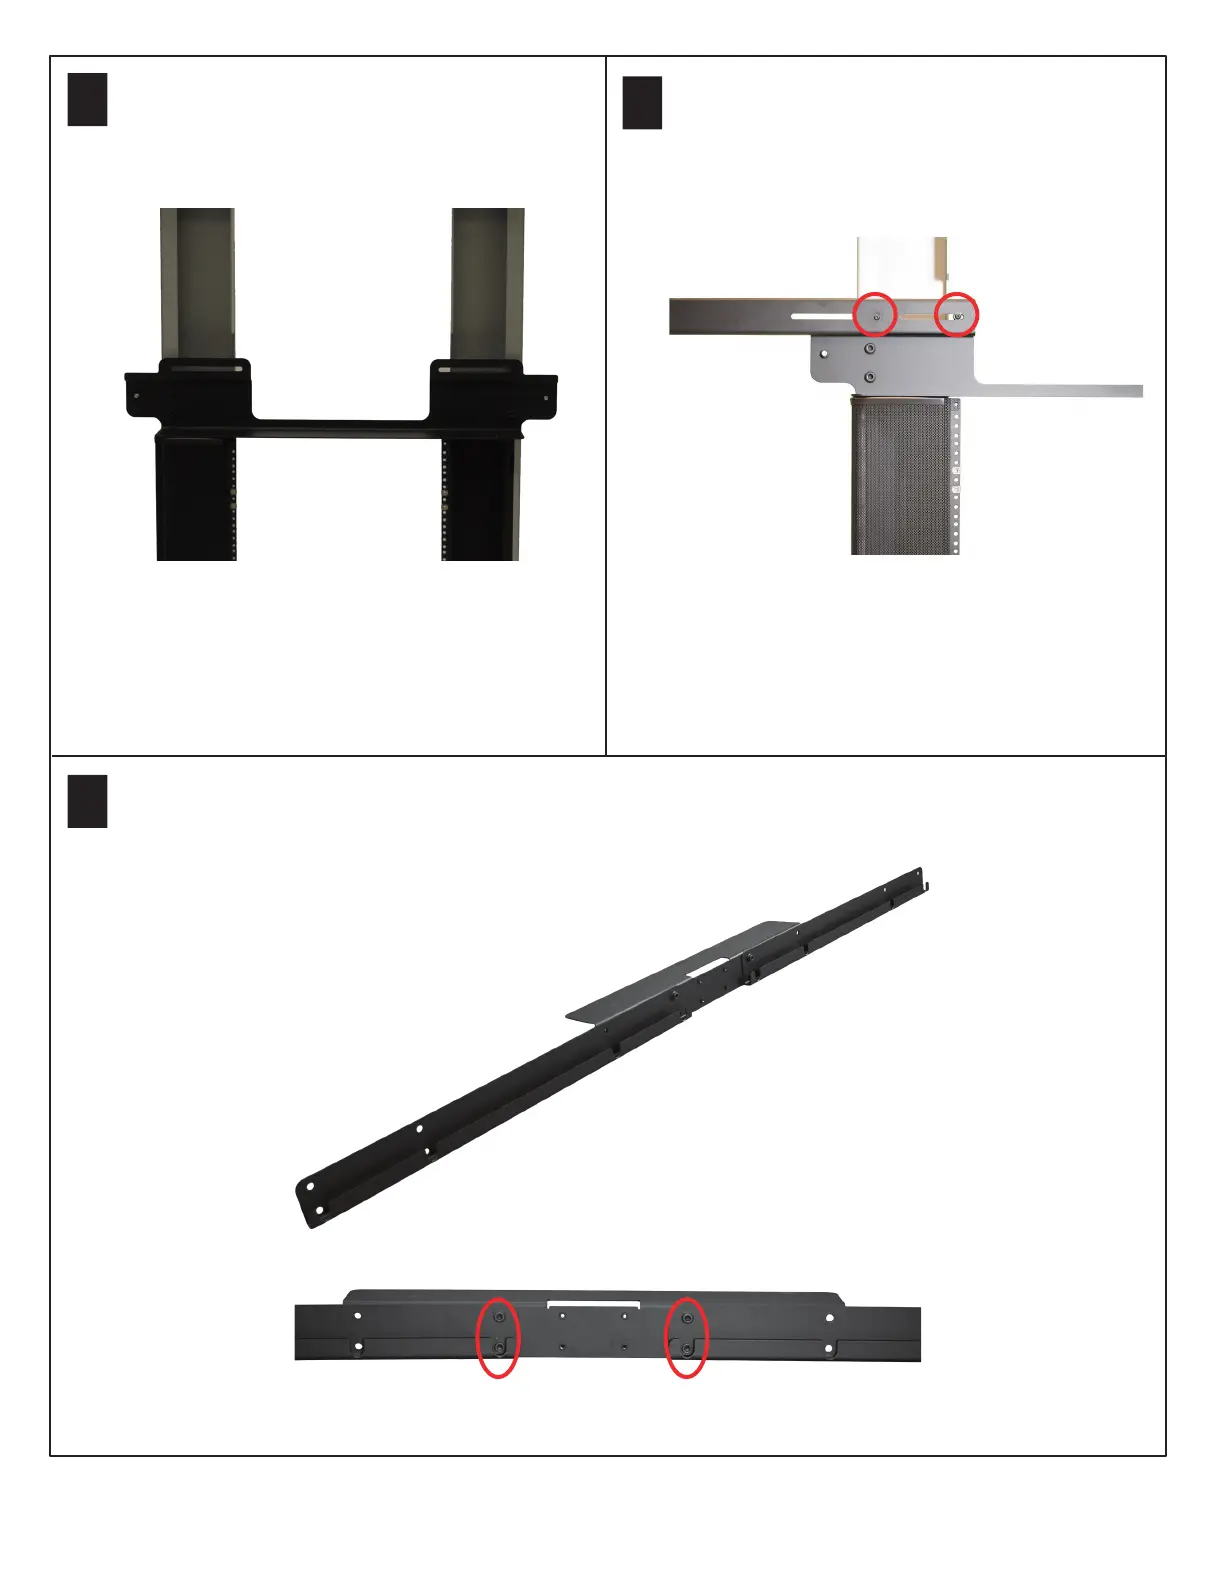
Attach an upper display rail extension to each end of the center top display rail using two M10 x 25 flanged
socket head cap screws per extension.
Install the lower display rail by aligning the holes in
the display rail with the holes in the vertical
supports. Attach with four M10 x 25 flanged socket
head cap screws. Do not fully tighten.
Install a lower display rail extension to each side of
the lower display rail using two M8 x 20 button
head cap screws and two M8 hex nuts per side.
Ensure the edge of the rail extension is flush with
the edge of the lower display rail.Tighten using the
supplied M8 wrench.
 Loading...