19
MAINTENANCE
Regular maintenance is important for optimal
performance and to reduce wear. Inspect and properly
tighten all parts each time the exercise bike is used.
Replace any worn parts immediately.
To clean the exercise bike, use a damp cloth and a
small amount of mild soap. IMPORTANT: To avoid
damage to the console, keep liquids away from
the console and keep the console out of direct
sunlight.
CONSOLE TROUBLESHOOTING
If a replacement power adapter is needed, call the
telephone number on the cover of this manual.
IMPORTANT: To avoid damaging the console, use
only a manufacturer-supplied regulated power
adapter.
HOW TO ADJUST THE REED SWITCH
If the console does not display correct feedback, the
reed switch should be adjusted.
To adjust the reed switch, first unplug the power
adapter. Then, remove the parts described below.
See assembly step 5 on page 8. Identify the Rear
Upright Cover (19). Remove the two M4 x 15mm Flat
Head Screws (13) from the Rear Upright Cover. Next,
use a standard screwdriver to release the tabs along
the bottom edges of the Rear and Front Upright Covers
(19, 20), remove the two M4 x 12mm Screws (57), and
then remove the Rear and Front Upright Covers.
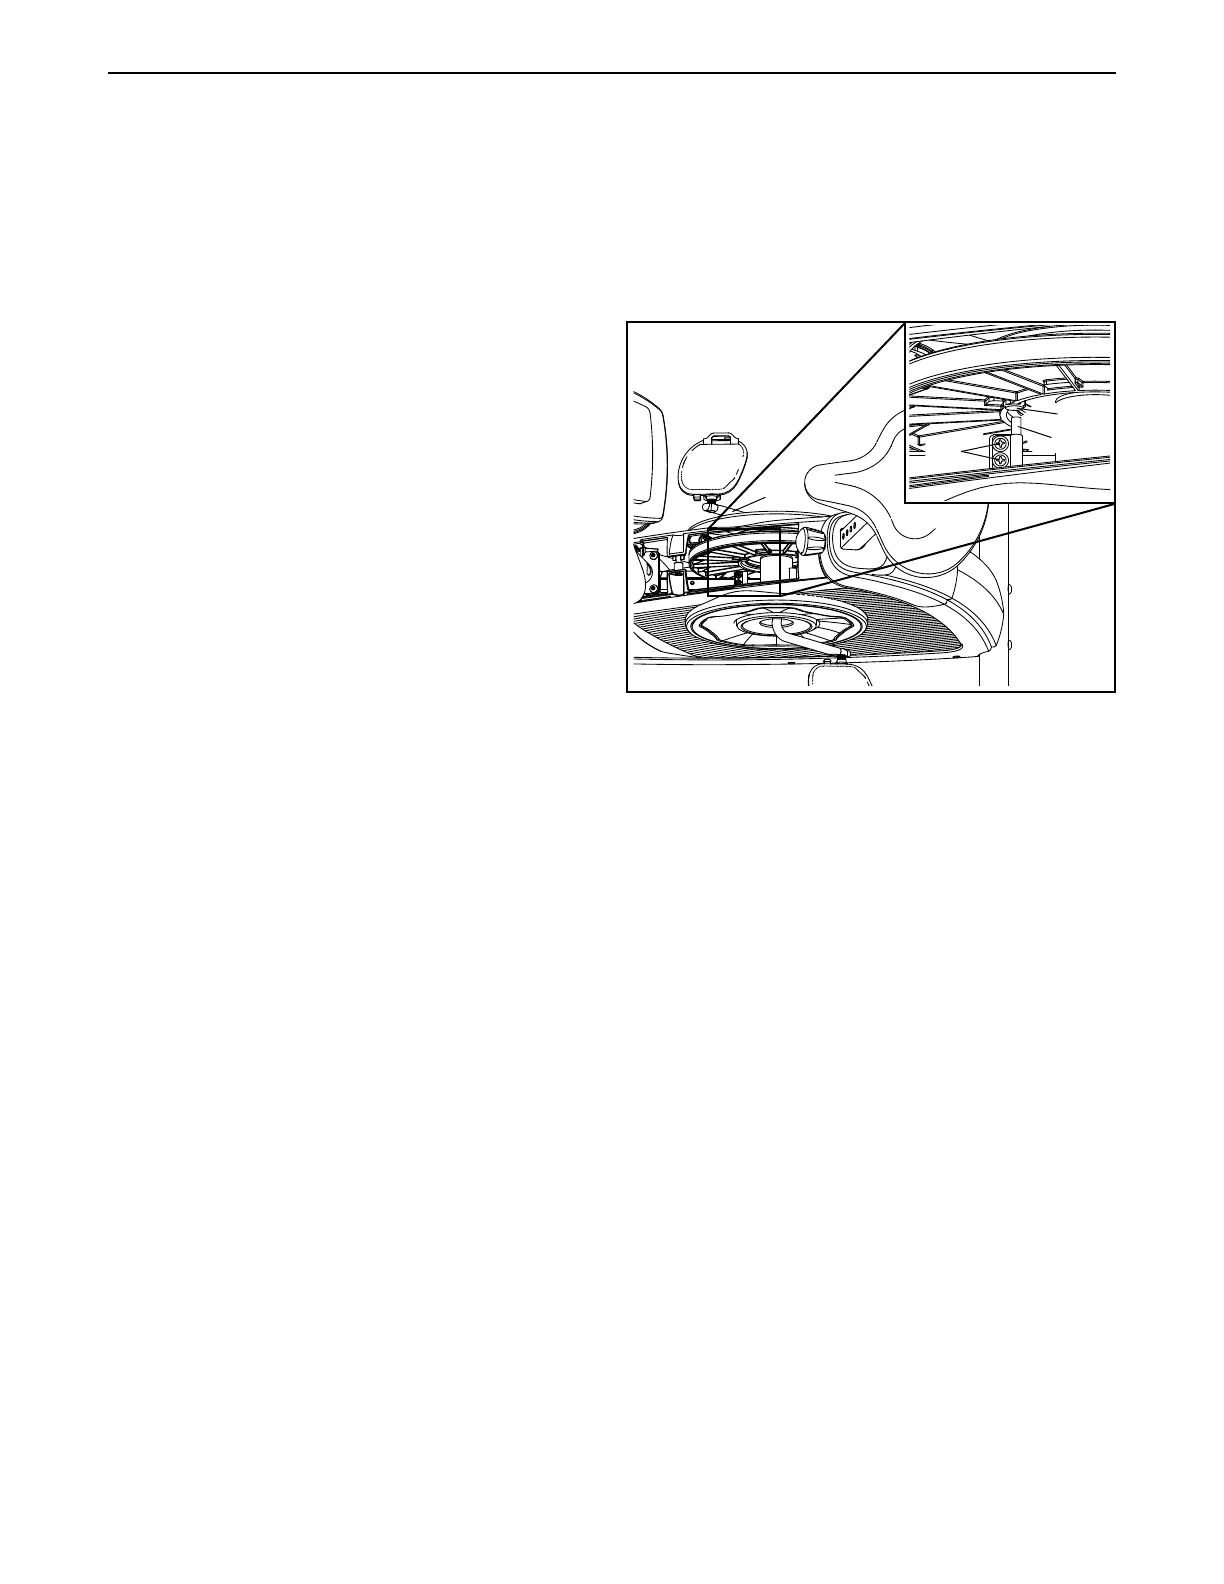
Next, locate the Reed Switch (35). Turn a Crank
Arm (60) until a Magnet (39) is aligned with the
Reed Switch. Next, slightly loosen the two indicated
M4.5 x 12mm Flange Screws (36). Slide the Reed
Switch slightly closer to or away from the Magnet, and
then retighten the Flange Screws.
Plug in the power adapter, and then turn the Crank
Arm (60) so that the Magnet (39) passes the Reed
Switch (35) repeatedly. Repeat these actions until the
console displays correct feedback.
When the reed switch is correctly adjusted, reattach
the parts that you removed and plug in the power
adapter.
36
35
39
60
MAINTENANCE AND TROUBLESHOOTING

 Loading...