8
3. OPERATION
3-1. Button operation
1) Before operation, make sure both battery circuits are properly connected with the terminal sequence "
+,GND,-" and the battery pack breaker is in the "ON" position (for long-term models only).
2 ) Press the " " to turn on the power supply for the UPS to turn on the LCD screen.
The UPS will enter initialization mode. After initialization, follow the "CONTROL" menu to operate the UPS.
This button only works when the UPS is turned off with the battery connected but without AC input. When
the UPS is connected with the AC network, simply follow the "CONTROL" menu to operate the UPS after
LCD initialization.
3-2. Screen Description
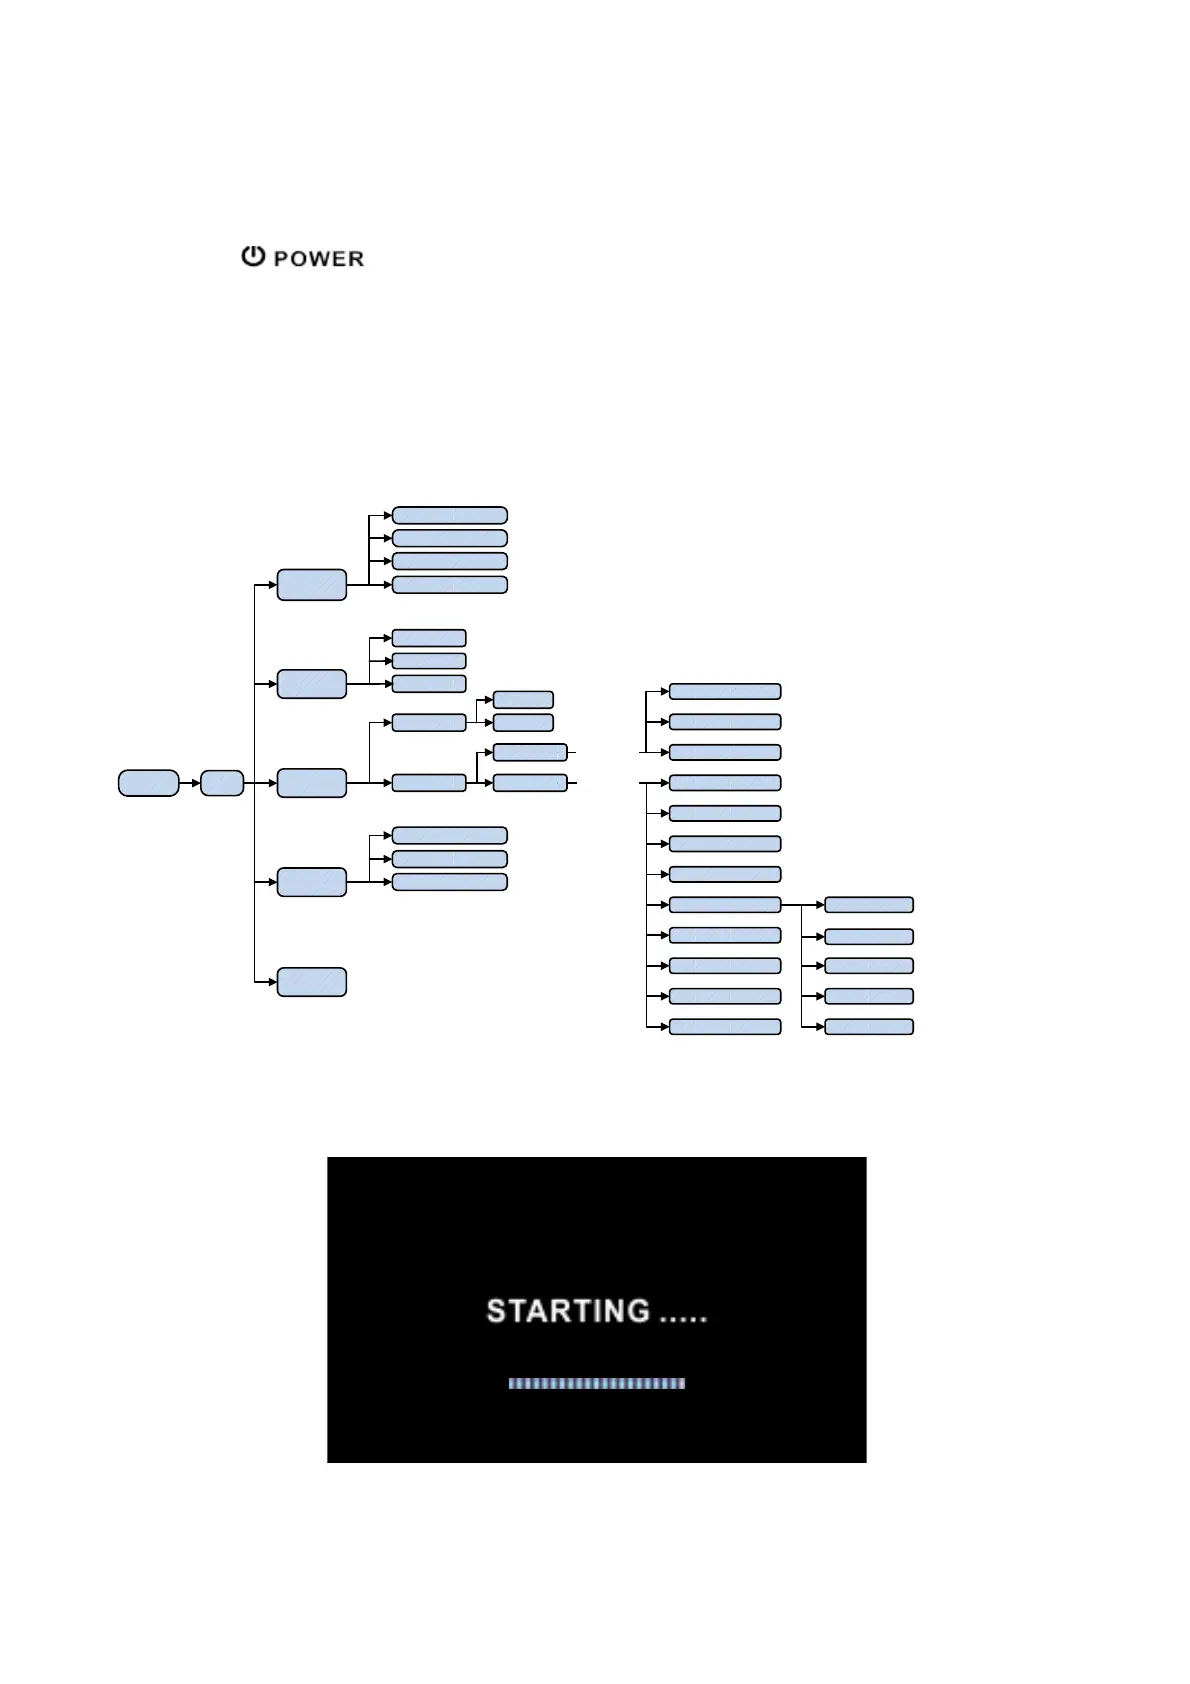
After initialization, the LCD will display the main screen. There are five sub-menus: Control, measure,
settings, information and log data. Touch one of the sub-menu icons to enter the sub-screen.
Tree menu
3-2-1. Home screen
When powered on, the LCD will initiate initialization for approximately a few seconds as shown below.
After initialization, the main screen will be displayed as shown below. On the button, there are five icons
representing five sub-menus: Control, measure, setting, information, log data.
MAINInitializing
CONTROL
DATA LOG
MEASURE
ON/OFF UPS
BATTERY TEST
MUTE ALL
MEASURE1
MEASURE2
MEASURE3
GENERAL
BASIC1
BASIC2
SETTING
INFO
ON/OFF CHARGER
DATALOG
PARAMETERS
CALIBRATION
EEPROM
TOUCH
SYS PARAMETER
PASSWORD:****
INSTALL INFO
VOL CALI
CURR CALI
INITIAL
ELECTRICAL
BATTERY
MISCELLANEOUS
UPS SELFTEST
ELECTRICAL
BATTERY
MISCELLANEOUS
PASSWORD :0000
PARAMETER INFO
RATED INFO
BASIC INFO
ADVANCE
User
Maintainer
 Loading...