810-1902-03 Rev D TM1 Installation Guide
16
Bleeding Air from the Monitor
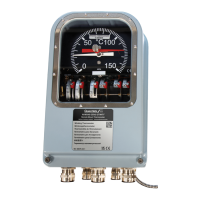
1) Open the transformer valve fully and inspect for any oil
leaks. Power-on the TM1 with the black toggle switch. Using
a 3/32” Allen key, remove the two cap screws located on the
top of the bleed selector on either side of the screw in the
center as shown (Fig 15).
Figure 15: Bleed Selector Screws
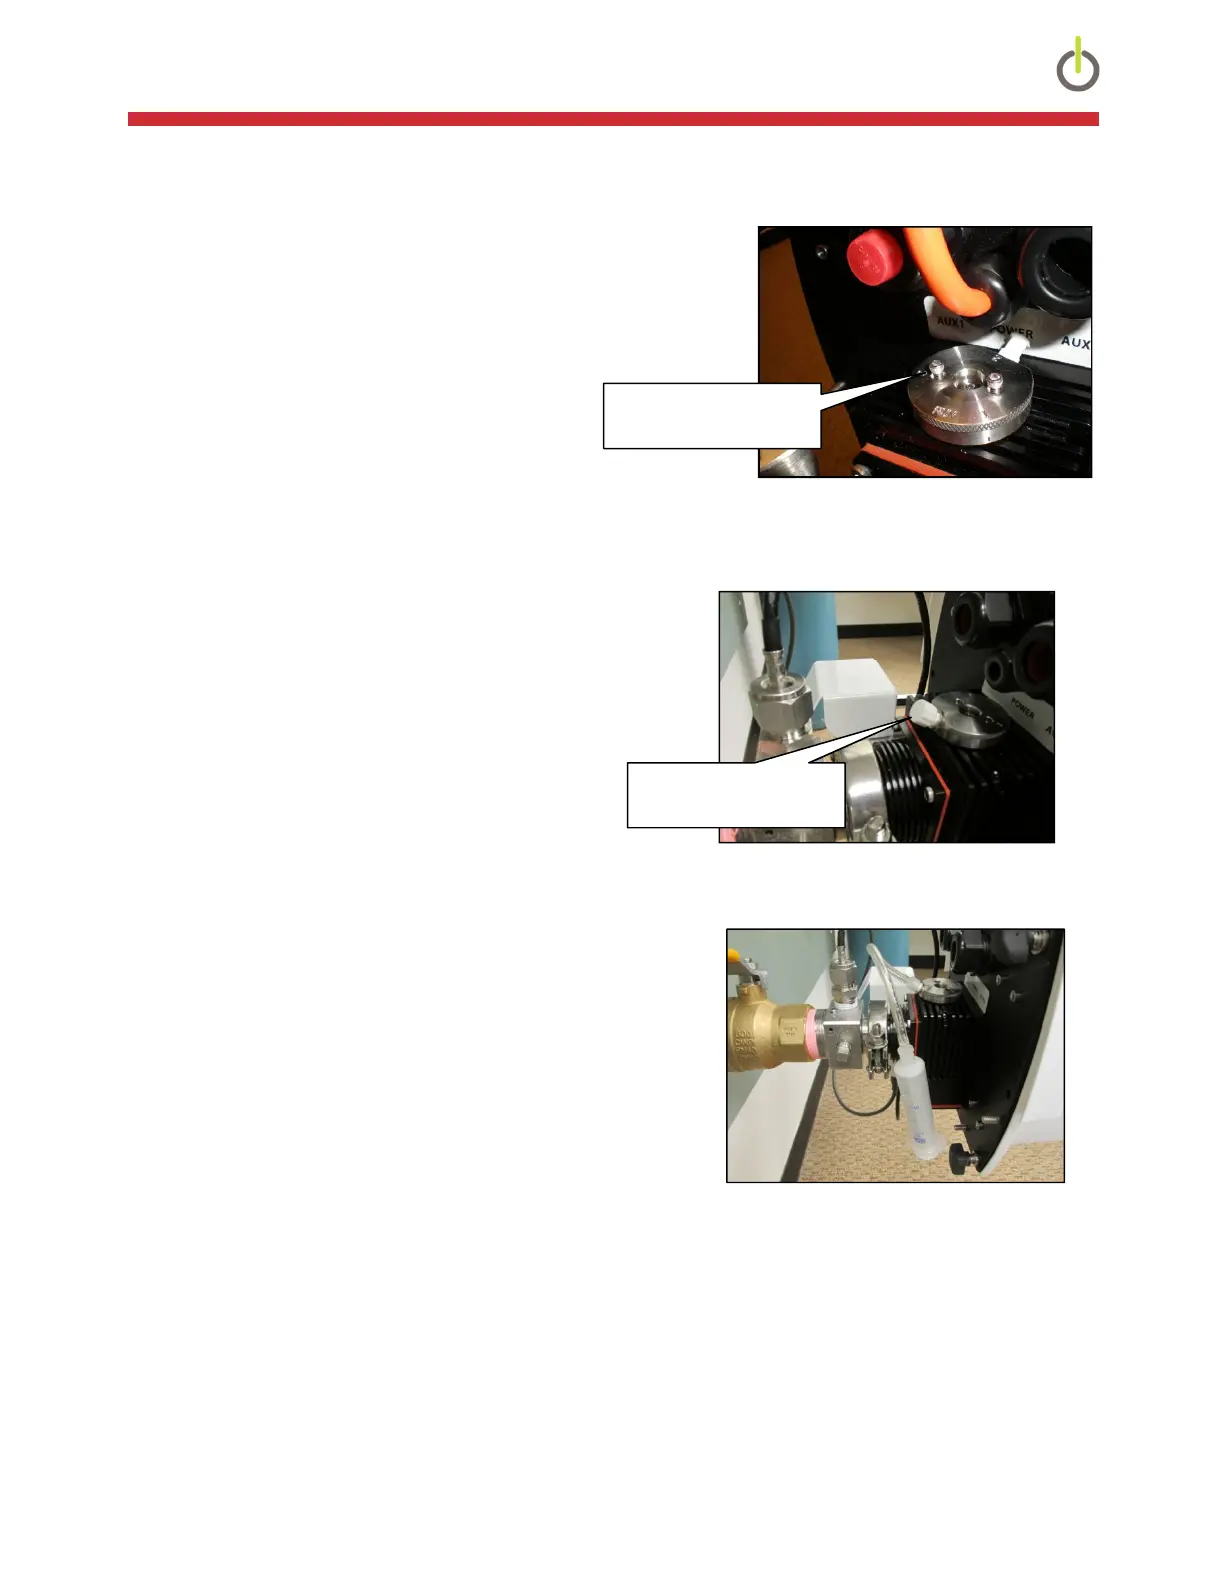
2) Rotate the bleed selector clockwise to position 2,
exposing the Luer fitting. Unscrew the white cap from
Luer fitting (Fig 16). Connect the supplied Tygon tube to
the supplied syringe. Secure the other connector on the
end of the tube onto the Luer fitting (Fig 17). Return the
bleed selector to position 1.
Figure 16: Luer Fitting Cap
3) Draw the syringe plunger back to remove air and draw
bubble-free oil into it. Rotate the bleed selector clockwise
and repeat for the other two positions, pulling air and then
oil out of each port. Remove the syringe from the Luer
fitting, replace the Luer cap and rotate the bleed selector
counter-clockwise to the Run position (Fig 15).
Figure 17: Syringe Attachment
4) Reinstall the two cap screws that were removed previously. Make sure that the screws are securely
tightened and that the center screw is tight.
5) Replace the monitor cover and secure the four thumb-screws (or socket-head screws).
6) The TM1 installation is now complete. Please refer to the TM1 Operation & Maintenance Guide
(810-1928-01) for further instruction on these topics.
Luer Cap in position 2
Remove Screws (2X)
 Loading...