Quantum SuperLoader 3: Rackmount Replacement
6-68061-01 Rev A
December 2013
10 Replacing the SuperLoader 3 In a New Rackmount
Replacing the SuperLoader 3 In a New Rackmount
Be sure you have the correct tools and parts before proceeding with these
instructions (see Required Tools and Kits on page 2).
These instructions explain how to attach the SuperLoader 3 directly to the
stationary rails of a rack.
1 Secure the help of at least one other person. At least two people are
required to safely reinstall the SuperLoader into a rack cabinet.
WARNING: Failure to take these safety steps may result in personal injury
or equipment damage.
Caution: Never remove the top cover of the SuperLoader 3. Removing
the top cover could result in damage to the SuperLoader 3.
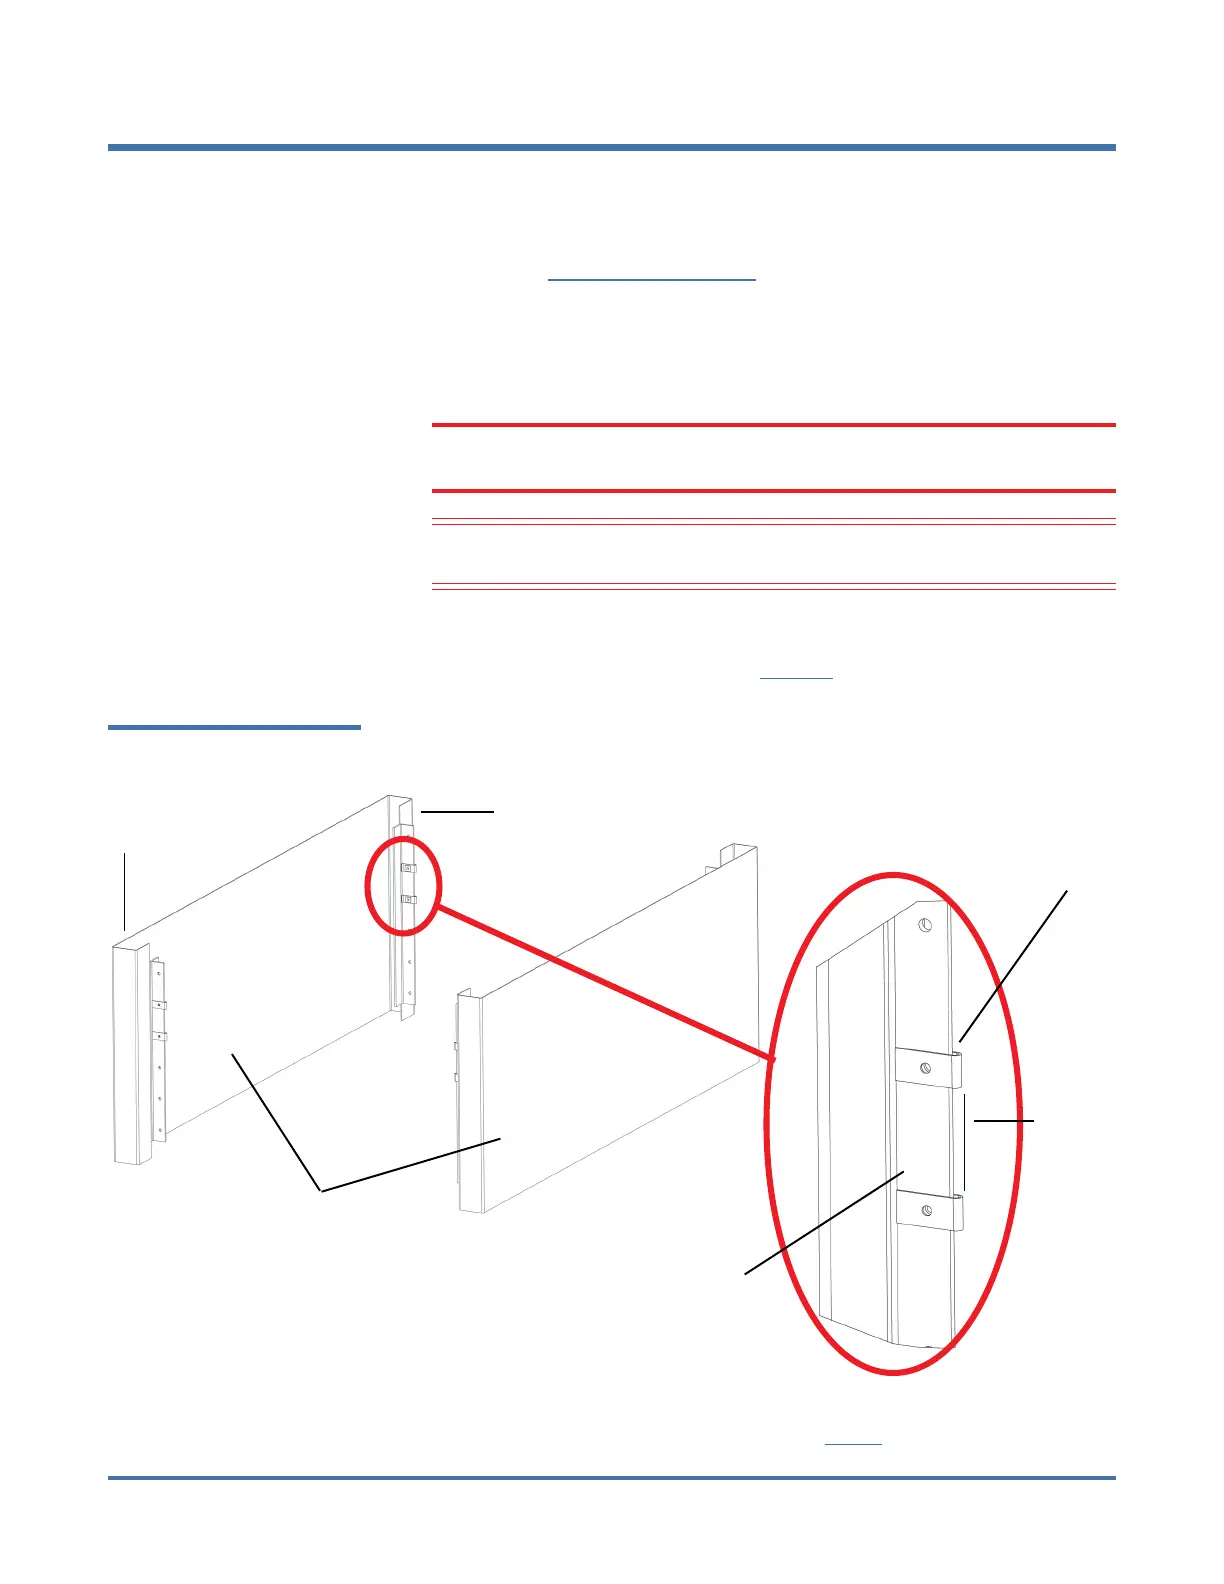
2 If present, install two (2) clip nuts, 1.75 in. (44.45 mm) apart, onto each of
the four (4) rails of the rack, making sure that you install each pair of clip
nuts at exactly the same height (see Figure 6).
Figure 6 Installing Clip Nuts
3 Attach the appropriate SuperLoader 3 brackets (long or short depending on
the depth of the rack and as determined in Step 8 on page 9) to the rear of
Rail
Rail
Outer covers
of the rack
Rail
Clip nut
1.75 in
(44.45mm)
 Loading...