EN
BTR185 INSTALLATION AND USE MANUAL - REV009A
36
BTR1854 - Installation
0FF
ON
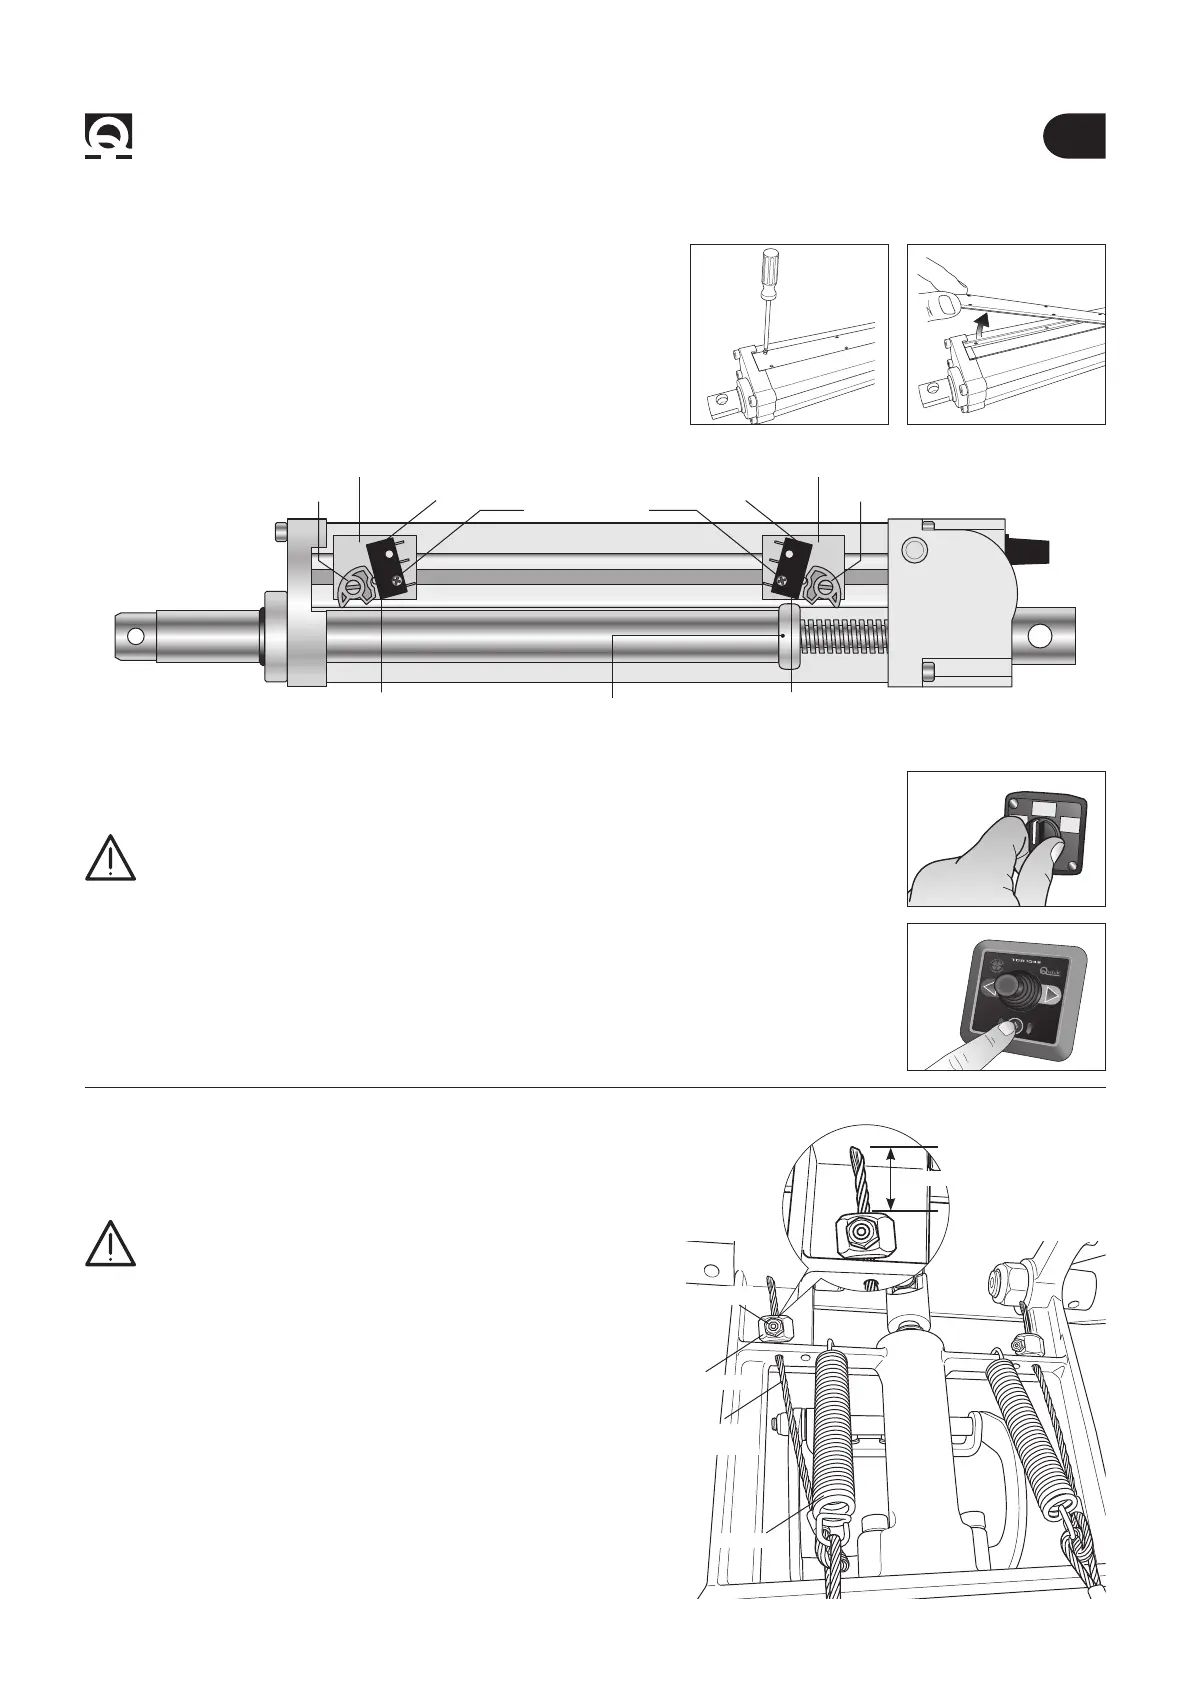
g. 21
g. 20
• To adjust the FC1 and FC2 limit switches, partially unscrew the xing screw and move them on
the right or on the left according to the need, then screw the xing screw back on (g. 20).
WARNING: while adjusting the limit switch FC1 and FC2, verify that the cam which operates
them is always positioned between them and never in overstroke.
• Disconnect the BTR propeller from power for at least ve seconds (g. 21).
• Connect power to the BTR propeller (g. 21).
• Enable a TCD control connected to the BTR propeller to open the propeller and activate it (g. 22).
• Disable the TCD control before hand enabled in order to close the propeller (g. 22).
• Ensure that the high-absorption protection did not intervene (the “ERROR” LED must be switched
off - see section 4.6 g. 18 / Part. C).
CAM 1CAM 2
PLASTIC SUPPORT PLASTIC SUPPORT
FIXING SCREW
Actuator’s interior
Opening of the actuator’s side lid
SWITCH FC1SWITCH FC2
4.7 - Actuator’s adjustment
ADJUSTMENT OF THE THRUSTER’S
MAXIMUM CLOSING
ADJUSTMENT OF THE THRUSTER’S
MAXIMUM CLOSING
g. 22
• Open the thruster completely by switching it on by the remote
(g. 22).
WARNING: once the thruster is open, disconnect power
supply (g. 21) in order to lock it into this position.
• Insert the two limit switch wires in the proper slots.
• Position the two cable-stoppers, apply tension to the two wires,
checking that both springs are equally pulled, tighten the cable-
stoppers by means of a 2,5 mm hexagon wrench key.
• Lock the cable-stopper by tightening the counter nut by means
of a 8 mm open end wrench, cut with a cutting nipper the excess
cable leaving about 20 mm besides the cable-stopper.
• Power up the thruster (g. 21) which will automatically close.
• In order to ensure that the thruster is properly working, open the
thruster several times using the control (g. 22).
4.8 - Installation of the springs’ limit switch wires
Fig. 23
Fig. 23
LIMIT SWITCH
WIRE
CABLE-STOPPER
COUNTER NUT
SPRING
20 mm MAX
CAM
 Loading...