RP2040) inside the microcontroller. The debug translator also knows how to talk to the specific debug probe that you
have connected to the SWD port, and how to program the flash on your device.
This section walks through installing a debug translator called OpenOCD.
TIP
If you have run the pico-setup script on your Raspberry Pi (Chapter 1), OpenOCD is already installed and you can skip
to the next section.
NOTE
These instructions assume you want to build openocd in /home/pi/pico/openocd
$ cd ~/pico
$ sudo apt install automake autoconf build-essential texinfo libtool libftdi-dev libusb-1.0-0-
dev
$ git clone https://github.com/raspberrypi/openocd.git --recursive --branch rp2040 --depth=1
$ cd openocd
$ ./bootstrap
$ ./configure --enable-ftdi --enable-sysfsgpio --enable-bcm2835gpio
$ make -j4
$ sudo make install
OpenOCD should now be installed, and you can run it as
openocd from your terminal.
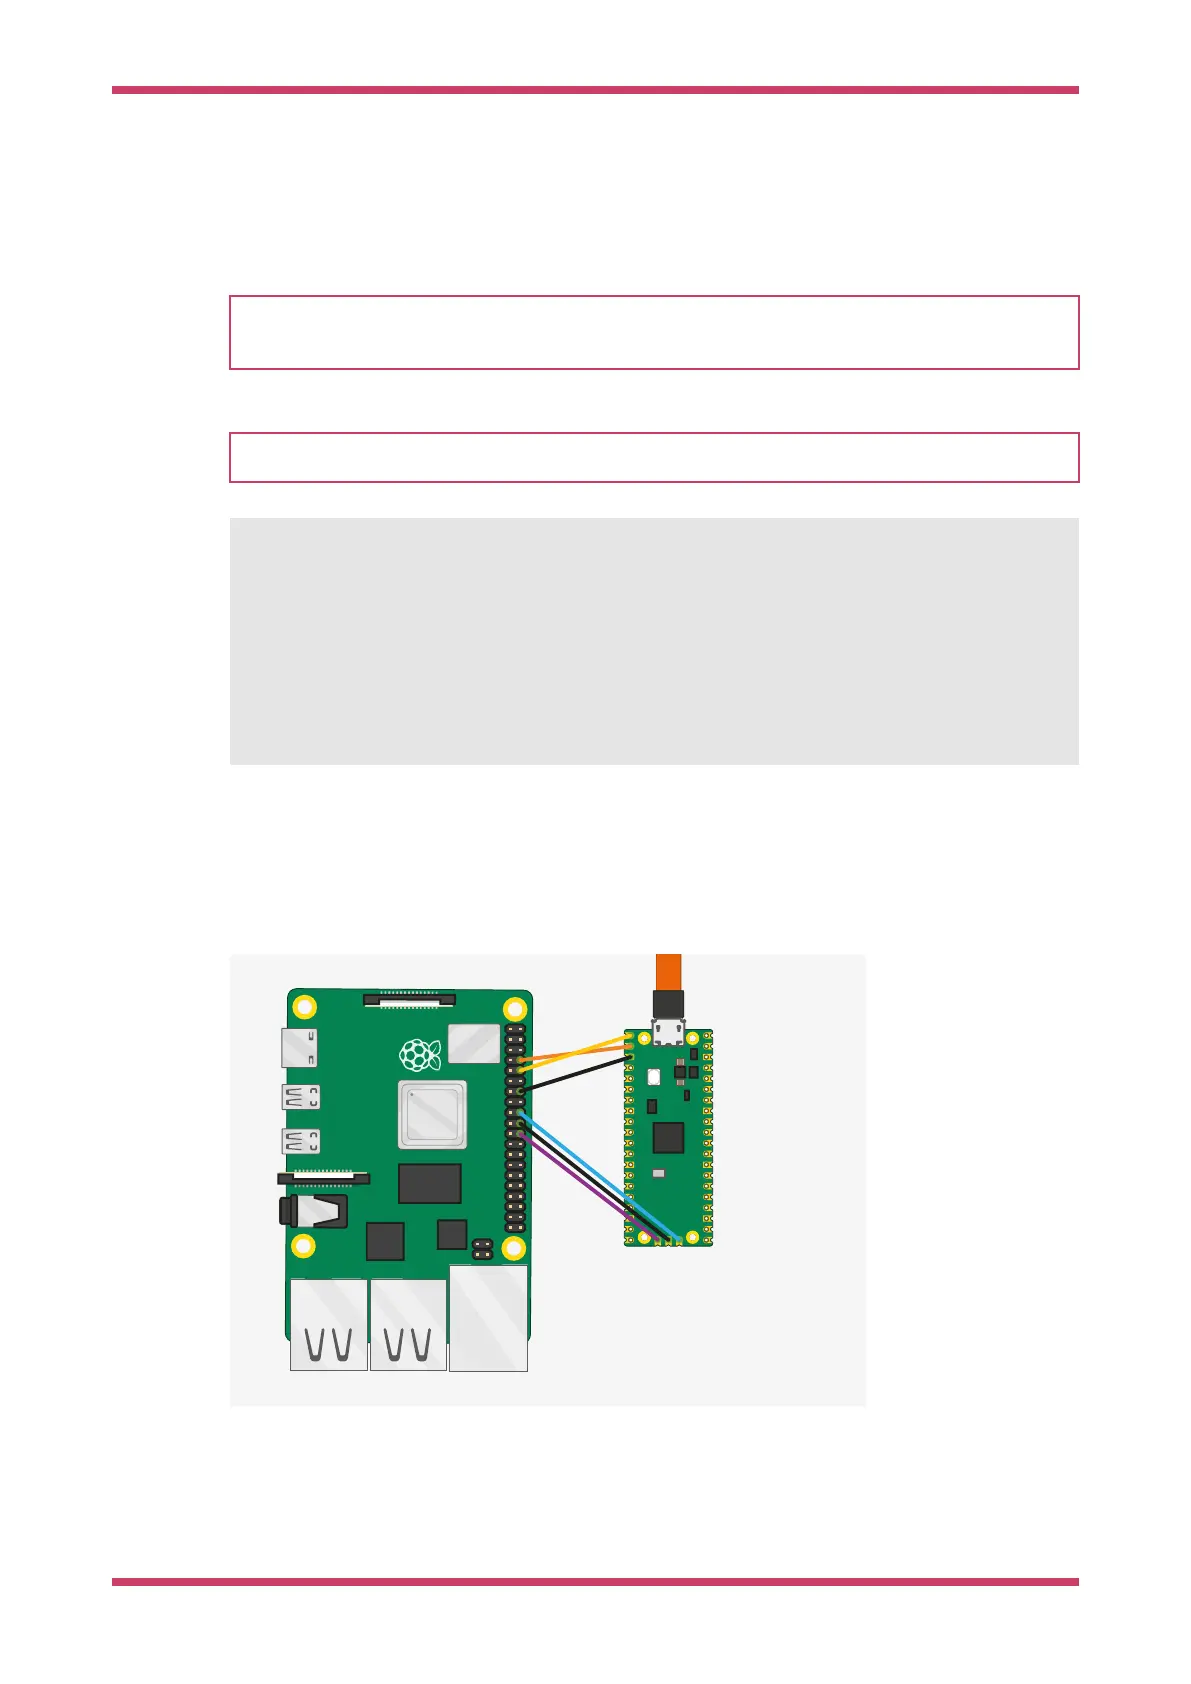
5.2. SWD Port Wiring
You need to connect wires to the SWD port in order to program and run code on RP2040 via SWD.
Figure 7. A Raspberry
Pi 4 and the Raspberry
Pi Pico with UART and
SWD port connected
together. Both are
jumpered directly back
to the Raspberry Pi 4
without using a
breadboard. Only the
lower three wires in
this diagram are
needed for SWD
access; optionally you
can also connect the
Pi UART, as shown by
the upper 3 wires, to
directly access the
Pico’s serial port.
The default configuration is to have SWDIO on Pi GPIO 24, and SWCLK on GPIO 25 — and can be wired to a Raspberry Pi
Pico with the following mapping,
Getting started with Raspberry Pi Pico
5.2. SWD Port Wiring 19

 Loading...