Page 8
b. Change the IP address of the laptop’s Network Interface Card
• Navigate to Control Panel
• Click on Network and Internet
• Click on Network and Sharing Center
• Click on Change Adapter Settings
• Right click on Ethernet/Local Area Connection
• Click on Properties
• Double click on Internet Protocol Version 4
• Click on Use the Following IP Address:
• Change IP to the default IP address range of the
Distribution Module (192.168.1.200 is recommended)
• Change Subnet Mask (default is 255.255.255.0)
c. Turn off the wireless card of the laptop (if applicable)
d. Log into the Distribution Module
• Enter 192.168.1.202 into the web browser (Google Chrome is recommended)
• Log in as System Engineer and enter password Rath7284!
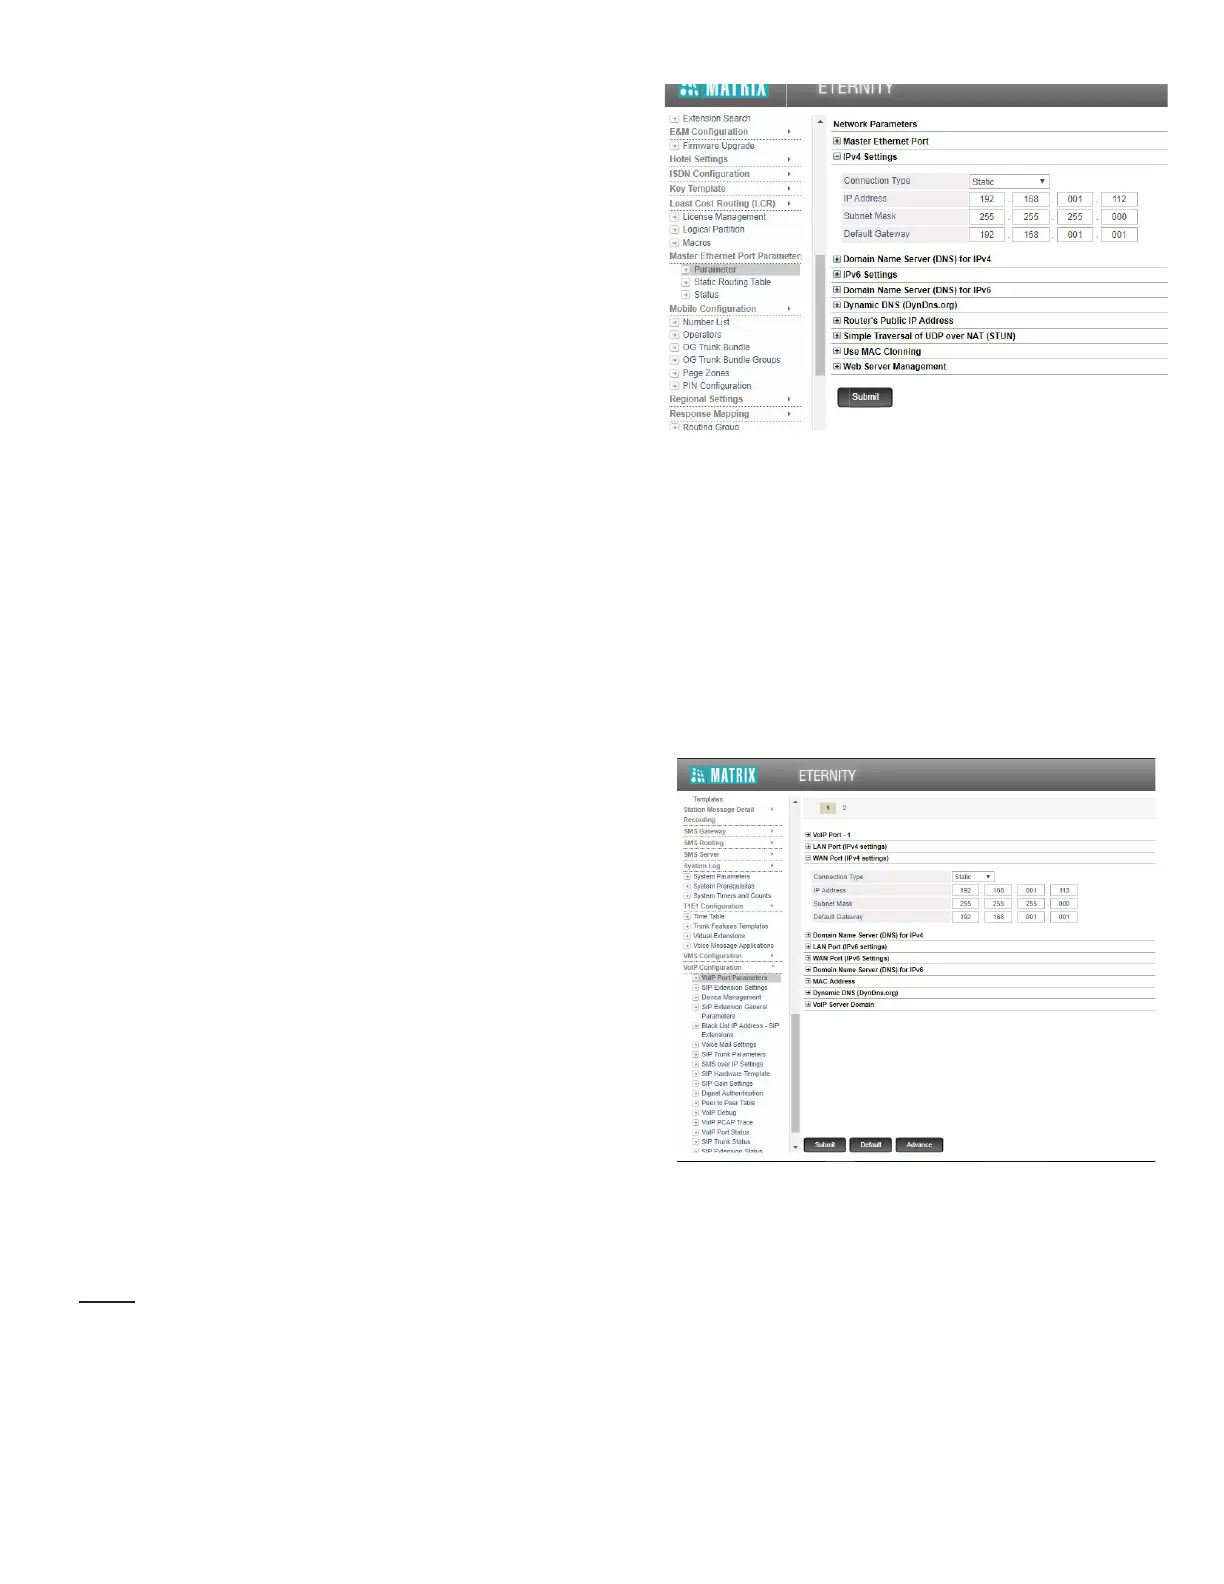
e. Change Programming Port IP Address
• Navigate to Master Ethernet Port Parameters in left side menu
• Click on the + icon next to IPV4 Settings
• Enter desired IP Address, Subnet Mask, and Gateway
• Click Submit
• Click the lock icon in the top right hand corner to log out of the system
• Follow the instructions listed in step b to change the IP address of the PC to an address that is in the same
address range of the Programming Port
• Log back into the Distribution Module using the new IP address (password will not change)
f. Enter VoIP Information
• Navigate to VoIP Conguration in left side menu
• Click the drop down arrow, more menu options
should appear
• Click VoIP Port Parameters
g. Enter Server Information (this will be the SIP Server
information for the IP Emergency Phones)
• Navigate to WAN Port (IPV4 Settings)
• Enter the assigned network IP address into the IP
Address line
• Enter the Subnet Mask of your network into the
Subnet Mask line
• Enter the Router IP address into the Default Gateway line
• Click Submit
h. Setting up SIP Extensions
• Click on SIP Extension Settings
• VOIP Port 1 should be selected
• Enter the desired name in the Name line
• Enter the extension in the SIP ID line
Note: This must be a number above 4000 to avoid issues within the system (Example: Extension 1 = 4001,
Extension 2 = 4002).
• Enter the desired password in the Password line (follow the password requirements displayed on the screen)
• Click Submit