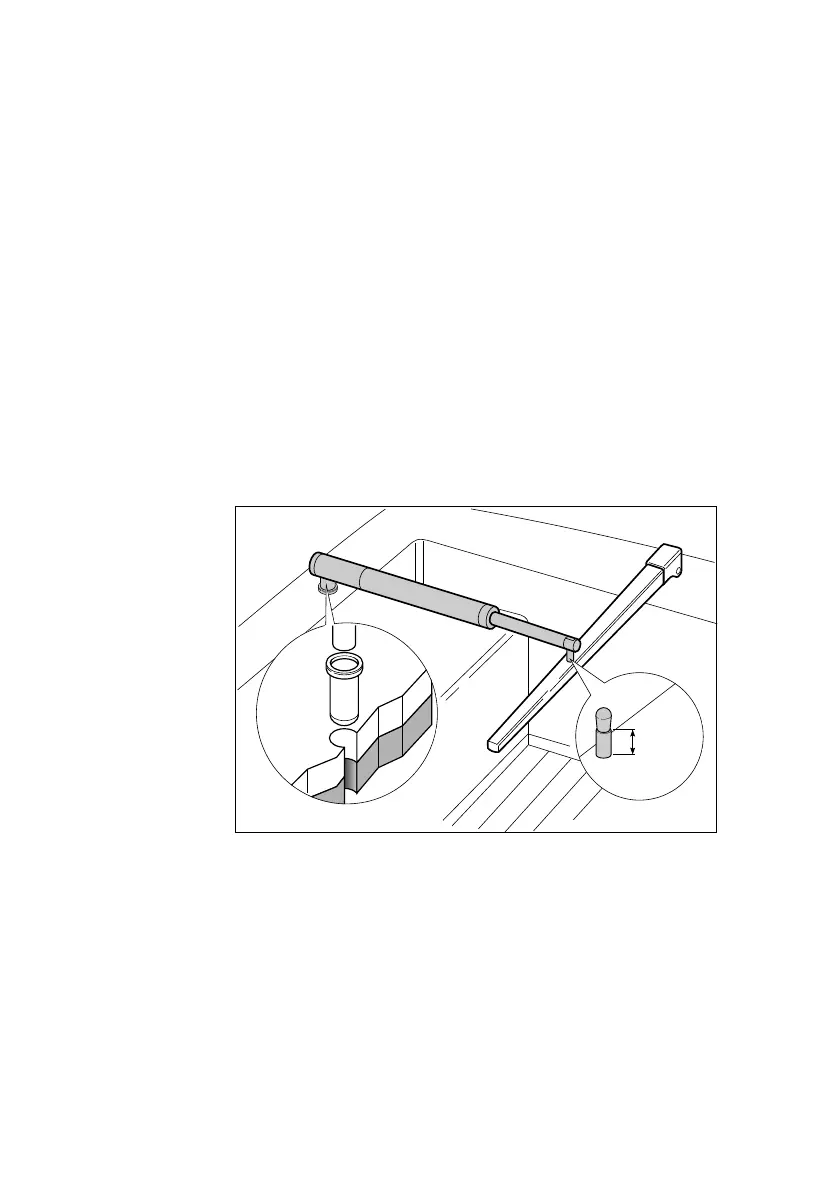
1. Clamp the tiller on the boat’s center line and mark dimensions A
and B.Use masking tape to locate the fixing points for the tiller pin
and mounting socket.
Note: You can measure dimension A on either the port or starboard
side of the cockpit, depending on which side you intend to mount the
drive. If you select port mounting, you must correct the autopilot
steering direction as described on page 78.
2. Make sure the measurements are at right angles (as shown on the
diagram).
3. Make sure that the drive unit is mounted horizontally.
Basic installation
After establishing the control dimensions A and B, you can usually
mount the tiller drive directly onto the cockpit seat.
Installing the tiller pin (part no. D001)
1. Drill a 6 mm (
1
/
4
in) diameter hole to a depth of 25 mm (1 in) at
the fixing point you have marked on the tiller.
2. Use a two part epoxy adhesive (e.g. Araldite) to fix the tiller pin in
place.
3. Position the shoulder of the pin so it is 12.5 mm (
1
/
2
in) above the
tiller surface.
Mounting socket
12.5 mm
(0.5 in)
Tiller pin
D284-2
81131_8.book Page 51 Thursday, October 7, 2004 11:03 AM
 Loading...