21
Expert Mode
20
Expert Mode
How to create a logger file?
Note! The following operation will
change the current settings in the
unit!
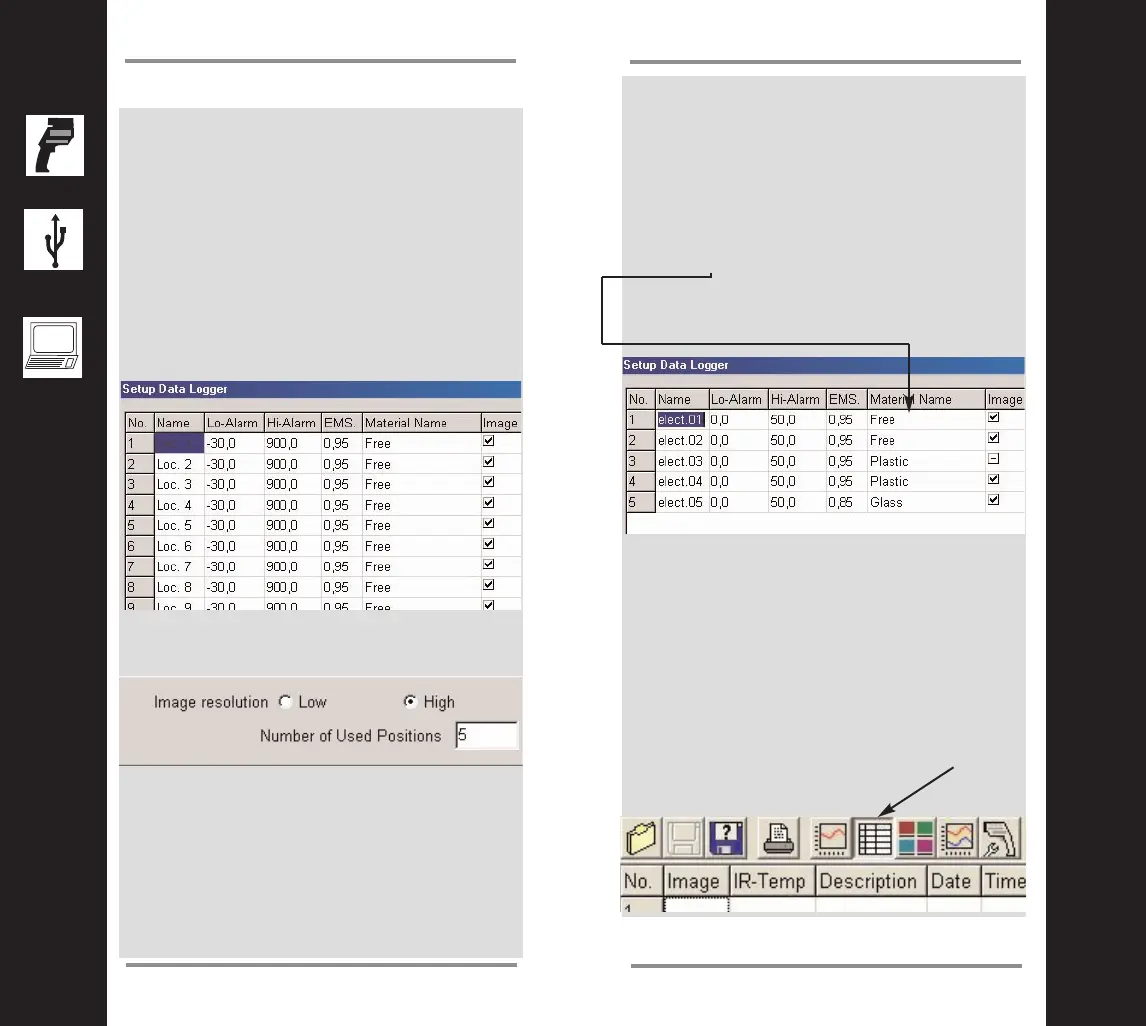
Configure an inspection table using the menu
SETUP/DEVICE LOGGER. The following screen
display will appear.
Continue by setting the desired number of the
inspection points to be measured in the table at
the lower right. In our example it is 5. Choose
the desired image resolution. “High” means a
resolution of 640x480 pixels, “Low” is
320x240 pixels.
Please note! In both modes you could confi-
guere up tp 100 positions. If you have chosen
“High” the maximum number of photos is 26.
In the “Low” resolution mode, you can take
more than 100 photos. The camera memory-
can store up to 106 photos. This could be hel-
pful, if you want to repeat a photo at a previous
position.
Next, enter the name of the location and insert
the related material from the material table by
clicking here. For a known emissivity enter the
value in the column EMS. In the column “Image”
you could enable or disable taking a photo by
checking the appropriate box
The material names are stored in a material
table file. This can be customized. See chapter
“How to create a material table?”
Save this logger file with a new name by
clicking on the “Save as” button. With a click on
“OK” transfer the table to the unit.
Now go to the Logger view by clicking here and
open the file you have just saved
 Loading...