refer to the Linux documentation - Quick Start Guide for U-Boot and Linux - RZN1x-Quick-Start-
Guide.pdf.
There are many similarities between the derivatives of the RZ/N1 series but some minor differences,
too. Therefore here is a more detailed explanation how to run a sample application on each.
All standalone projects and the CC project of the Core To Core variant contain different workspaces for
each board variant. The project workspaces ending on *_eb contain the configuration for the CPU
Board together with the extension board (4 switch ports). The other project workspaces contain the
configuration for working with the CPU Board only.
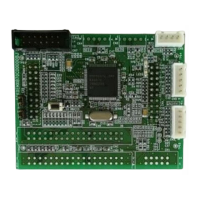
3.5.1 Standalone Variant – RZ/N1D and RZ/N1S
It is possible to load the code via debugger into RAM, which is a very fast approach to test the user
application, or to flash the CM3 core. In both cases any application located in
goal\projects\goal_pnio_lib and must be built using IAR Embedded Workbench.
3.5.1.1. Loading application into RAM via IAR Embedded Workbench
To compile a project, follow these steps:
1. Start the IAR Workbench IDE
2. Open a project via “File/Open Workspace”.
3. Go to the workspace folder and open it. In case the CPU board is used together with the
extension board, please ensure to select the correct IAR-project.
4. Compile the project via “Project/Compile” or “Project/Rebuild all”.
5. Power up the device
6. Open a serial terminal according to section 3.2.
7. Press any key on your keyboard to interrupt the bootloader.
8. Ensure to configure the U-Boot boot command to release the CM3 core after reset. This is done
by the command:
setenv bootcmd "mw 0x04000004 1 && rzn1_start_cm3 && loop 0 1"
followed by
saveenv
and reset the board.
9. Connect the debugger to the system via the “Download and Debug” button of the IAR
Workbench.
10. After the Debug view opened, click on the “Go” button.
3.5.1.2. Loading application into flash via dfu-util
The board uses the U-Boot bootloader for initial setup of the hardware and loading of the CM3 core
firmware. This chapter describes how to install the compiled management software on the flash of the
board. If no bootloader was yet installed on the board, please refer to the Linux documentation - Quick
Start Guide for U-Boot and Linux - RZN1x-Quick-Start-Guide.pdf.
The following steps describe the installation of management software:

 Loading...