18
Tubing
4.5.3 Tubing Connections
Indoor coils have only a holding charge of dry nitrogen.
Keep all tube ends sealed until connections are to be
made.
1. Use type “L” copper refrigeration tubing. Braze the
connections with the following alloys:
• – Copper to copper, 5% silver minimum
• – Copper to steel or brass, 15% silver minimum
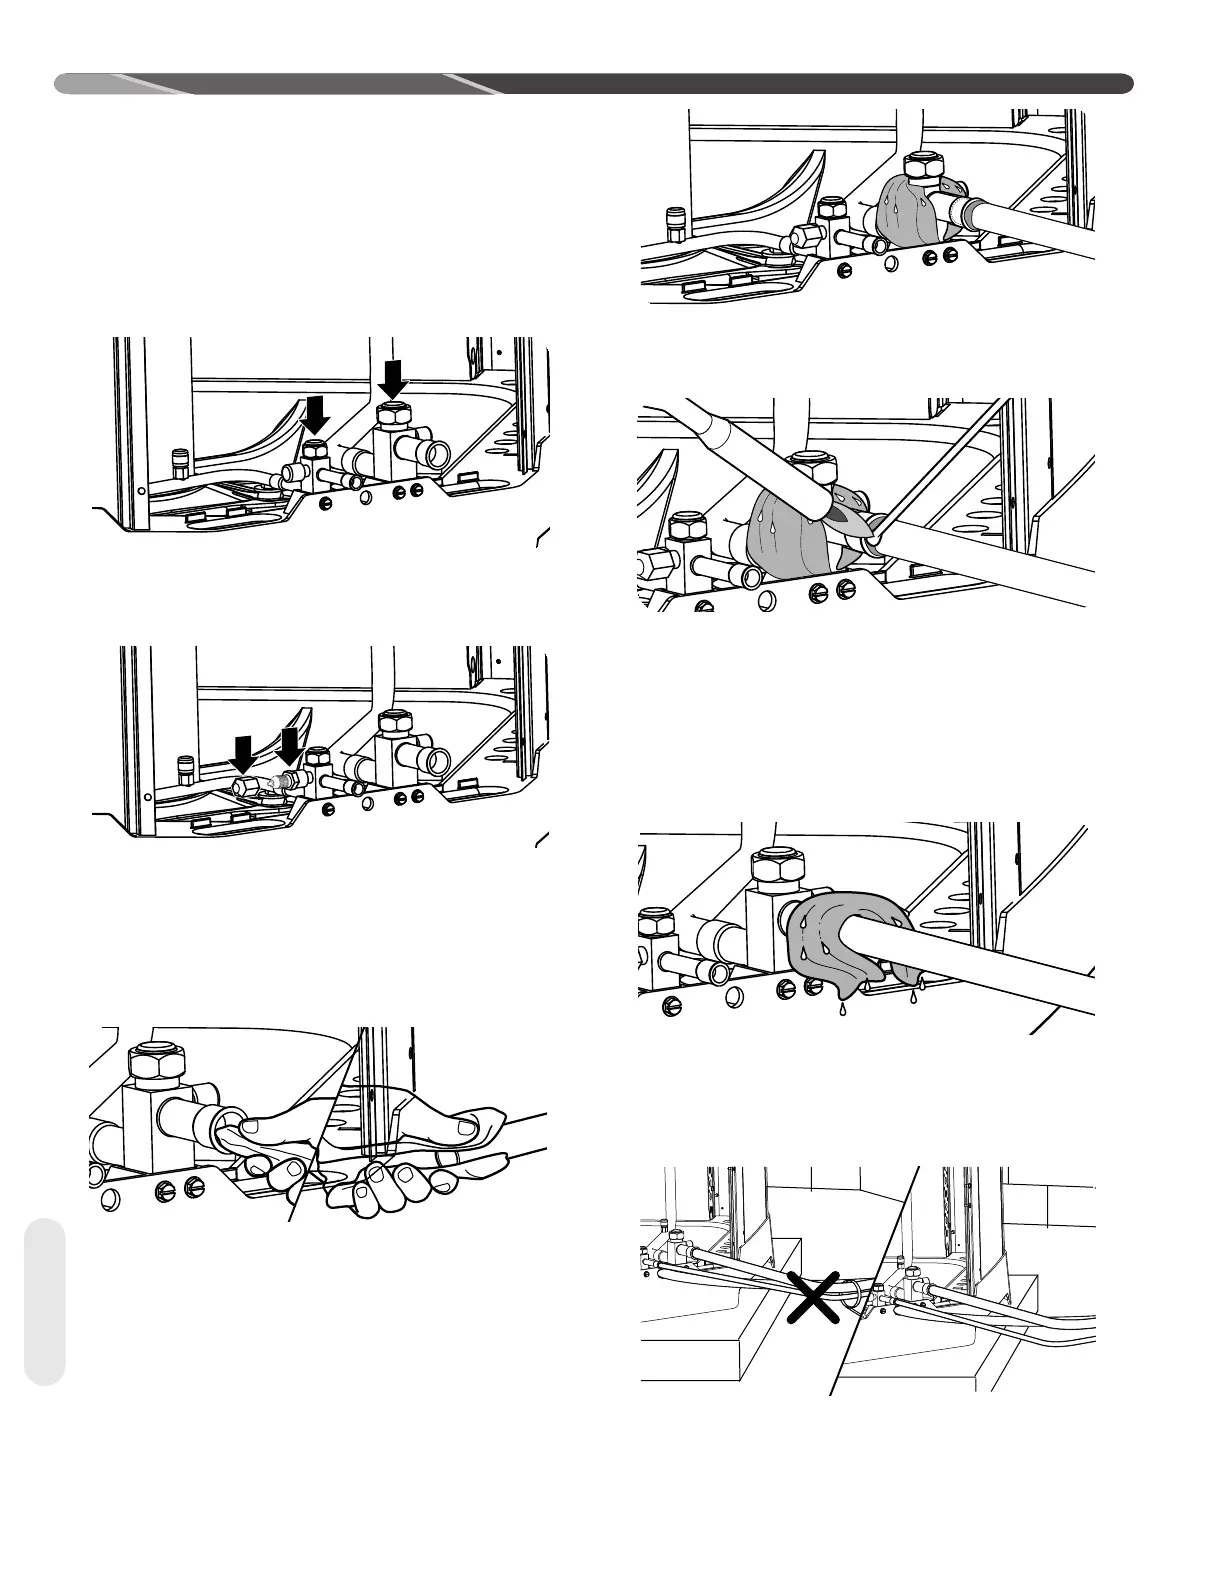
Figure 11: "L" Type Refrigeration Tubing Locations
2. Be certain both refrigerant shutoff valves at the
outdoor unit are closed.
Figure 12: Remove Caps and Schrader Cores
3. Remove the caps and Schrader cores from the
pressure ports to protect seals from heat damage.
Both the Schrader valves and the service valves
have seals that may be damaged by excessive
heat.
Figure 13: Clean Inside Fittings and Outside Tubing
4. Clean the inside of the fittings and outside of the
tubing with a clean, dry cloth before soldering.
Clean out debris, chips, dirt, etc., that enters tub-
ing or service valve connections.
Figure 14: Wrap Valves Before Applying Heat
5. Wrap valves with a wet rag or thermal barrier
compound before applying heat.
Figure 15: Braze the Tubing
6. Braze the tubing between the outdoor unit and
indoor coil. Flow dry nitrogen into a pressure port
and through the tubing while brazing, but do not
allow pressure inside tubing which can result in
leaks. Once the system is full of nitrogen, the
nitrogen regulator should be turned off to avoid
pressuring the system.
Figure 16: Cool the Joint After Brazing
7. A
fter brazing, use an appropriate heatsink material
to cool the joint.
8. Reinstall the Schrader cores into both pressure
ports.
Figure 17: Do Allow the Vapor and Liquid Lines to Cross
9. Do not allow the bare vapor line and liquid line
to be in contact with each other. This causes an
undesirable heat transfer resulting in capacity loss
and increased power consumption.
 Loading...