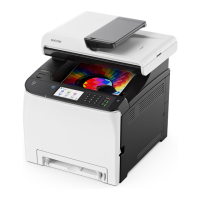
RICOH SP C250SF/SP C252SF Color Multifunction Printers
Getting Started Guide
17
Select a format for entering the WEP key.
Enter the WEP key. The number and type of characters you can enter vary
depending on the length and format selected for the key, as follows:
• WEP key length: [64bits], Format: [Hexadecimal]
WEP key max length: 10 characters (0-9, A-F, a-f)
• WEP key length: [64bits], Format: [ASCII]
WEP key max length: 5 characters (ASCII characters)
• WEP key length: [128bits], Format: [Hexadecimal]
WEP key max length: 26 characters (0-9, A-F, a-f)
• WEP key length: [128bits], Format: [ASCII]
WEP key max length: 13 characters (ASCII characters)
5. When finished, click [OK] to save changes.
6. Close web browser.
7. Check that Wi-Fi is set to “Active.” Press [User Tools]
[Network Settings] [Wi-Fi Configuration]
[Wi-Fi] [Active] [User Tools].
8. Disconnect Ethernet cable.
9. Turn printer power switch Off. Wait a moment, and turn On.
10. Next, install Network Printer/Scanner Drivers. See 3.2 Network Quick Install.
Note: For further information on Web Image Monitor, please refer to the Operating Instructions, p233.
Using Infrastructure Mode
Infrastructure mode is the printer’s default communication mode, as most Wi-Fi networks function in this
mode. This enables you to connect the device for communication through a single access point, i.e., your
wireless router.
Note: Ad-Hoc mode, also known as “peer-to-peer” mode, is also supported. Ad-Hoc networks do not
require a centralized access point. Instead, devices on the wireless network connect directly to each
other. For instance, if you set up the two laptops in Ad-Hoc wireless mode, they would connect directly to
each other, without the need for a centralized access point. This would be useful for a temporary
connection, e.g., you’re away from the office/home and need to connect two devices via a Wi-Fi
connection to exchange files or other information when there is no other Wi-Fi network to connect both
devices to.
To configure Infrastructure mode, proceed as follows:
1. Press [User Tools].
2. Scroll [
] to [Network Settings], and press [OK].
3. Scroll [
] to [Wi-Fi Configuration], and press [OK].
4. Scroll [
] to [Setup Wizard], and press [OK].
5. Select [Infrastructure], and press [Next]. Display reads, Searching Scan List…
6. Select discovered router Network Name, e.g., NETGEAR30 or select [Input SSID] and enter/edit
manually via alphanumeric keys.
 Loading...