5
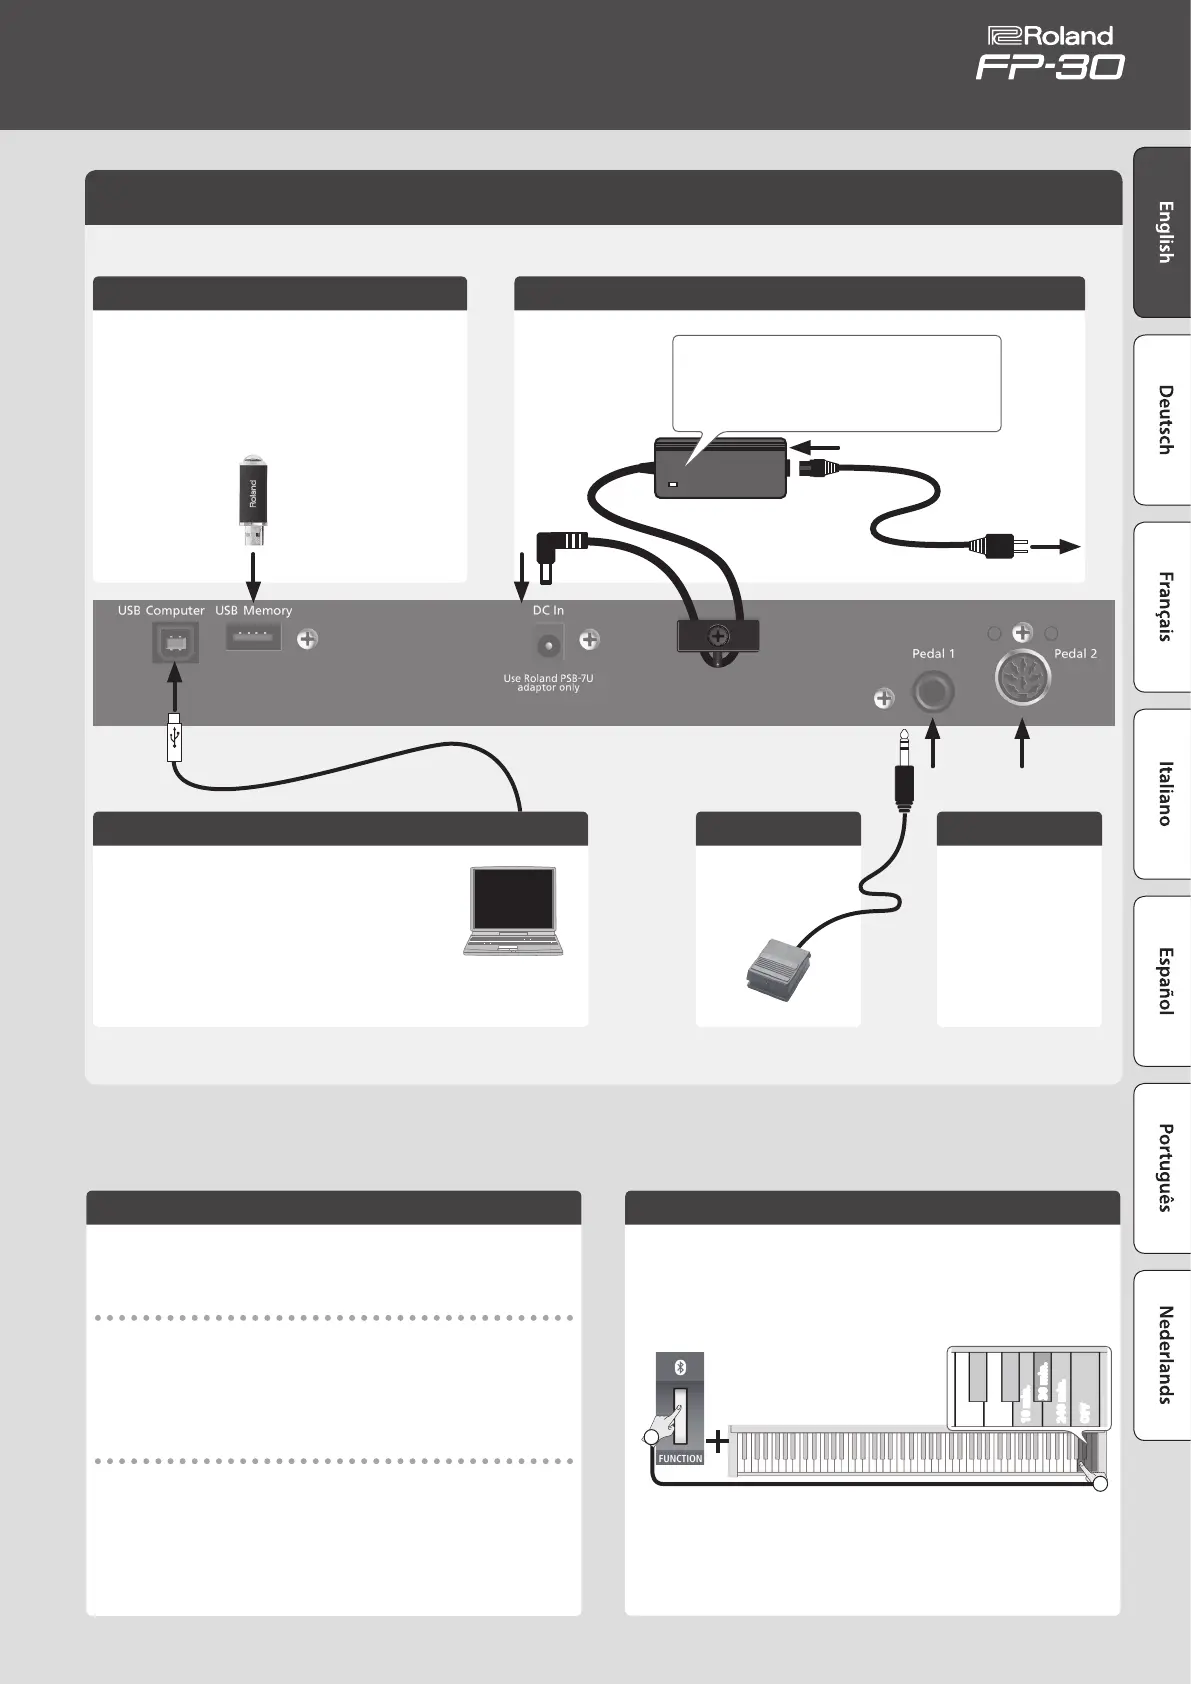
Connecting Equipment (Rear Panel)
Turning On/O the Power
Once everything is properly connected (p. 5), be sure to follow the procedure
below to turn on their power. If you turn on equipment in the wrong order,
you risk causing malfunction or equipment failure.
Turning the power on
1. Long-press the [
L
] (POWER) button to turn the power on.
* This unit is equipped with a protection circuit. A brief interval (a few seconds) after
turning the unit on is required before it will operate normally.
* You might hear some sound when switching the unit on/o. However, this is normal
and does not indicate a malfunction.
Turning the power o
1. Hold down the [
L
] (POWER) button for one second or longer; the power will be
turned o.
Making the Power Automatically Turn O After a Time (Auto O)
The power to this unit will be turned o automatically after a predetermined
amount of time has passed since it was last used for playing music, or its
buttons or controls were operated (Auto O function).
If you do not want the power to be turned o automatically, disengage the
Auto O function.
(Default: 30 min.)
Hold down
240 min.
OFF
10 min.
30 min.
2
1
DC In Jack
Connect the included AC adaptor here.
AC Outlet
Power Cord
Place the AC adaptor so the side with the indicator (see
illustration) faces upwards and the side with textual information
faces downwards.
The indicator will light when you plug the AC adaptor into an
AC outlet.
Pedal 1 Jack
Connect the included
damper pedal.
Pedal 2 Jack
If connecting the separately
sold dedicated pedal
(KPD-70) to the separately
sold dedicated stand
(KSC-70), connect the KPD-
70’s cable here.
USB Memory Port
Connect a USB ash drive here.
5 If a USB ash drive is connected, you can play or save songs.
* Do not disconnect the USB ash drive or turn o the power while
the access indicator of the USB ash drive is blinking.
* Carefully insert the USB ash drives all the way in—until it is rmly
in place.
USB Computer Port
If you use a commercially available USB cable to connect the
FP-30’s USB COMPUTER port to your computer’s USB port, you’ll be
able to do the following things.
5 SMF data played back by MIDI-compatible software can be
sounded by the FP-30.
5 MIDI data can be transferred between the FP-30 and your DAW
software, opening up a wide range of possibilities for music
production and editing.
* To prevent malfunction and equipment failure, always turn down the volume, and turn o all the units before making any connections.
Owner’s Manual
 Loading...