EasyManua.ls Logo

Roland Gaia SH-01 User Manual

Roland Gaia SH-01
68 pages
To Next Page IconTo Next Page
To Previous Page IconTo Previous Page
Page #14 background imageLoading...
Page #14 background image
14
Removing the Batteries
If you want to remove the batteries, turn o power to the
GAIA SH-01  rst; then open the battery compartment
cover, and take out the batteries.
When to Replace the Batteries
(BATTERY indicator)
When the batteries run low, the BATTERY indicator will
light.
If you continue using the unit, the BATTERY indicator will
blink. Cease operation, and charge the batteries.
NOTE
If you continue to play the instrument even though the
BATTERY indicator is  ashing, eventually all the indicators
on the panel will go out, and the instrument will become
inoperable.
The BATTERY indicator is only an approximate indication.
Batteries that can be used
When using nickel-metal hydride batteries, the battery
life will be approximately  ve hours of continuous
use at room temperature. However, if USB memory is
connected, the battery life will be approximately four
hours. The battery life for continuous use will depend
on factors such as the conditions of use.
NOTE
Do not use alkaline batteries or zinc-carbon batteries.
Battery handling
Do not mix fresh batteries with partially used batteries
or batteries of a di erent type.
If you won’t be using the unit for an extended period
of time, save your stored settings to USB memory, and
remove the batteries.
Incorrect use of batteries, rechargeable batteries, or
battery chargers can cause leakage, overheating,  re,
or explosion. Before use, carefully read and observe
the instructions that accompanied your batteries,
rechargeable batteries, or battery charger.
POWER SAVE MODE
You can set the GAIA SH-01 so it will automatically enter
power-save mode when a certain length of time has
passed without any operation being performed.
To return from power-save mode to normal operation,
perform an operation such as turning a knob or playing
the keyboard.
You can set the amount of time that is to pass before the
unit will enter Power Save mode.
For details, see Time setting for POWER SAVE MODE” (p. 54).
Connecting Headphones or
Speakers
The GAIA SH-01 does not contain speakers. In order to
hear sound, you’ll need to connect it to an audio device,
such as monitor speakers or a stereo system, or connect
headphones.
921
* To prevent malfunction and/or damage to speakers or
other devices, always turn down the volume, and turn o
the power on all devices before making any connections.
Connecting monitor speakers or a
stereo system
Use cables to connect the GAIA SH-01’s rear panel OUTPUT
jacks to your monitor speaker or stereo set.
* In order to take full advantage of the GAIA SH-01’s
capabilities, we recommend that you use it in stereo.
To use it in mono, connect to the OUTPUT L/MONO jack.

Table of Contents

Other manuals for Roland Gaia SH-01

Question and Answer IconNeed help?

Do you have a question about the Roland Gaia SH-01 and is the answer not in the manual?
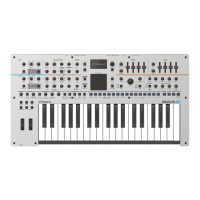
Roland Gaia SH-01 Specifications

General IconGeneral
TypeVirtual Analog Synthesizer
Polyphony64 voices
Keyboard37 keys (velocity-sensitive)
ArpeggiatorYes
Synthesis TypeVirtual Analog
SequencerNo
MIDIIn, Out
ConnectivityMIDI, USB
Oscillators3
EffectsReverb, Delay, Flanger, Distortion
Weight4.2 kg
LFO1
FilterHigh-pass, Low-pass, Band-pass
USBYes
Memory64 Patches
Power SupplyAC adapter (included)
OutputsStereo Output (L/MONO, R)

Summary

Main Features of the GAIA SH-01

Multi-Synthesizer Sound Engine

Explains the GAIA SH-01's sound generation capability using three synthesizers simultaneously.

Versatile Effects Section

Describes the five built-in effects (distortion, modulation, delay, reverb, low boost) for sound enhancement.

Live Performance Enhancements

Covers D BEAM controller, Arpeggiator, and Phrase recorder for expressive live playing.

USB and Computer Connectivity

Saving User Data with USB Memory

Details how to use USB memory for storing user patches and phrases.

Connecting to a Computer via USB

Explains USB MIDI/AUDIO capabilities for recording and computer integration.

Unit Safety and Operation Guidelines

Understanding Warning and Caution Notices

Explains the meaning of WARNING and CAUTION labels for safe usage.

Essential Safety Observance Rules

Lists crucial guidelines to follow for preventing fire, electric shock, or injury.

Important Operational Notes

Power Supply and Connection Precautions

Notes on electrical connections, power supply noise, and battery usage.

Additional Usage and Handling Precautions

General Usage and Handling Precautions

Precautions regarding memory data, controls, cables, and transport.

USB Memory Handling Guidelines

Specific precautions for inserting, handling, and storing USB memory devices.

Top Panel Controls Identification

Oscillator, Filter, and Amplifier Sections

Explanation of the OSC, FILTER, and AMP sections for sound generation.

Top Panel Control Details

Performance and Tempo Controls

Details on V-LINK, TAP TEMPO, KEY HOLD, MONO, PORTAMENTO, TRANSPOSE.

Rear Panel Connections and Ports

MIDI and USB Connectivity Ports

Information on MIDI IN/OUT and USB COMPUTER connectors.

Getting Started with the GAIA SH-01

Connecting the AC Adaptor Correctly

Step-by-step guide for connecting the AC adaptor and using the cord hook.

Installing and Handling Batteries

Instructions for installing AA batteries and safety notes for battery compartment.

Battery, Power, and Audio Output Management

Connecting Headphones and Speakers

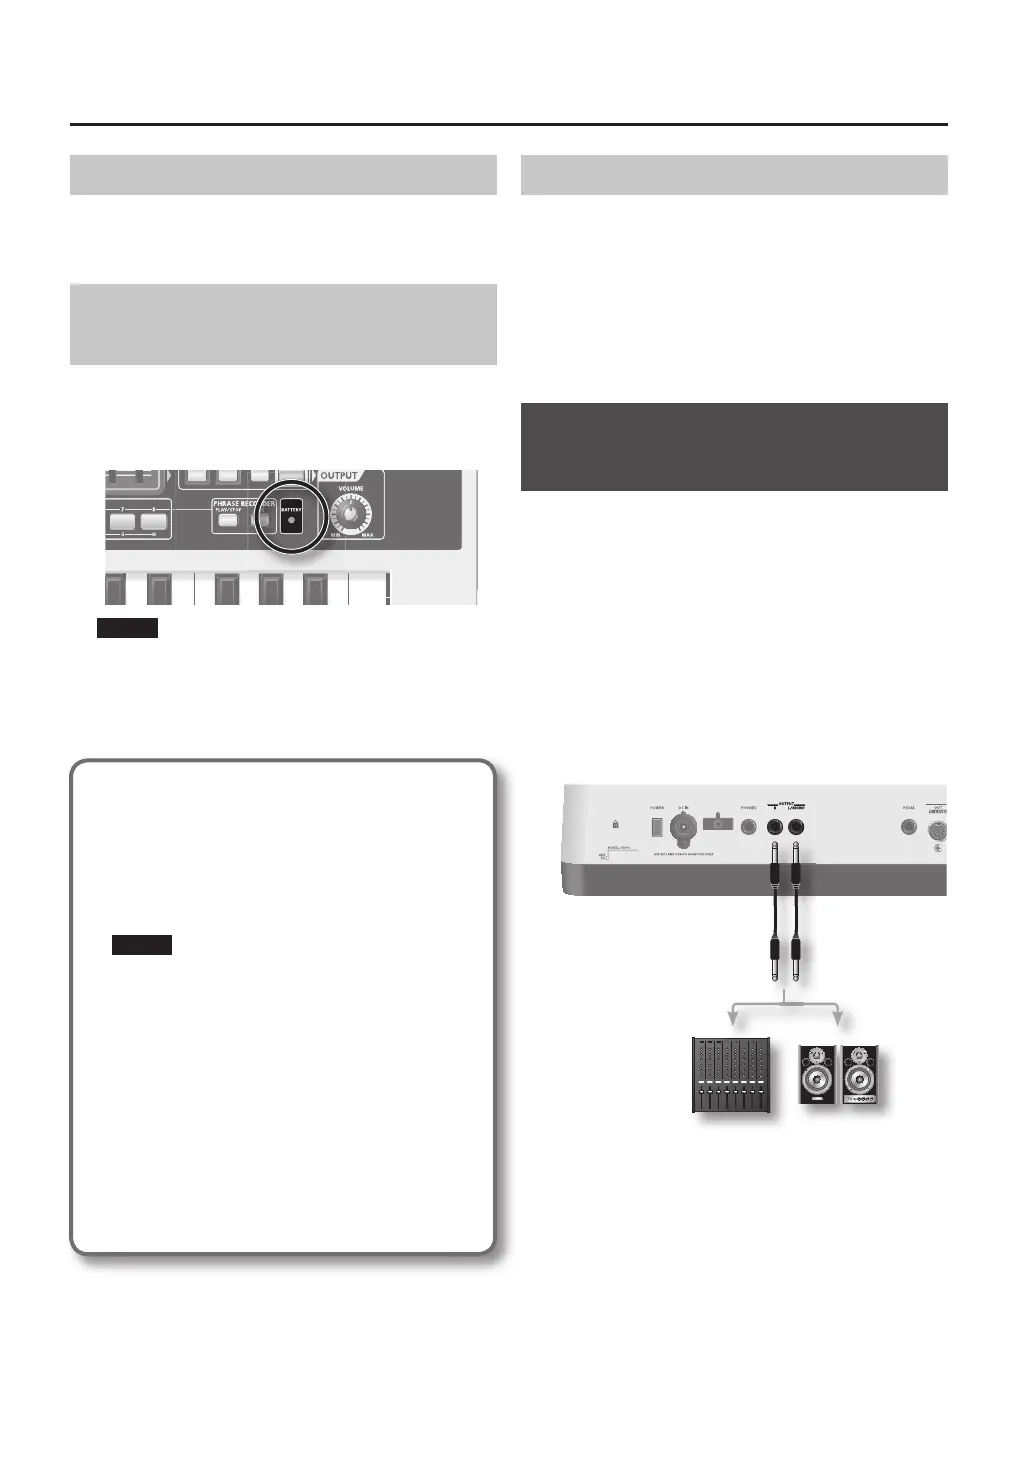
Guide on connecting audio output devices and safety recommendations.

Powering the Unit On and Off

Procedure for Turning the Unit Power On

Step-by-step guide to safely turn the unit's power on.

Procedure for Turning the Unit Power Off

Steps to safely turn off the unit's power and connected equipment.

Understanding the GAIA SH-01 Organization

Key Performance Functions

Explanation of Arpeggiator, Tempo, Octave, Transpose, and Phrase recorder.

Performing and Selecting Sounds

Adjusting Master Volume Level

How to adjust the overall output volume using the VOLUME knob.

Selecting and Managing Patches

Steps to select preset, user, or USB memory patches.

Phrase Recorder Operations

Recording Keyboard Performances

Instructions for recording keyboard and knob operations as phrases.

Creating and Shaping Sounds

Core Sound Elements: OSC, FILTER, AMP

Explains the three main elements determining sound character: pitch, brightness, loudness.

Sound Design Techniques

Waveform and Pitch Specification (OSC)

Selecting waveforms and determining pitch using the OSC section.

Filter Resonance and Envelope Settings

Filter Envelope (ENV) Parameters

Detailed parameters for the filter envelope (Attack, Decay, Sustain, Release, Depth).

AMP Section Controls for Sound Level

Amp Envelope (ENV) Parameter Settings

Details on AMP envelope parameters (Attack, Decay, Sustain, Release).

Saving Custom Sounds and Write Protection

Saving a Created Sound (WRITE)

Procedure for saving user-created sounds as patches.

Computer, USB, and MIDI Integration

Connecting and Operating with Computers (USB/MIDI)

Using USB for audio/MIDI recording and connecting to computers.

MIDI Communication and Control

Using the SH-01 with MIDI devices, channels, and external sequencers.

Advanced Operation and System Settings

OSC, Filter, and AMP Parameter Details

Specific parameters for Oscillator, Filter, and Amplifier sections.

LFO, Modulation, and Effect Parameters

Parameters for LFO, Modulation LFO, and Effect settings.

Maintenance, Troubleshooting, and Reference

Restoring Factory Settings

Procedure for resetting the unit to its original factory condition.

Troubleshooting Common Issues

Guide to diagnosing and resolving common operational problems.

Related product manuals