6
4-3 Installing the Blade
* Always make sure the power switch is off before installing (or replacing) the blade.
To prevent injuries, be very careful when handling the blades.
Do not touch the tip of the blade with your fingers, as the cutting performance of the blade
will be impaired.
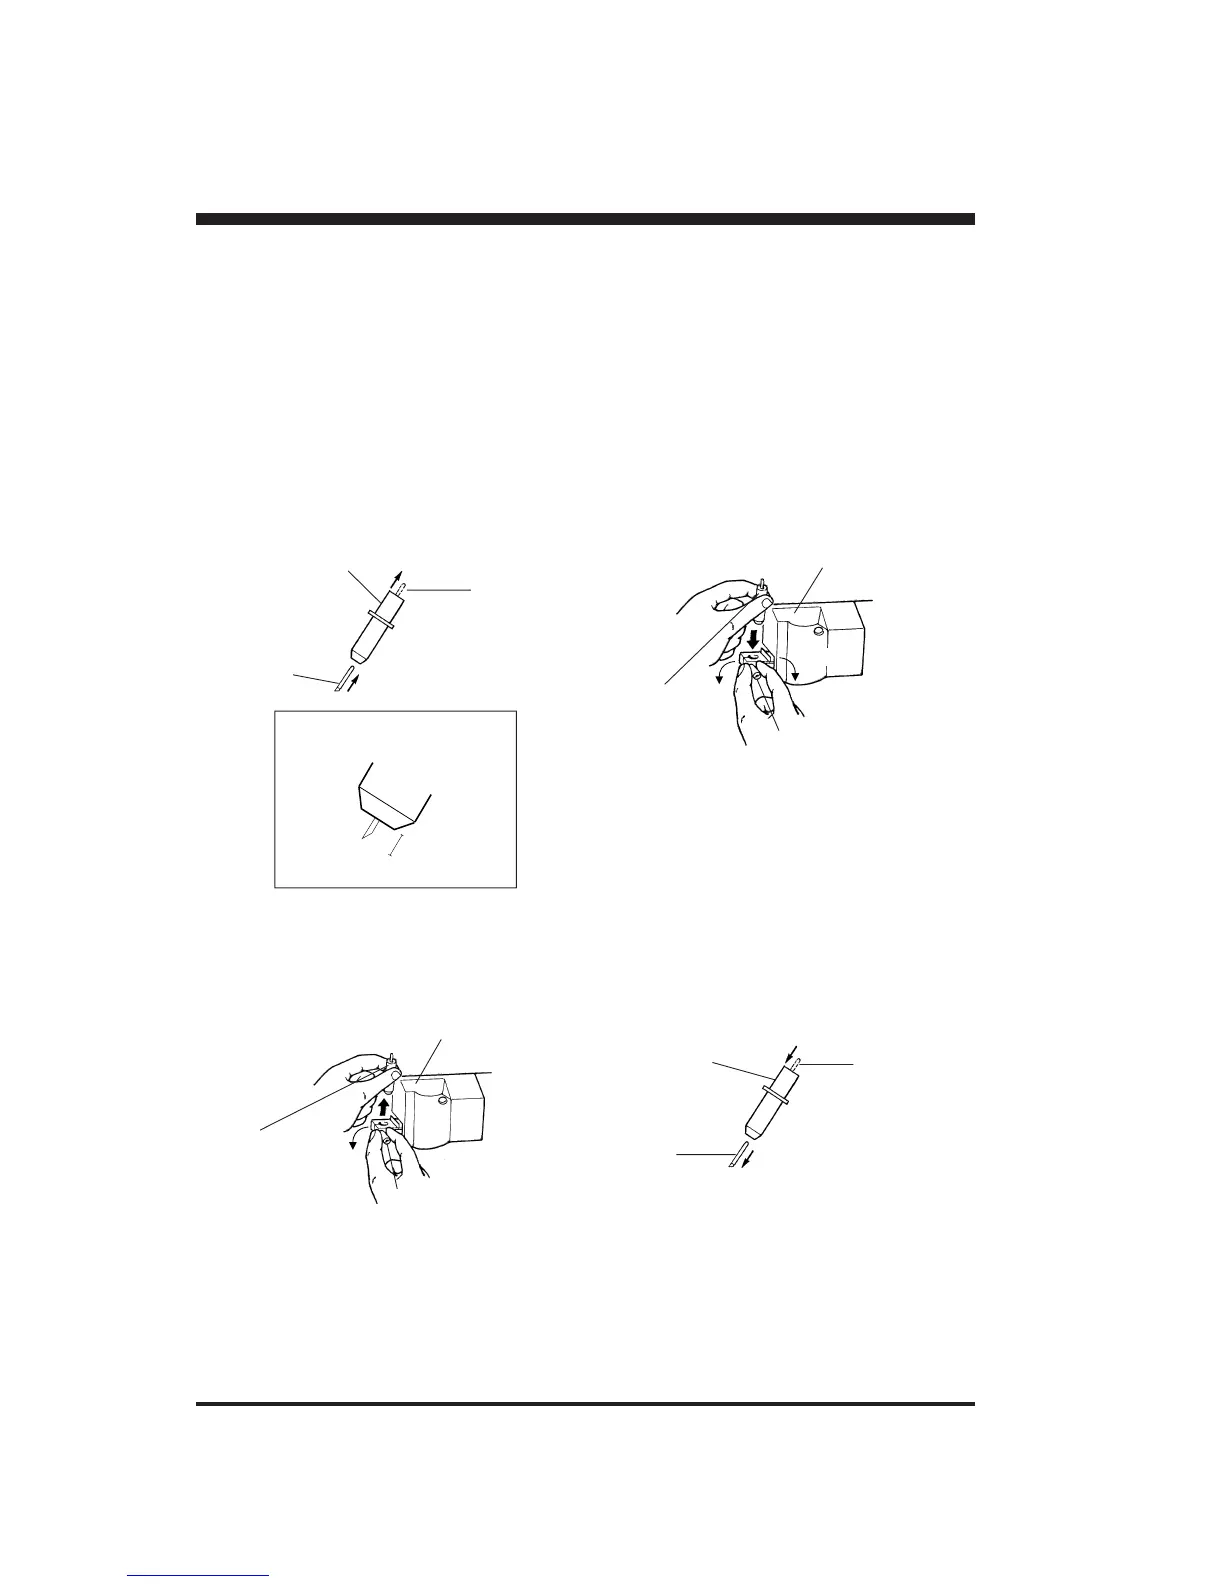
• Installation
(1) Insert the blade into the blade holder until it snaps into
place with an audible click.
*Take care not to break or chip the blade.
(2) Loosen the tool securing screw on the tool carriage, then
insert the blade holder.
Tighten the tool securing screw until the blade holder is
secured in place.
Tool carriage
Tool securing screw
Blade holder
• Removal
(1) Loosen the tool securing screw on the tool carriage, then
remove the blade holder from the tool carriage.
(2) Press the push-pin and remove the blade from the blade
holder.
Tool carriage
Blade holder
Tool securing screw
Push-pin
Blade holder
Blade
Tighten
Loosen
Push-pin
Blade holder
Blade
Blade Completely installed
4 mm

 Loading...