EasyManua.ls Logo

Roland PNC-900 Camm-1 User Manual

Roland PNC-900 Camm-1
31 pages
To Next Page IconTo Next Page
To Previous Page IconTo Previous Page
Page #18 background imageLoading...
Page #18 background image
12
(3)
Stick application tape over the completed work.
Press down firmly on the application sheet to remove air
bubbles. If you do not press firmly enough the cut area will
not stick to the surface.
(4)
Carefully apply the work at the desired location, while
keeping it as straight as possible. Rub over the application
tape to make sure the work is firmly stuck in place. Then peel
off the application tape.
4-9 When Cutting Is Completed
(1) When cutting is finished, press down the sheet loading levers and remove the sheet. (See "Removing the Sheet" on page 7.)
(2) If a blade was used, wipe the blade with a soft cloth to remove any pieces of the sheet that may be adhering to it.
If a pen was used, remove the pen from the tool carriage and cap it securely.
(3) Turn off the power.
If you do not intend to use the unit for an extended period of time, you should pull the plug for the power cord out of the
outlet.
* For routine cleaning, use a soft piece of cloth.
Performing a Demo Cutting
The PNC-900 is equipped with a "self-test" function to conveniently allow you to check whether or not it is capable of operating
normally. Should you ever suspect that the PNC-900 is not performing satisfactorily, you should follow the steps below to
perform the self-test.
* A computer is not required in order to carry out the self-test.
(1) Refer to "4-3 Installing the Blade" and install a blade holder (or pen) in the PNC-900's tool carriage.
(2) Set the pen force to the smallest possible value (the pen force slider should be at the furthest point to the left). If after the first
test you feel that the sheet was not cutout clean enough, you can try gradually increasing the pen force until you have the
optimum level.
(3) Hold down the key on the panel while you turn the power on.
(4) Load the sheet (or some paper), following the procedure described
in "4-4 Loading the Sheet."
(5) Press the SETUP key.
Demo cutting starts.
ON
OFF
SETUP
POWER ON
Question and Answer IconNeed help?

Do you have a question about the Roland PNC-900 Camm-1 and is the answer not in the manual?

Roland PNC-900 Camm-1 Specifications

General IconGeneral
ModelPNC-900 CAMM-1
InterfaceRS-232C
Power SupplyAC 100 to 240 V ±10%, 50/60 Hz
TypeCutter
Max Media Thickness0.8 mm
Acceptable Material Width50 to 700 mm (2 to 27.5 inches)
Software Resolution0.025 mm/step (0.00098 inches/step)
Blade Force30 - 350 gf
Command SystemRoland CAMM-GL
Power ConsumptionApprox. 50 W
Power Requirements100 - 240 V, 50/60 Hz
Mechanical Resolution0.025 mm/step (0.00098 inches/step)

Summary

To Ensure Safe Use

To Ensure Correct Use

Precautions

Precautions in Use

Important safety advice for operating the PNC-900.

Moving the PNC-900

Part Names and Functions

Basic Operation

Connecting to the Computer

Instructions for establishing a connection between the PNC-900 and a computer.

DIP Switch Settings

Configuration of DIP switches for communication parameters and blade offset.

Blade Installation and Removal

Step-by-step guide for installing and removing the cutting blade.

Loading and Removing the Sheet

Setting the Origin Point

Cutting Tests and Adjustments

Performing a Cutting Test

Procedure to test and confirm blade force settings for optimal cutting.

Adjusting Blade Force

Guide on how to adjust the blade force using the control slider.

Downloading Cutting Data

Pausing and Resuming Cutting

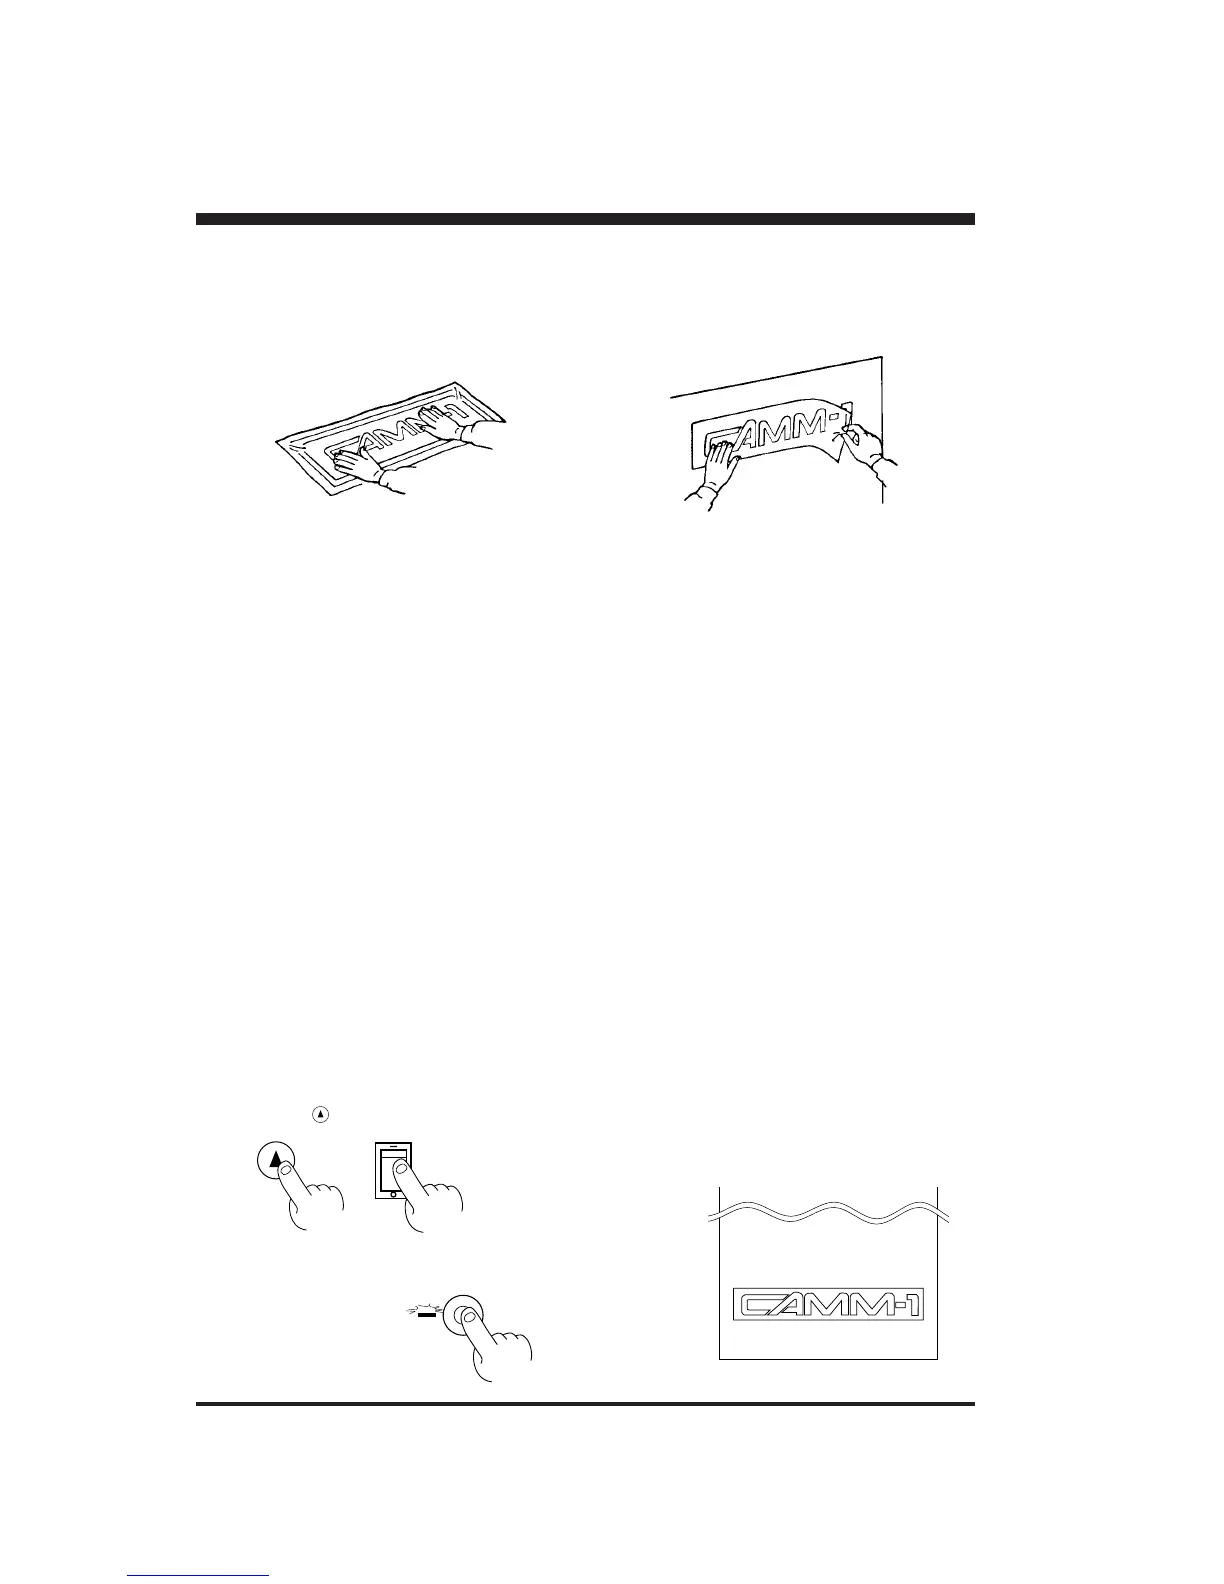
How to pause, resume, or terminate a cutting operation using the PAUSE key.

Continuing Cutting Operations

Cutting Thick Sheets

When Cutting Is Completed

Performing a Demo Cutting

Settings for Each Function

What to Do If...

PNC-900 Not Running or Error LED Blinking

Troubleshooting steps for when the unit does not operate or the error LED blinks.

Cutting Issues

Specifications of PNC-900

Interface Specifications

Related product manuals