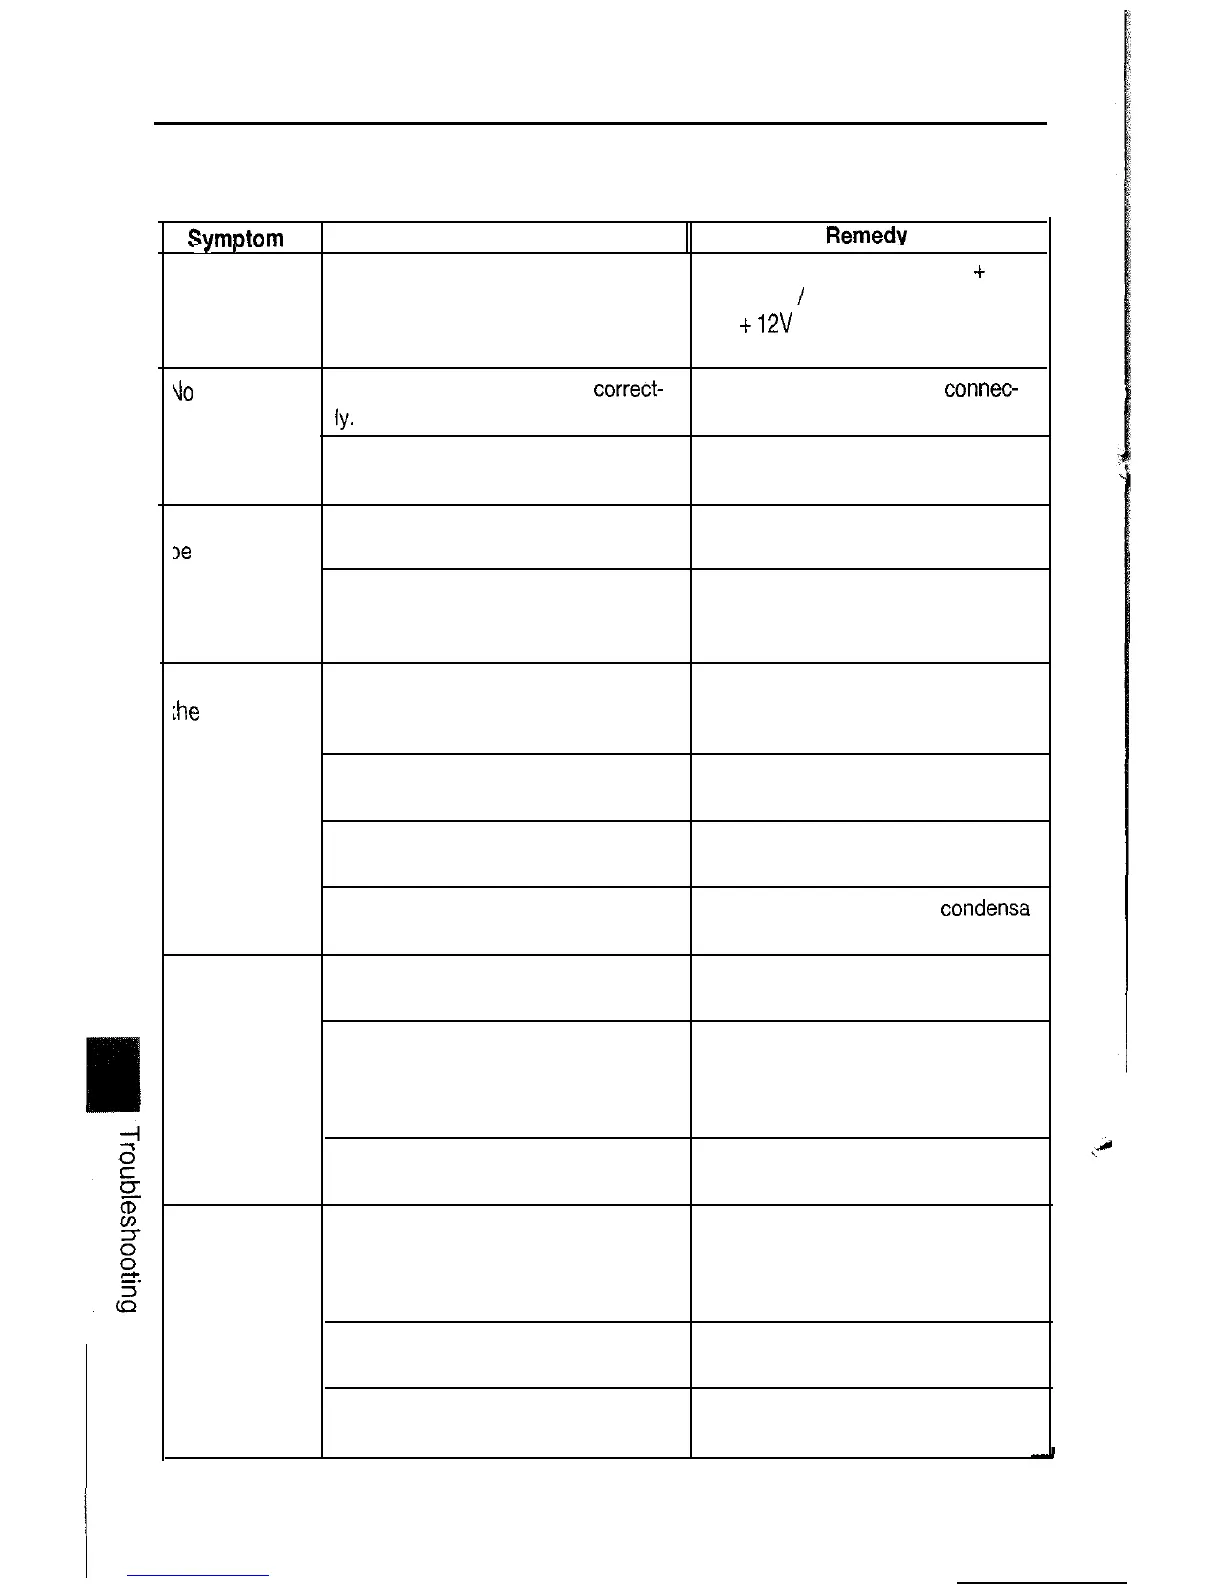
Troubleshooting
An error made in operation or an error during installation can be mistaken for a system
malfunction. Check below before contacting your Authorized SANYO Service Station.
L
SvmDtom
I
-.
.
Jo power
Cause
The power wires are not connected
correctly.
Remedy
Check the connections of the
+
12V
Accessory
/
ignition wire (Red) and
the
+
12V
Constant power supply
wire (Yellow).
\lo
sound
The speakers are not wired
correct-
Check the speaker wiring
connec-
IY.
tions.
The volume level is too low.
Increase the volume level. (See
page 8 “Audio control”.)
4 CD cannot
,e
loaded.
There is another CD in the unit.
Transport screw is still in place.
Eject the CD and then insert the
next CD.
Remove a transport screw on the
top of unit. (See page 20 “Before
Wiring and Installation”.)
The unit ejets
Transport screw is still in place. Remove a transport screw on the
;he
CD. top of unit. (See page 20 “Before
Wiring and Installation”.)
Extremely dirty CD Clean the CD. (See page 4 “Han-
dling the CDs”.)
Extremely hot temperature Open the window and allow the car
to cool.
Moisture condenses on the optical Wait for a while, until the
condensa
lens.
tion evaporates.
Sound skip
Improper installation Install the unit properly. (See page
while playing a
24 “Installation”.)
CD.
The CD is defective.
Compare the sound with another
CD. If the sound from the second
CD is acceptable, the first CD is
defective.
Dirty CD Clean the CD. (See page 4 “Han-
dling the CDs”.)
Poor sound The CD is defective.
Compare the sound with another
while playing a
CD. If the sound from the second
CD.
CD is acceptable, the first CD is
defective.
Dirty CD
Clean the CD. (See page 4 “Han-
dling the CDs”.)
Moisture condenses on the optical
Eject the CD and wait for a while,
lens.
until the condensation evaporates.
25
 Loading...