www.scheppach.com / service@scheppach.com / +(49)-08223-4002-99 / +(49)-08223-4002-58
24
|
GB
Electrical connection
The electrical motor installed is connected and ready
for operation. The connection complies with the ap-
plicable VDE and DIN provisions.
The customer‘s mains connection as well as the ex-
tension cable used must also comply with these reg-
ulations.
Damaged electrical connection cable
The insulation on electrical connection cables is of-
ten damaged.
This may have the following causes:
• Passage points, where connection cables are
passed through windows or doors.
• Kinks where the connection cable has been im-
properly fastened or routed.
• Places where the connection cables have been cut
due to being driven over.
• Insulation damage due to being ripped out of the
wall outlet.
• Cracks due to the insulation ageing.
Such damaged electrical connection cables must not
be used and are life-threatening due to the insula-
tion damage.
Check the electrical connection cables for damage
regularly. Make sure that the connection cable does
not hang on the power network during the inspection.
Electrical connection cables must comply with the
applicable VDE and DIN provisions. Only use con-
nection cables with the marking „H07RN“.
The printing of the type designation on the connec-
tion cable is mandatory.
For single-phase AC motors, we recommend a fuse
rating of 16A (C) or 16A (K) for machines with a high
starting current (starting from 3000 watts)!
10. Cleaning
•
switch of the device prior to carrying out mainte-
nance or repair work on the plasma cutter.
• Regularly clean the outside of the plasma cutter
and its accessories. Use compressed air, cotton
waste or a brush to remove dirt and dust.
• In case of a defect or a necessary replacement of
equipment parts, please contact the appropriate
11. Transport
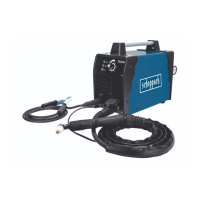
Lift the plasma cutter using the carrying handle (1).
• In order to release the compressed air hose (19),
you must press the locking mechanism of the com-
pressed air connection (19a) and pull out the com-
pressed air hose (19) at the same time.
regulator.
m IMPORTANT!
You must fully assemble the appliance before using it
m ATTENTION!
-
-
ating personnel.
9. Initial operation
1. Set the plasma cutter up in a dry and well venti-
lated area.
2. Position the machine in the vicinity of the work-
piece.
3.
4. Clamp the ground terminal (5) to the workpiece to
be cut and make sure that there is a good electri-
cal contact.
5. Set the cutting current on the current controller
(12). If the arc beam is interrupted the cutting cur-
rent must be set higher if necessary. If the elec-
trode burns through frequently, then the cutting
current must be set lower.
6. To cut in the manual cutting mode, pull the over-
lying burner across the workpiece while maintain-
ing a constant speed. To achieve the perfect cut,
it is important for the material thickness to com-
ply with the correct cutting speed. If the cutting
speed is too low, the cutting edge will be blunt
due to the severe heat input. The optimal cutting
inclined towards the rear while cutting. If the plas-
-
der to cool the burner. The same process is fol-
lowed when the workpiece is pulled out with a
pressed plasma burner button (14). During the
(13) as a result of overheating.
 Loading...