INCU-C Series V2018.1.1
22
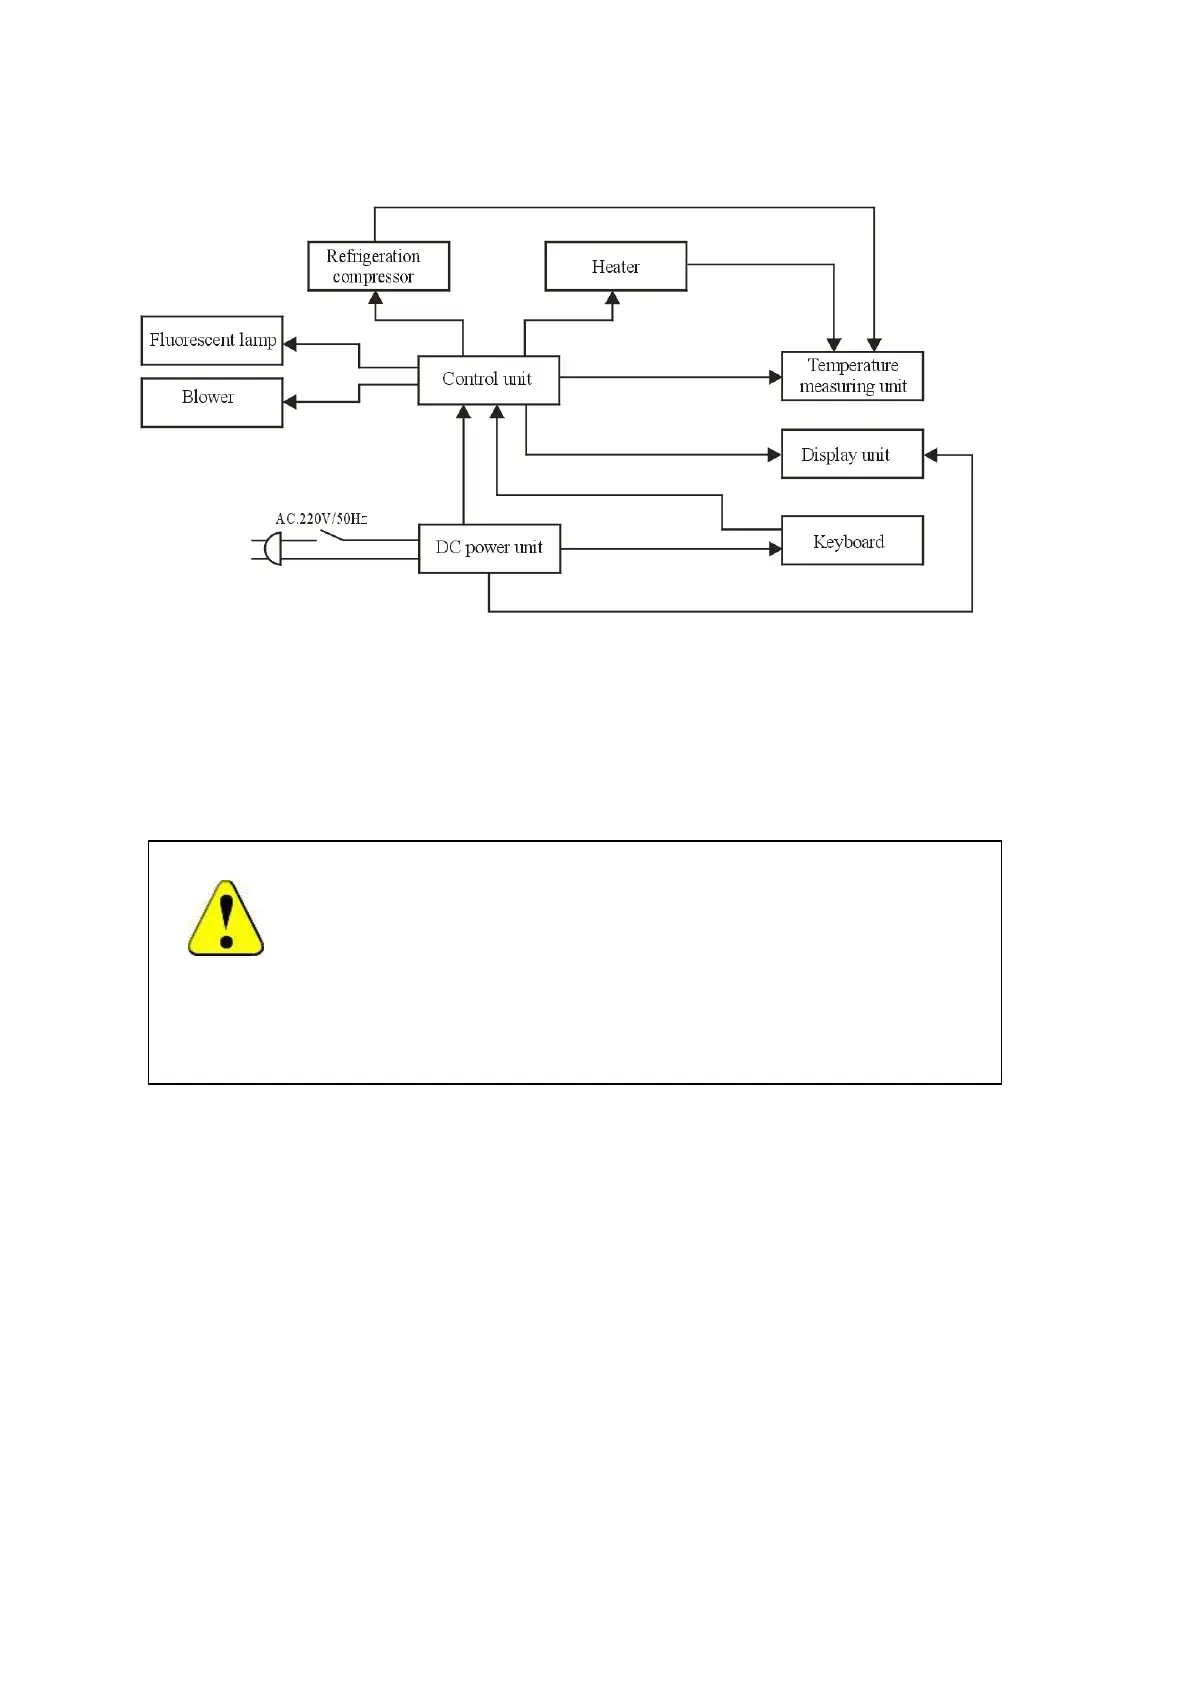
10.Electric Inputs & Outputs
11 . Temperature Calibration.
11.1 Take a certified calibrated thermometer in a small bottle with glycerin and place that
in the geometrical center of the incubator.
Low Temperature Point Correction (0.0)
11.2 Change the set point to the value that the unit is most frequently used for, or a lower
point, for example, 8.0°C and let the incubator run for at least 1 hour– until the
temperature is constant, and let the temperature inside of the chamber uniform.
11.3 Open the outer door and read the temperature on the thermometer through the inner
glass door; calculate the difference with actual displayed temperature. for example, if
reading is 6°C , difference would be 6-8= -2°C , while if reading is 9°C , the difference
would be 9-8=1°C
11.4 Press the SET button and go with the up arrow to code “47”.
11.5 Press the SET again, to enter the Step 1. "Low Temperature Point Correction (0.0)",
the display shows the "Temperature Correction" with "0.0" and the "Current Correc-
tion Value". Use the up and/or down key to make a further adjustment on the current
correction value by the temperature difference calculated above, for "-2°C ", de-
crease by 2, for "1°C ", increase by 1.
Attention:
1. The unit is delivered with calibration done in the factory, so please
perform the calibration only if necessary. It's recommended the unit is
calibrated once a year or two years.
2. If the unit is running at one set point in most time, perform one point
calibration as 11.2.
3. To get a linear temperature in the chamber, a 2 point calibration must be
executed.

 Loading...