R-3A53
R-3A53B
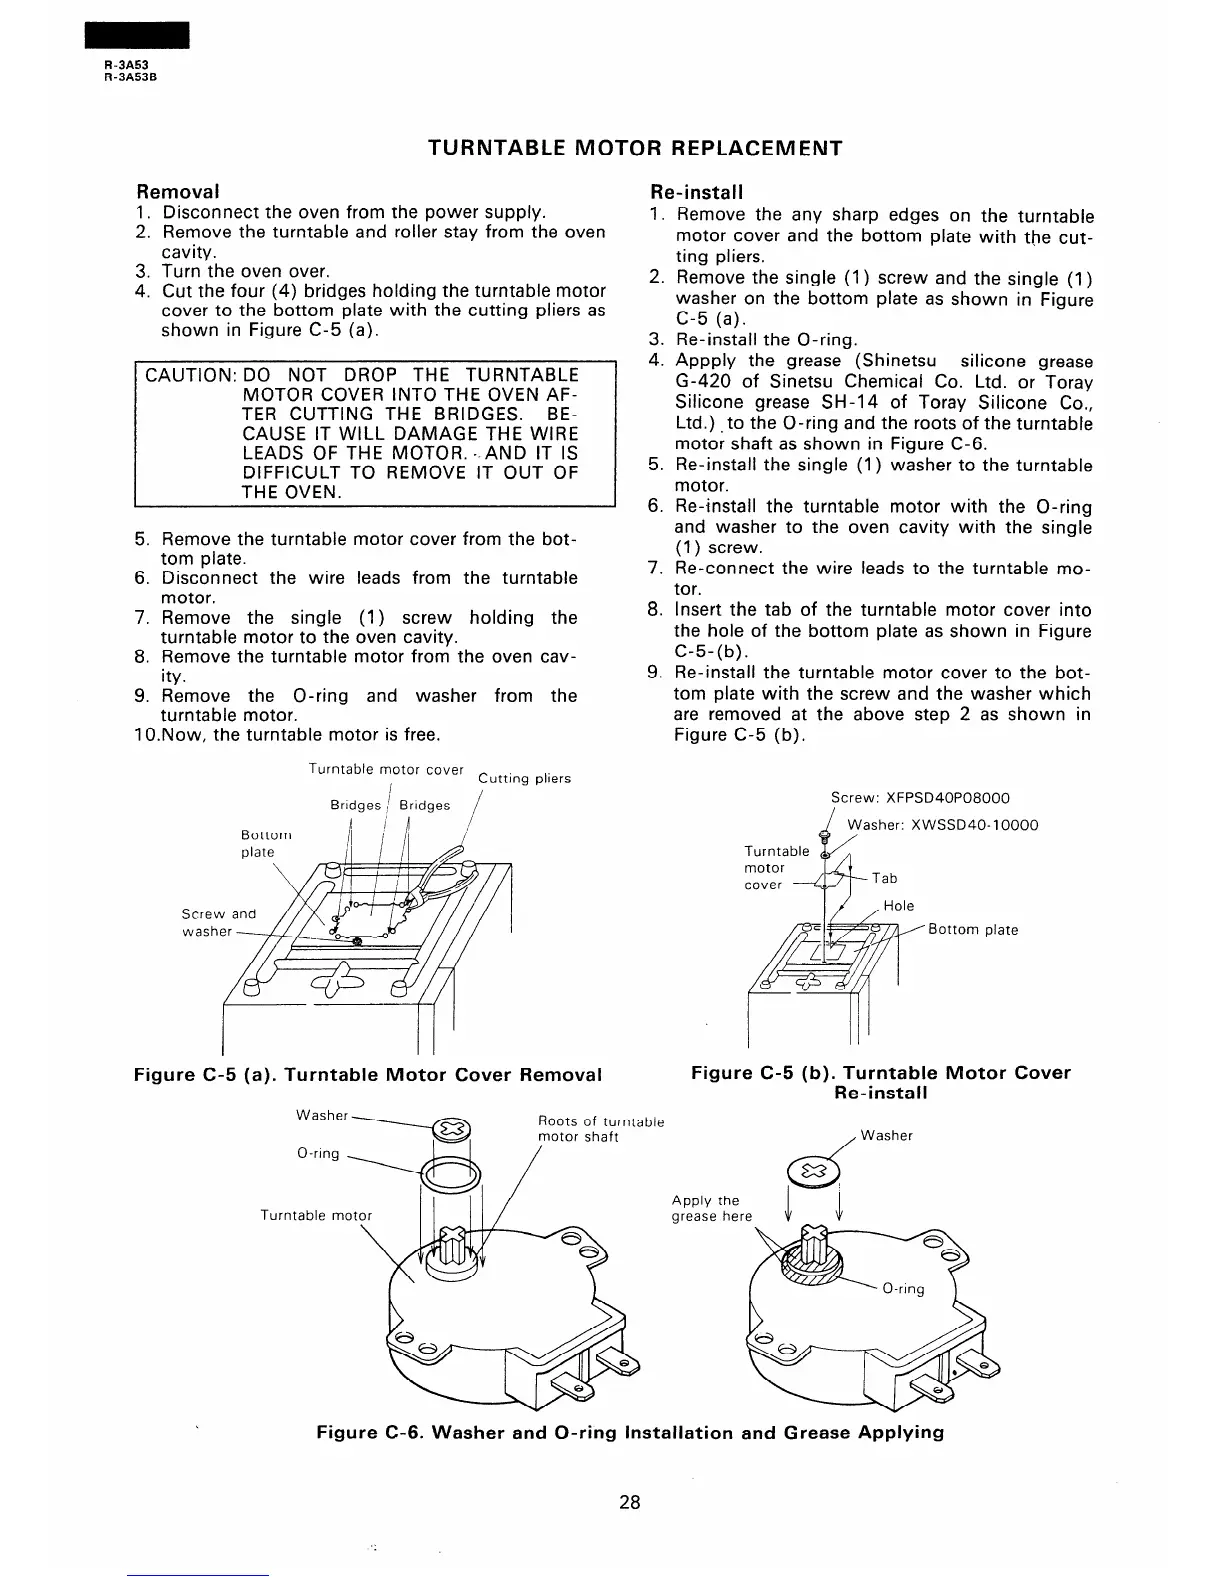
TURNTABLE MOTOR REPLACEMENT
Removal
Re-install
1. Disconnect the oven from the power supply.
2. Remove the turntable and roller stay from the oven
cavity.
1.
3. Turn the oven over.
4. Cut the four (4) bridges holding the turntable motor
cover to the bottom plate with the cutting pliers as
shown in Figure C-5 (a).
2.
3.
4.
CAUTION: DO NOT DROP THE TURNTABLE
MOTOR COVER INTO THE OVEN AF-
TER CUTTING THE BRIDGES. BE-
CAUSE IT WILL DAMAGE THE WIRE
LEADS OF THE MOTOR. --AND IT IS
DIFFICULT TO REMOVE IT OUT OF
THE OVEN.
5.
6.
Remove the any sharp edges on the turntable
motor cover and the bottom plate with the cut-
ting pliers.
Remove the single (1) screw and the single (1)
washer on the bottom plate as shown in Figure
C-5 (a).
Re-install the O-ring.
Appply the grease (Shinetsu silicone grease
G-420 of Sinetsu Chemical Co. Ltd. or Toray
Silicone grease SH-14 of Toray Silicone Co.,
Ltd.). to the O-ring and the roots of the turntable
motor shaft as shown in Figure C-6.
Re-install the single (1) washer to the turntable
motor.
Re-install the turntable motor with the O-ring
and washer to the oven cavity with the single
(1) screw.
Re-connect the wire leads to the turntable mo-
tor.
5.
6.
7.
8.
9.
Remove the turntable
tom plate.
Disconnect the wire
motor.
Remove the single
.
motor cover from the bot-
leads from the turntable
(1) screw holding the
turntable motor to the oven cavity.
Remove the turntable motor from the oven cav-
ity.
Remove the O-ring and washer from the
turntable motor.
lO.Now, the turntable motor is free.
Turntable motor cover
/
Cuttrng
Bridges / Bridges
/
Bottom
pliers
Figure C-5 (a). Turntable Motor Cover Removal
Turn
7.
8.
9.
Roots of turntable
motor shaft
table motor
Insert the tab of the turntable motor cover into
the hole of the bottom plate as shown in Figure
C-5-(b).
Re-install the turntable motor cover to the bot-
tom plate with the screw and the washer which
are removed at the above step 2 as shown in
Figure C-5 (b).
Screw: XFPSD40P08000
asher: XWSSD40-10000
Bottom plate
Figure C-5 (b). Turntable Motor Cover
Re-install
/
Washer
Apply the
grease here
Figure C-6. Washer and O-ring Installation and Grease Applying
28
 Loading...