Chapter 2
Installing the Device
RUGGEDCOM RUGGEDCOM RSG2488
Installation Guide
16 Connecting Low DC Power
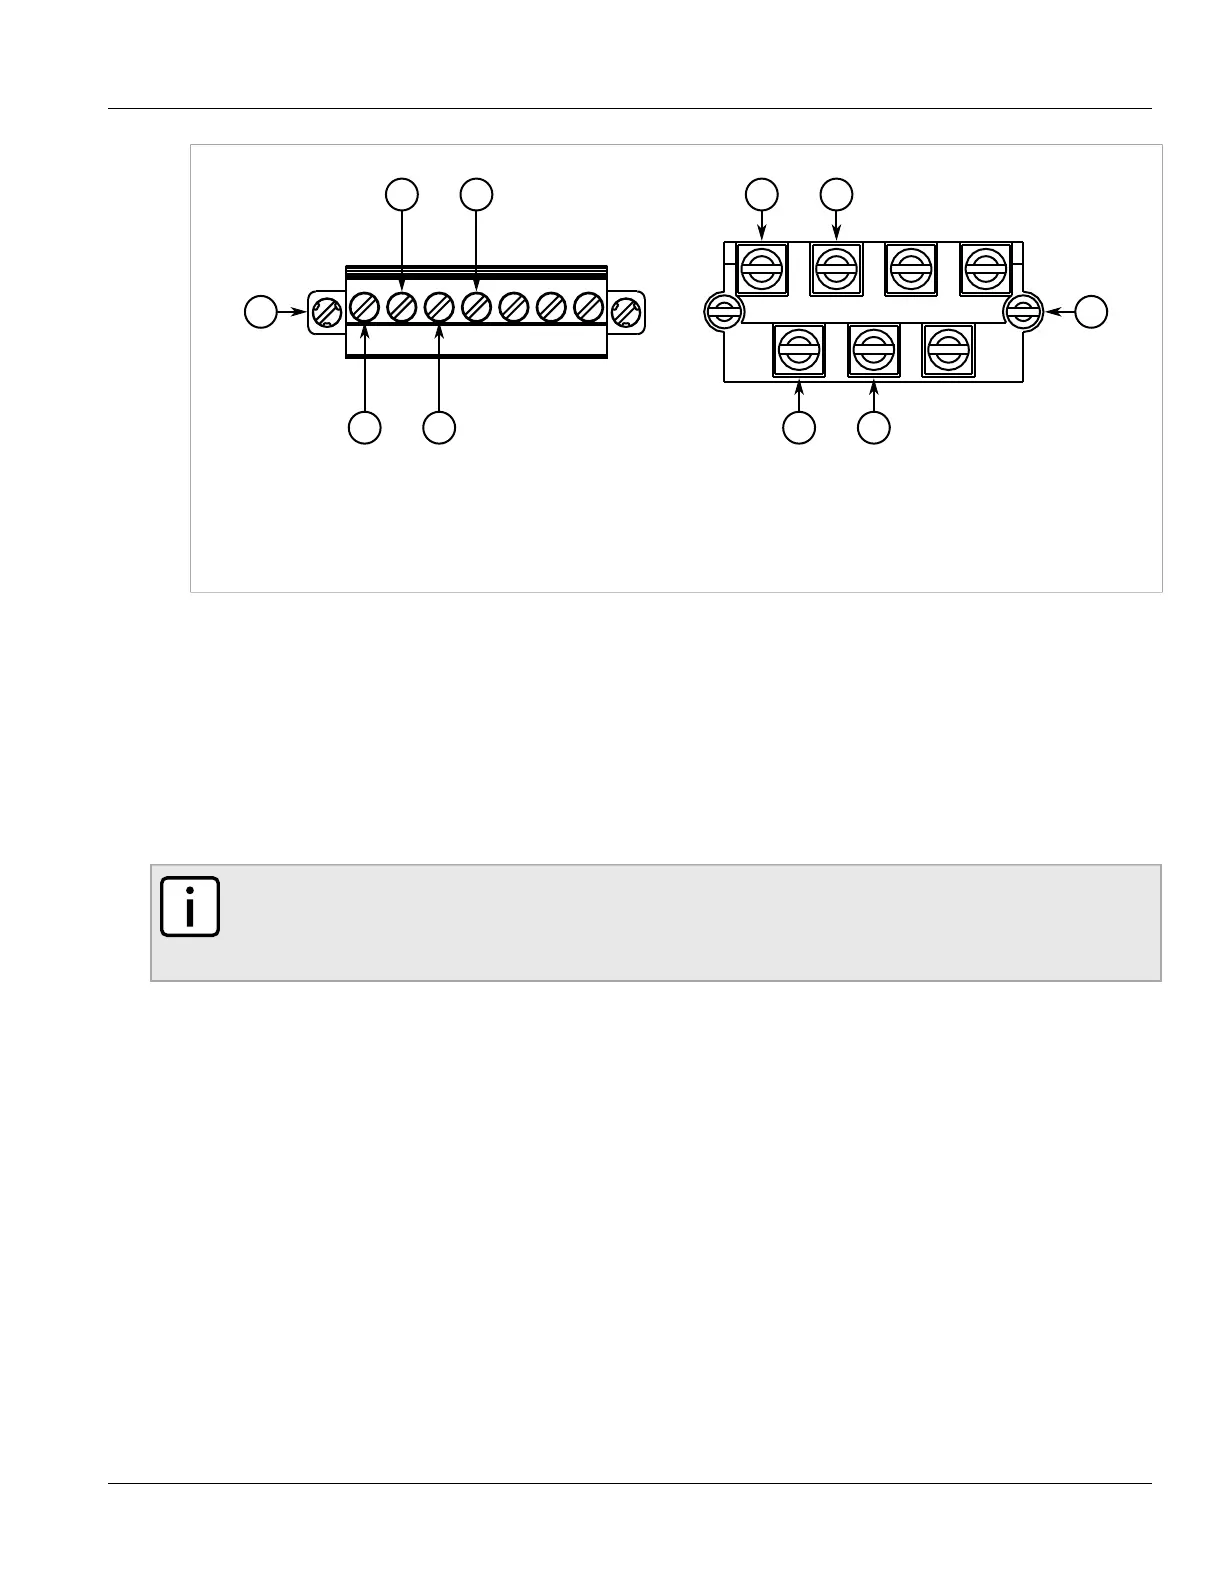
Figure 10: AC Terminal Block Wiring
1. Pluggable Terminal Block for HI Power Supplies 2. Screw-Type Terminal Block for HIP Power Supplies 3. Positive/Live (+/L)
Terminal for PS1 4. Neutral/Negative (-/N) Terminal for PS1 5. Positive/Live (+/L) Terminal for PS2 6. Neutral/Negative (-/N)
Terminal for PS2
2. Connect the negative wire from the power source to the neutral/negative (-/N) terminal on the terminal block.
3. Connect the ground terminal on the power source to the ground terminal on the device. For more
information, refer to Section 2.5, “Grounding the Device”.
Section 2.3.3
Connecting Low DC Power
To connect a low DC power supply to the device, do the following:
NOTE
The screw-type terminal block is installed using Phillips screws and compression plates, allowing either
bare wire connections or crimped terminal lugs. Use #6 size ring lugs for secure, reliable screws, which
must be removed to make connections.
1. Connect the positive wire from the power source to the positive terminal on the terminal block.
 Loading...