EasyManua.ls Logo

Silvercrest SMW 900 EDS B2 User Manual

Silvercrest SMW 900 EDS B2
108 pages
To Next Page IconTo Next Page
To Previous Page IconTo Previous Page
Page #93 background imageLoading...
Page #93 background image
- 90 -
Drücken Sie die Taste Grill 7 . Im Display
erscheint “Gr 1”.
Drehen Sie den Drehregler r , bis
“Gr 3” und die Symbole und im
Display erscheinen und bestätigen Sie die
Auswahl durch Drücken auf die Taste
Start/Schnellstart r .
Stellen Sie mit dem Drehregler r eine
Garzeit von 10 Minuten ein.
Drücken Sie die Taste Start/Schnellstart r
, um den Grillvorgang zu starten.
Hinweis
Bei der ersten Inbetriebnahme kann es durch ferti-
gungsbedingte Rückstände zu leichter Rauch- und
Geruchsentwicklung kommen. Dieses ist unschädlich.
Sorgen Sie für eine ausreichende Belüftung. Öffnen
Sie zum Beispiel ein Fenster.
Nach 10 Minuten schaltet sich das Gerät auto-
matisch aus. Warten Sie, bis es vollständig ab-
gekühlt ist.
Ziehen Sie den Netzstecker aus der Steckdose
und reinigen Sie das Gerät anschließend innen
mit einem feuchten Tuch und trocknen Sie es
sorgfältig ab.
Drehteller 3 einsetzen
Setzen Sie den Drehteller 3 mittig auf die Ach-
se im Garraum. Achten Sie darauf, dass er
komplett auf die Achse rutscht und fest sitzt.
Bedienen
Uhr einstellen
Nachdem Sie den Stecker in die Steckdose gesteckt
haben, öffnen Sie die Tür der Mikrowelle einmal.
Das Display 1 zeigt "1:00" an. Schließen Sie die
Tür wieder.
1. Drücken Sie die Taste Uhr q . Im
Display 1 erscheint „Hr 12“.
2. Wählen Sie durch Drehen am Drehregler r
den gewünschten Modus (Hr 24 oder Hr
12) und bestätigen Sie Ihre Auswahl durch
Drücken auf die Taste Start/Schnellstart r .
Hinweis
Erst beim anschließendem Drehen des Drehreglers
r, erscheint die Anzeige der Uhrzeit und man
kann die Stunde einstellen.
3. Stellen Sie durch Drehen am Drehregler r
die gewünschte Stunde ein und bestätigen Sie
Ihre Auswahl durch Drücken auf die Taste
Start/Schnellstart r .
4. Stellen Sie durch Drehen am Drehregler r
die gewünschten Minuten ein und bestätigen Sie
Ihre Auswahl durch Drücken auf die Taste
Start/Schnellstart r .
Die Uhrzeit ist nun eingestellt.
Um die aktuelle Tageszeit abzulesen, während die
Mikrowelle in Betrieb ist, drücken Sie die Taste Uhr
q ; die Uhrzeit wird dann einige Sekunden im
Display 1 angezeigt.
Standby-Modus
Die Mikrowelle schaltet automatisch in den Stand-
by-Modus und die Uhrzeit wird angezeigt, wenn für
längere Zeit keine Taste gedrückt wird. Wenige Se-
kunden nach der Umstellung in den Standby-Modus
wird auch die Displaybeleuchtung gedimmt.
Küchentimer einstellen
Die Mikrowelle verfügt über einen Küchentimer, den
Sie unabhängig vom Mikrowellenbetrieb einsetzen
können.
1. Drücken Sie die Taste TIMER w, wenn das
Gerät im Standby-Betrieb ist. Im Display 1 er-
scheint „0:00“ und das Symbol .
2. Stellen Sie nun mit dem Drehregler r die
gewünschte Zeit ein.
Sie können Zeiteinstellungen von 10 Sekunden
bis 95 Minuten vornehmen.
IB_96324_SMW900EDSB2_BE.qxp 22.04.2014 12:12 Uhr Seite 90
DIN A5 148 mm x 210 mm

Table of Contents

Other manuals for Silvercrest SMW 900 EDS B2

Question and Answer IconNeed help?

Do you have a question about the Silvercrest SMW 900 EDS B2 and is the answer not in the manual?

Silvercrest SMW 900 EDS B2 Specifications

General IconGeneral
BrandSilvercrest
ModelSMW 900 EDS B2
CategoryMicrowave Oven
LanguageEnglish

Summary

Introduction

Intended Usage

Scope of delivery

Appliance Description

Appliance Components Overview

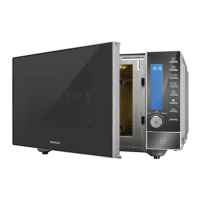
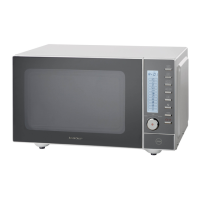
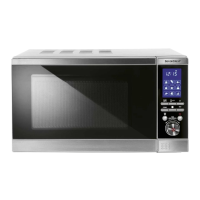
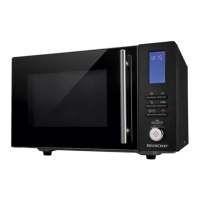
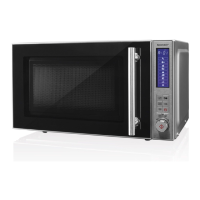
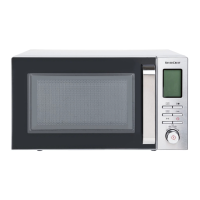
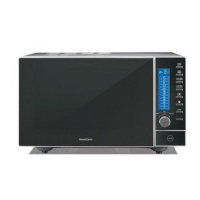
Details the numbered components of the microwave oven's exterior, including display and buttons.

Control Panel Button Identification

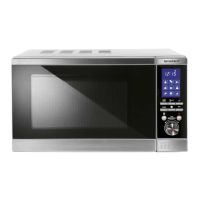
Lists and explains the function of each button on the microwave's control panel.

Included Accessories

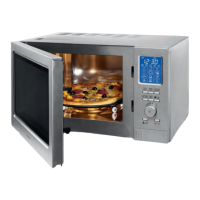
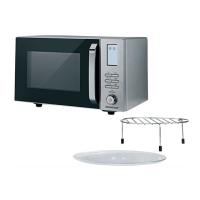
Identifies included accessories such as the turntable and grill stands.

Technical Details

Important Safety Instructions

Microwave Radiation and General Safety

Precautions against microwave radiation exposure and general safety guidelines for appliance use.

Fire and Burn Hazard Prevention

Specific warnings about fire risks and potential burns from hot surfaces or materials.

Appliance Damage & Electrical Safety

Instructions to prevent appliance damage and warnings concerning electrical hazards and fluid immersion.

Before You Begin

Microwave Cookery Principles

Tips for arranging food, managing cooking times, and using lids for optimal microwave cooking.

Guidance on Suitable Cookware

Explains ideal materials and recommends container shapes for microwave cooking to prevent overcooking.

Cookware Compatibility Table

A table detailing the compatibility of various cookware types with microwave, grill, and convection functions.

Commissioning

Appliance Installation Guidelines

Instructions for selecting a suitable location, ensuring proper ventilation, and minimum clearances.

Appliance Preparation for First Use

Steps to prepare the microwave before initial operation, including removing protective films.

Electrical Connection and Safety

Details on power socket requirements, circuit recommendations, and initial heating for residue removal.

Operation

Setting the Clock

Step-by-step guide to setting the 12 or 24-hour clock display accurately.

Standby Mode Functionality

Description of how the microwave automatically enters standby mode and its display behavior.

Kitchen Timer Operation

How to use the independent kitchen timer function for setting countdowns and alerts.

Child Lock Feature

Instructions on how to activate and deactivate the child safety lock to prevent accidental use.

Querying Operational Status

Methods to check the current time or the selected power level during operation cycles.

Interrupting and Cancelling Processes

Procedures to pause, resume, or completely stop active cooking or defrosting cycles.

Heating and Cooking

Microwave Operation

Basic instructions for using the microwave function, including selecting power levels and times.

Grill Function Operation

How to use the grill feature with different modes: top heat, bottom heat, and top/bottom heat.

Combination Grill Cooking

Instructions for using combined grill and microwave functions for optimized food preparation.

Convection Operation

How to use the convection feature for baking and roasting, including temperature and time settings.

Convection with Preheating

Guide to preheating the oven using the convection function before starting a cooking process.

Combination Convection Cooking

Instructions for combining convection and microwave functions for enhanced cooking results.

Auto Menu Functions

Starting the Auto Menu

How to select food type and weight for automated cooking programs.

Auto Menu Programs Overview

List of automatic cooking programs with symbols, food types, and weight/volume ranges.

Re-cooking Auto Menu Items

Guidance on re-cooking meals if they are not fully cooked after the initial automatic program.

Pizza Auto Program

Specific instructions for using the automatic programs dedicated to cooking pizzas.

Defrosting

Defrosting by Weight

How to defrost food by selecting the food type and its specific weight for automatic calculation.

Defrosting by Time

How to manually set the desired time for defrosting various food items.

Recipes

Meat Patty Recipe

Ingredients and preparation steps for making meat patties using combined cooking functions.

Frozen Bread Roll Baking

Instructions for baking frozen bread rolls using the convection function.

Potato Gratin Recipe

Ingredients and preparation steps for making potato gratin using combined cooking functions.

Muffin Recipe

Ingredients and preparation steps for baking muffins using the convection function.

Cleaning and Care

Interior Cleaning and Maintenance

How to keep the inside of the microwave clean, including tips for spills and residues.

Exterior Cleaning Guidelines

Instructions for cleaning the appliance's outer surfaces, door, and viewing window.

Odour Elimination

Method for removing persistent odours from the microwave cavity using steam and lemon.

Turntable and Grill Stand Cleaning

How to clean the removable turntable and the grill stand separately.

Troubleshooting

Display Issues and No Power

Steps to resolve issues where the display shows nothing or the appliance has no power.

Unresponsive Appliance

Solutions for when the control buttons or the entire appliance do not respond.

Cooking Process Not Starting

Troubleshooting steps for when the cooking or warming process fails to initiate.

Turntable Noise Issues

How to address loud noises originating from the turntable during operation.

Error Code Resolution

Explanation of common error codes (E01, E02, E03) and their corresponding solutions.

Disposal

Warranty and Service

Warranty Period and Claims

Information on the 3-year warranty, required proof of purchase, and claim procedures.

Service Contact Information

Contact details for customer service departments in Great Britain and Ireland for assistance.

Importer Information

Related product manuals