HCD-X1
16
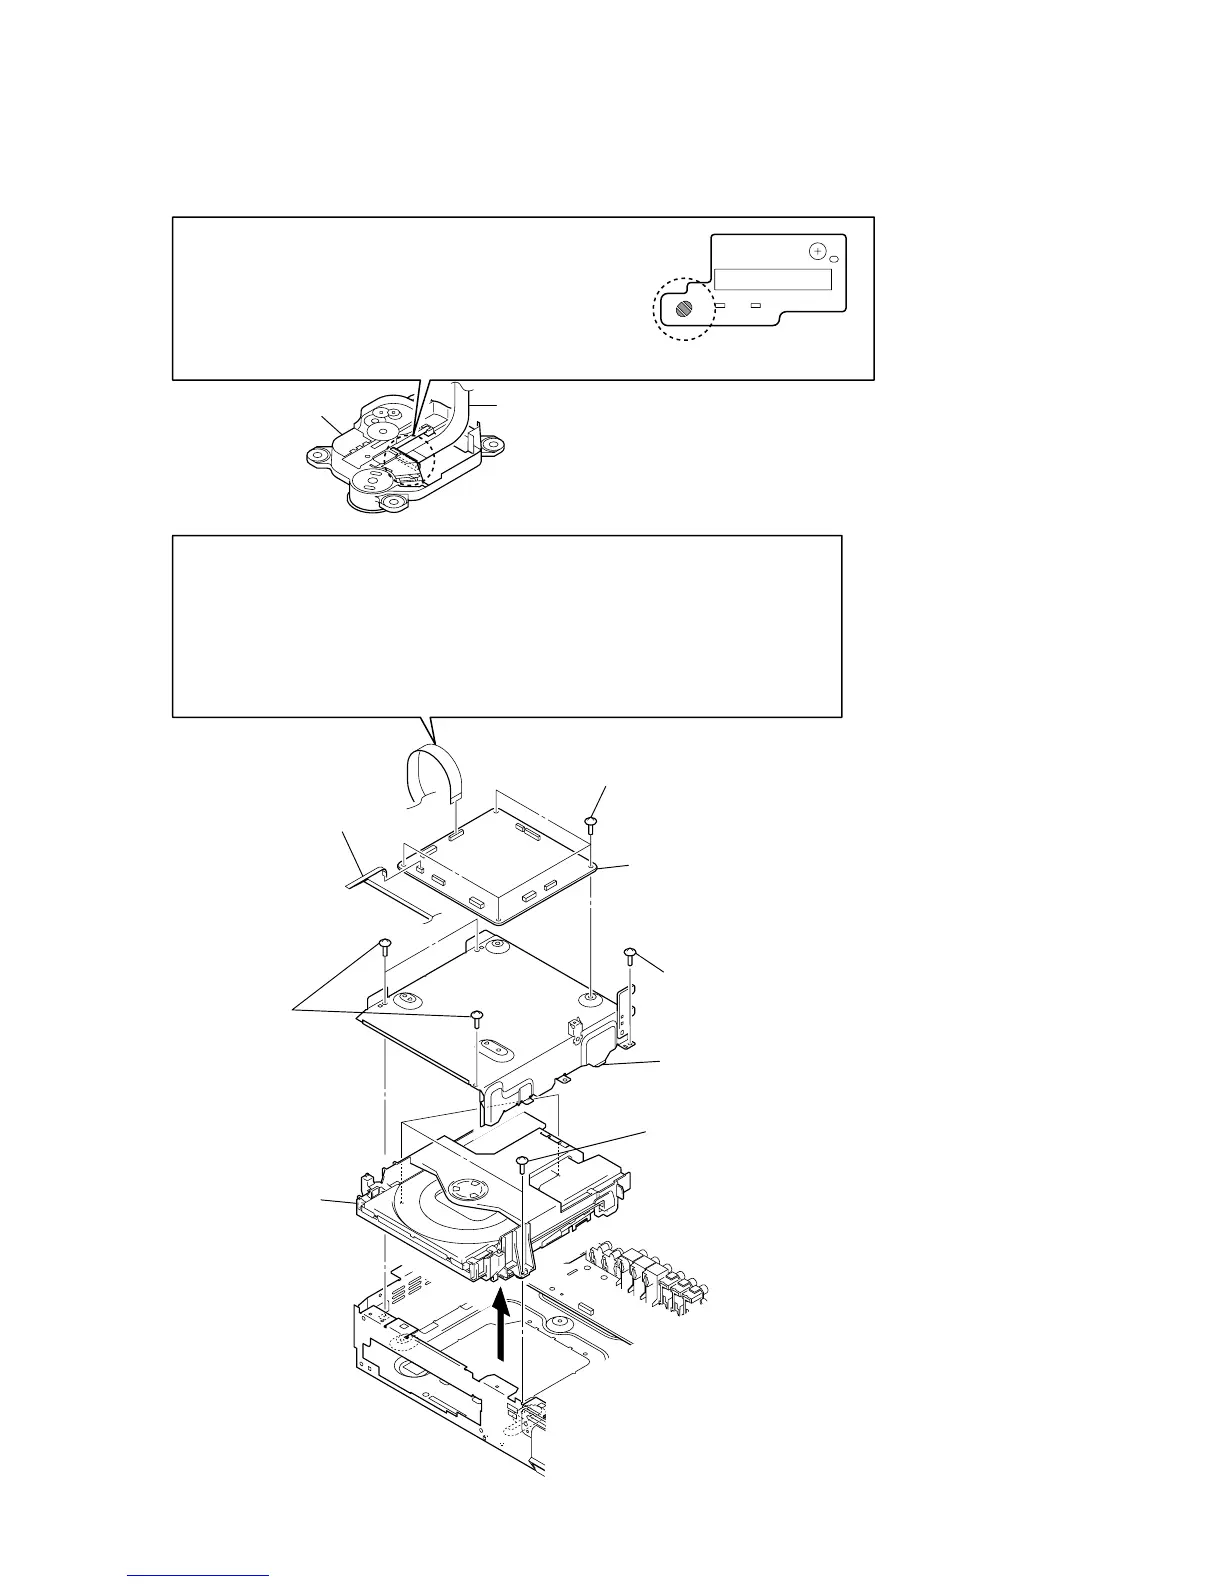
3-8. DVD MECHANISM DECK (CDM85-DVBU102)
3
four screws
(BVTP 3
×
8)
5
screw
(BV 3)
8
three screws
(BV 3)
9
DVD mechanism deck
(CDM85-DVBU102)
6
three screws
(BVTP 3
×
8)
4
DMB10 board
7
sub chassis
2
wire (flat type) (5 core)
(CN202)
wire (flat type) (24 core)
optical pick-up block
1
Perform work with this wire (flat type) (24 core) connected,
or make a bridge as mentioned above and then disconnect the wire (flat type) (24 core).
(optical pick-up will be destroyed without bridging.)
On the contrary at the installation, connect the wire (flat type) (24 core) first,
and then remove the bridge.
Note: For a soldering iron, use the one with a ground wire.
Note: Refer to SERVICING NOTES
“ NOTE OF REPLACING THE DMB10 BOARD
(page 6), when replacing the DMB10 board.
PRECAUTION WHEN REPLACING DVD MECHANISM DECK
(CDM85-DVBU102)
Be sure to bridge here, and then disconnect the
wire (flat type) (24 core).
(optical pick-up block will be destroyed without bridging.)
On the contrary at the installation, connect the
wire (flat type) (24 core) first, and then remove the bridge.
Note: For a soldering iron, use the one with a ground wire.
(Refer to DISASSEMBLY 3-2. OPTICAL PICK-UP BLOCK (KHM-310CAA))
PRECAUTION WHEN REMOVING GOOD OPTICAL PICK-UP BLOCK
 Loading...