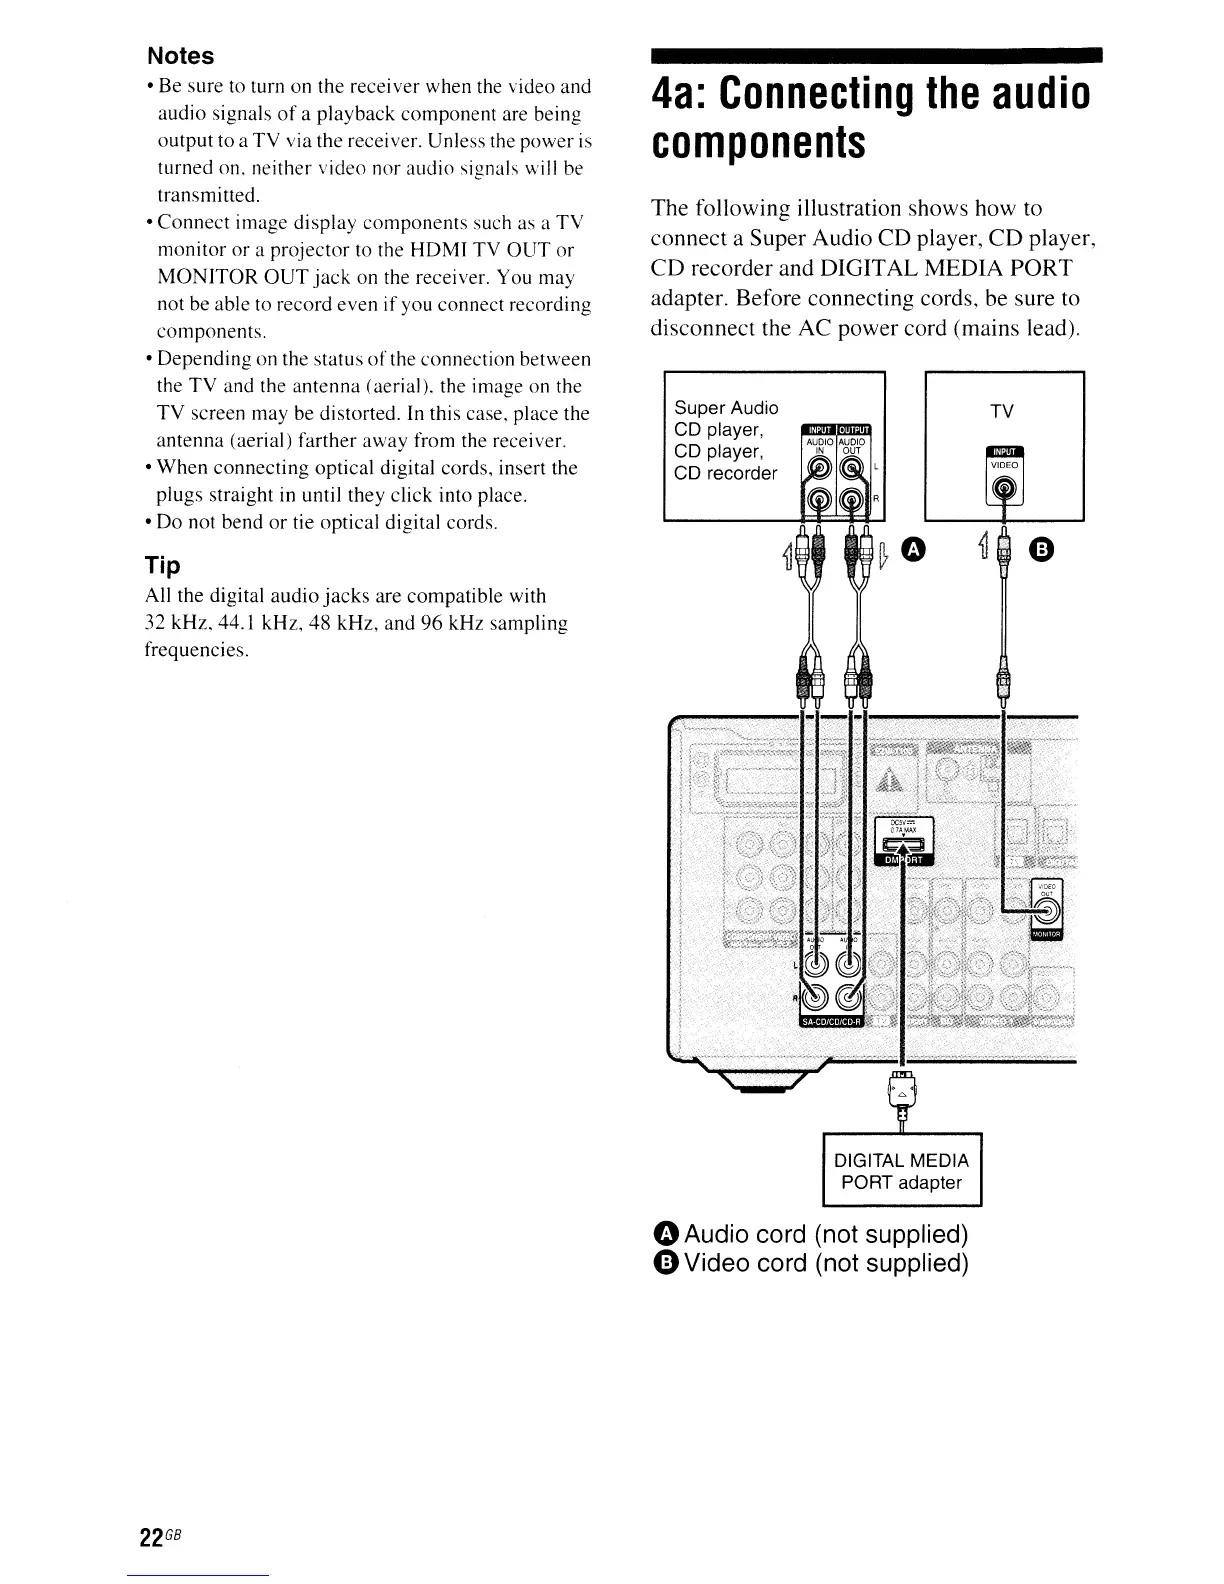
4a:
Connecting
the
audio
components
The following illustration shows how to
connect a Super Audio CD player,
CD
player,
CD
recorder and DIGITAL MEDIA
PORT
adapter. Before connecting cords, be sure to
disconnect the AC power cord (mains lead).
Notes
•
Be
sure to turn on the receiver when the video and
audio signals
of
a playback
component
are being
output
to a
TV
via the receiver. Unless the
power
is
turned on. neither video nor audio signals will be
transmitted.
•
Connect
image display
components
such as a
TV
monitor
or
a projector to the
HOM!
TV
OUT
or
MONITOR
OUT
jack
on the receiver. You may
not be able to record
even
if
you connect recording
components.
• Depending on the status
of
the connection between
the
TV
and the antenna (aerial). the image on the
TV
screen may be distorted. In this case, place the
antenna (aerial) farther away from the receiver.
•
When
connecting optical digital cords, insert the
plugs straight in until they click into place.
•
Do
not bend
or
tie optical digital cords.
Tip
All the digital
audio
jacks
are compatible with
32 kHz, 44.1 kHz.
48
kHz, and
96
kHz sampling
frequencies.
22
GB
Super
Audio
CD
player,
CD
player,
CD
recorder
DIGITAL
MEDIA
PORT
adapter
oAudio cord (not supplied)
CD
Video cord (not supplied)
TV