22 Series 4180 Powerhead
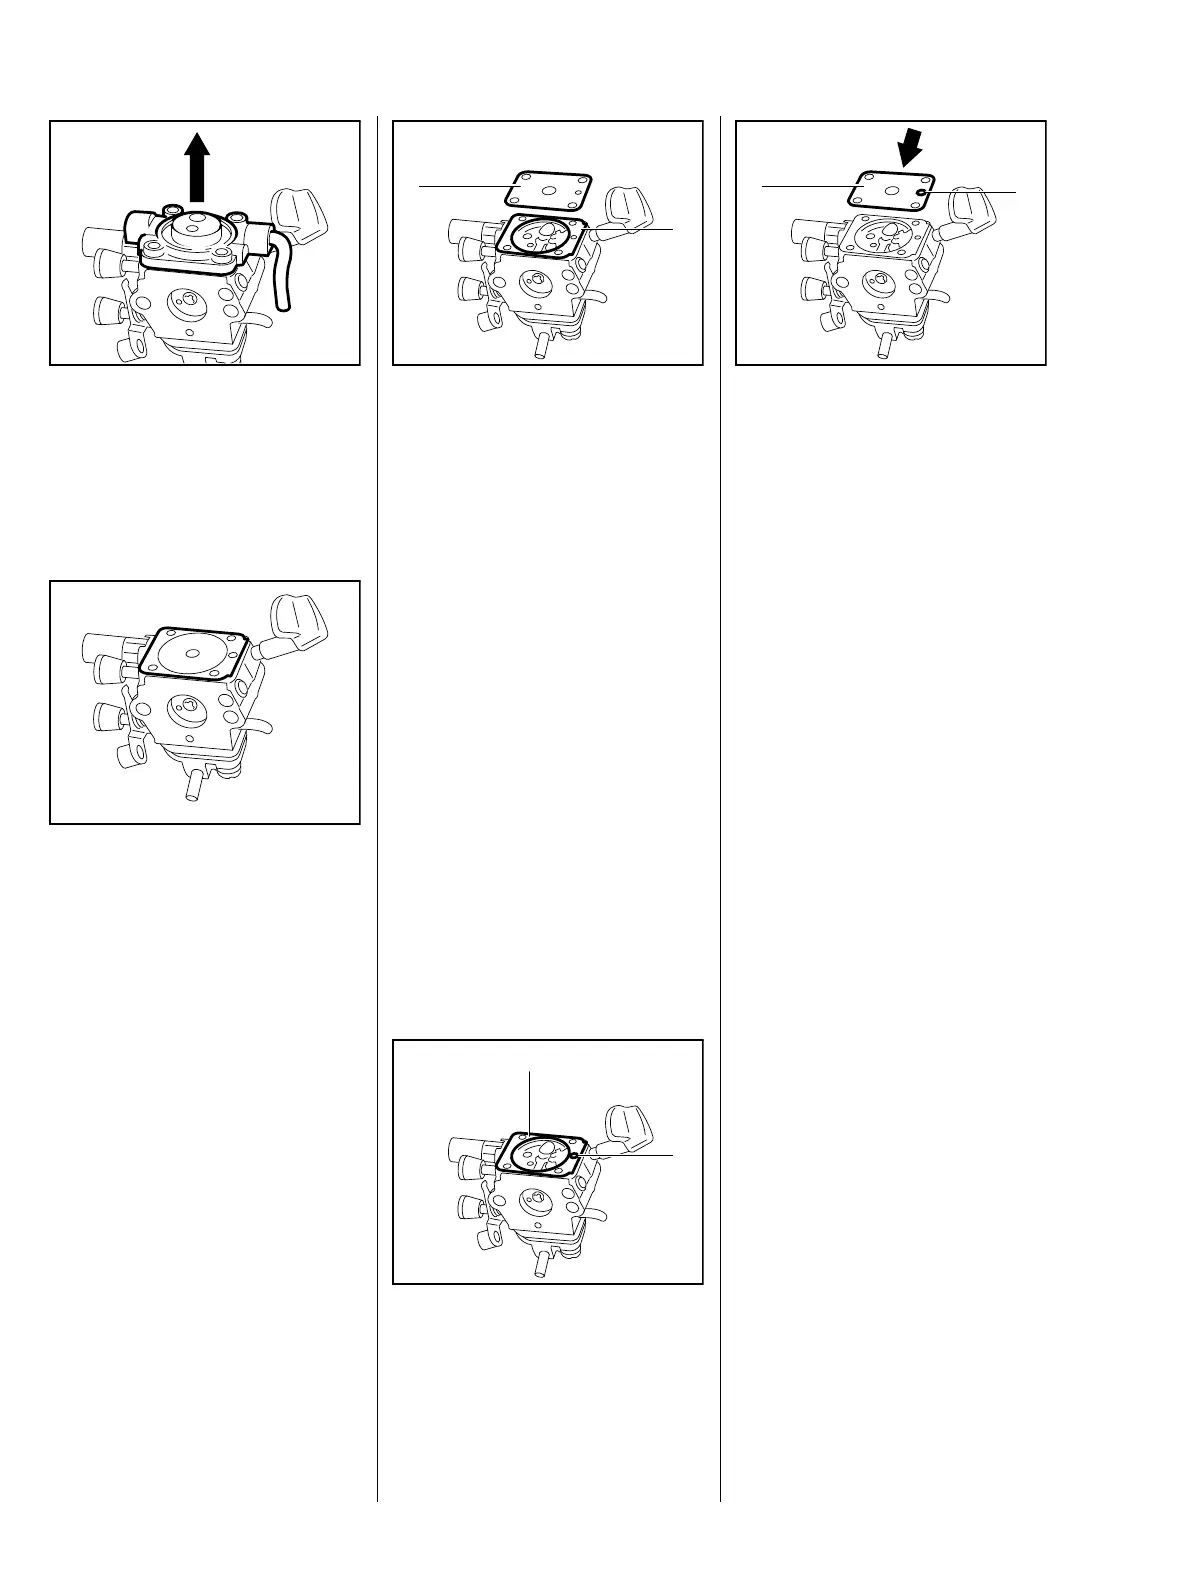
: Remove the flange.
: Examine the metering diaphragm
and sealing ring. Replace if
necessary, b 6.2.4
Reassemble in the reverse
sequence.
– Remove the flange, b 6.2.3
: Remove metering diaphragm (1)
and gasket (2) from the
carburetor body.
If the gasket and diaphragm are
stuck together, separate them
carefully.
: Check the diaphragm and gasket
and replace if necessary.
The diaphragm is the most delicate
part of the carburetor. The
diaphragm material is subjected to
continuous alternating stresses and
eventually shows signs of fatigue,
i.e. the diaphragm distorts and
swells and has to be replaced.
Reassemble in the reverse
sequence.
: Place the gasket (1) on the
carburetor body.
The cutout in the gasket (2) must
line up with the compensating bore
in the carburetor.
: Place the metering diaphragm (1)
on the gasket.
The cutout in the metering
diaphragm (2) must line up with the
compensating bore in the
carburetor and the gasket.
Assemble all other parts, b 6.2.3.
6.2.4 Metering Diaphragm
 Loading...