6. Subtract the front dimension from the rear
dimension to calculate the blade pitc h.
7. Adjust the jam n uts securing the rear dec k
y ok es/c hains to raise the rear of the dec k so
that the blade pitc h is set to 5/16 inc h (8 mm)
( Figure 77 ).
Figure 77
1. Chain
3. Jam nut
2. Yoke 4. Mower deck
Replacing the Grass
Deector
An unco v er ed discharge opening could
allo w the la wn mo w er to thr o w objects in
the operator’ s or bystander’ s dir ection and
r esult in serious injur y . Also, contact with
the blade could occur .
• Nev er operate the la wn mo w er without a
mulch kit or g rass deflector installed.
• Mak e sur e the g rass deflector is in the
do wn position.
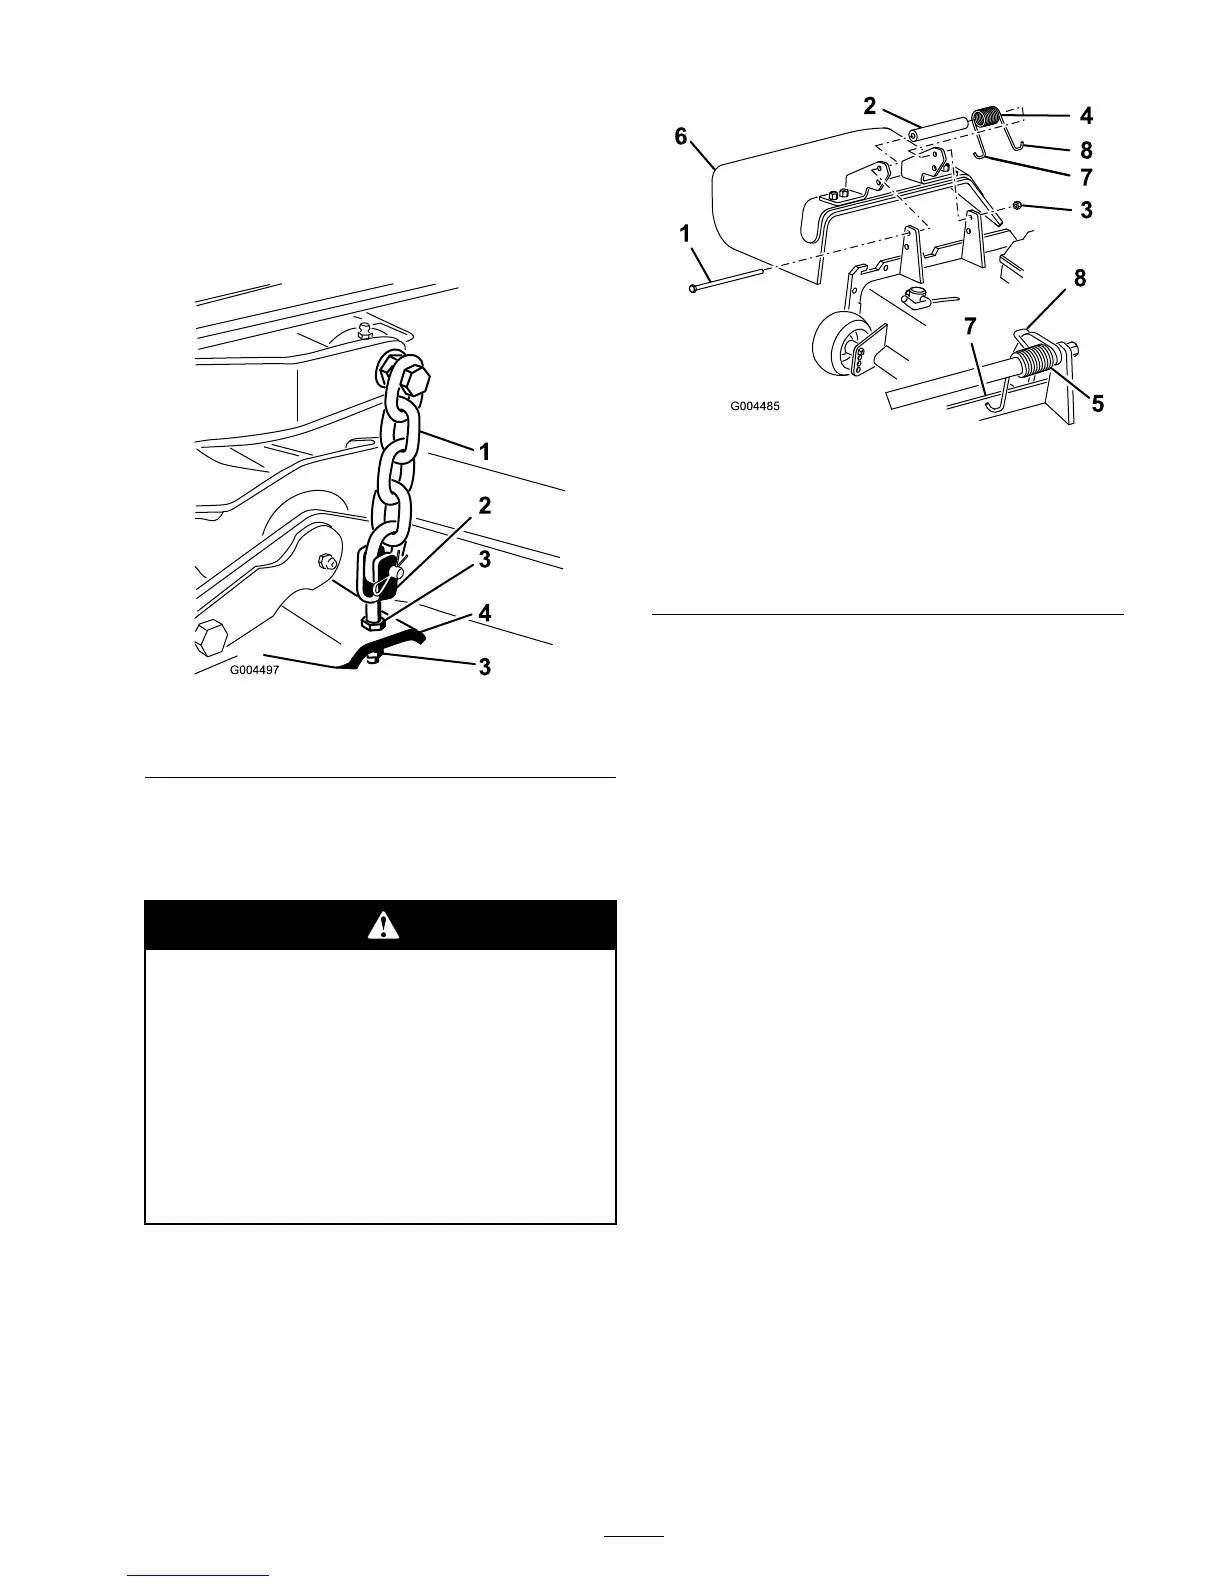
1. Lo w er the cutting unit to the shop floor , mo v e
the throttle lev er to the Slo w position, stop the
engine , set the parking brak e , and remo v e the
ignition k ey .
2. R emo v e the loc kn ut, bolt, spring and spacer
holding the deflector to the pi v ot brac k ets
( Figure 78 ). R emo v e damag ed or w or n g rass
deflector .
Figure 78
1. Bolt 5. Spring installed
2. Spacer
6. Grass Deector
3. Locknut 7. Left hand hook end of
spring, place behind deck
edge before installing bolt
4. Spring
8. Right hand hook end of
spring
3. Place the spacer and spring betw een
the re placement g rass deflector brac k ets
( Figure 78 ). Place the left hand J hook end of
the spring behind the dec k edg e .
Note: Mak e sure the left hand J hook end
of the spring is installed behind the dec k edg e
before installing the bolt as sho wn in Figure 78 .
4. Install the bolt and n ut. Place the right hand
J hook end of the spring around the g rass
deflector ( Figure 78 ).
Important: T he g rass deflector must be
a ble to lo w er do wn into position. Lift the
deflector up to test that it lo w er s into the
full do wn position.
Cleaning
Cleaning Under the Mower
R emo v e the g rass buildup under the mo w er daily .
1. Diseng ag e the PTO , mo v e the motion control
lev ers to the neutral loc k ed position and set
the parking brak e .
2. Mo v e the throttle lev er to the Slo w position,
stop the engine , remo v e the k ey , and w ait for
all mo ving par ts to stop before lea ving the
operating position.
67

 Loading...