A.Loosenthelowernutontheeyeboltandthread
ittotheendofthebolt(Figure56).
Figure56
1.Eyebolt2.Lowernut
B.Insertasocketwrenchintothesquareholein
theidlerarmandrotatethewrenchupward
(Figure55).
Important:Donotrotatethewrenchupward
toofarbecausedamagetotheidlerarm
extensionspringmayoccur.Ifthespring
stretchestomorethan3.75inches,replace
thespring.Measurethespringfrominside
looptoinsideloopasshowninFigure57.
Figure57
1.3.75inches
4.Toincreasethespringtensionthusincreasingthe
belttension,shortentheeyeboltheightbyloosening
thetopeyeboltnutandtighteningthelowernut
(Figure55&Figure58).
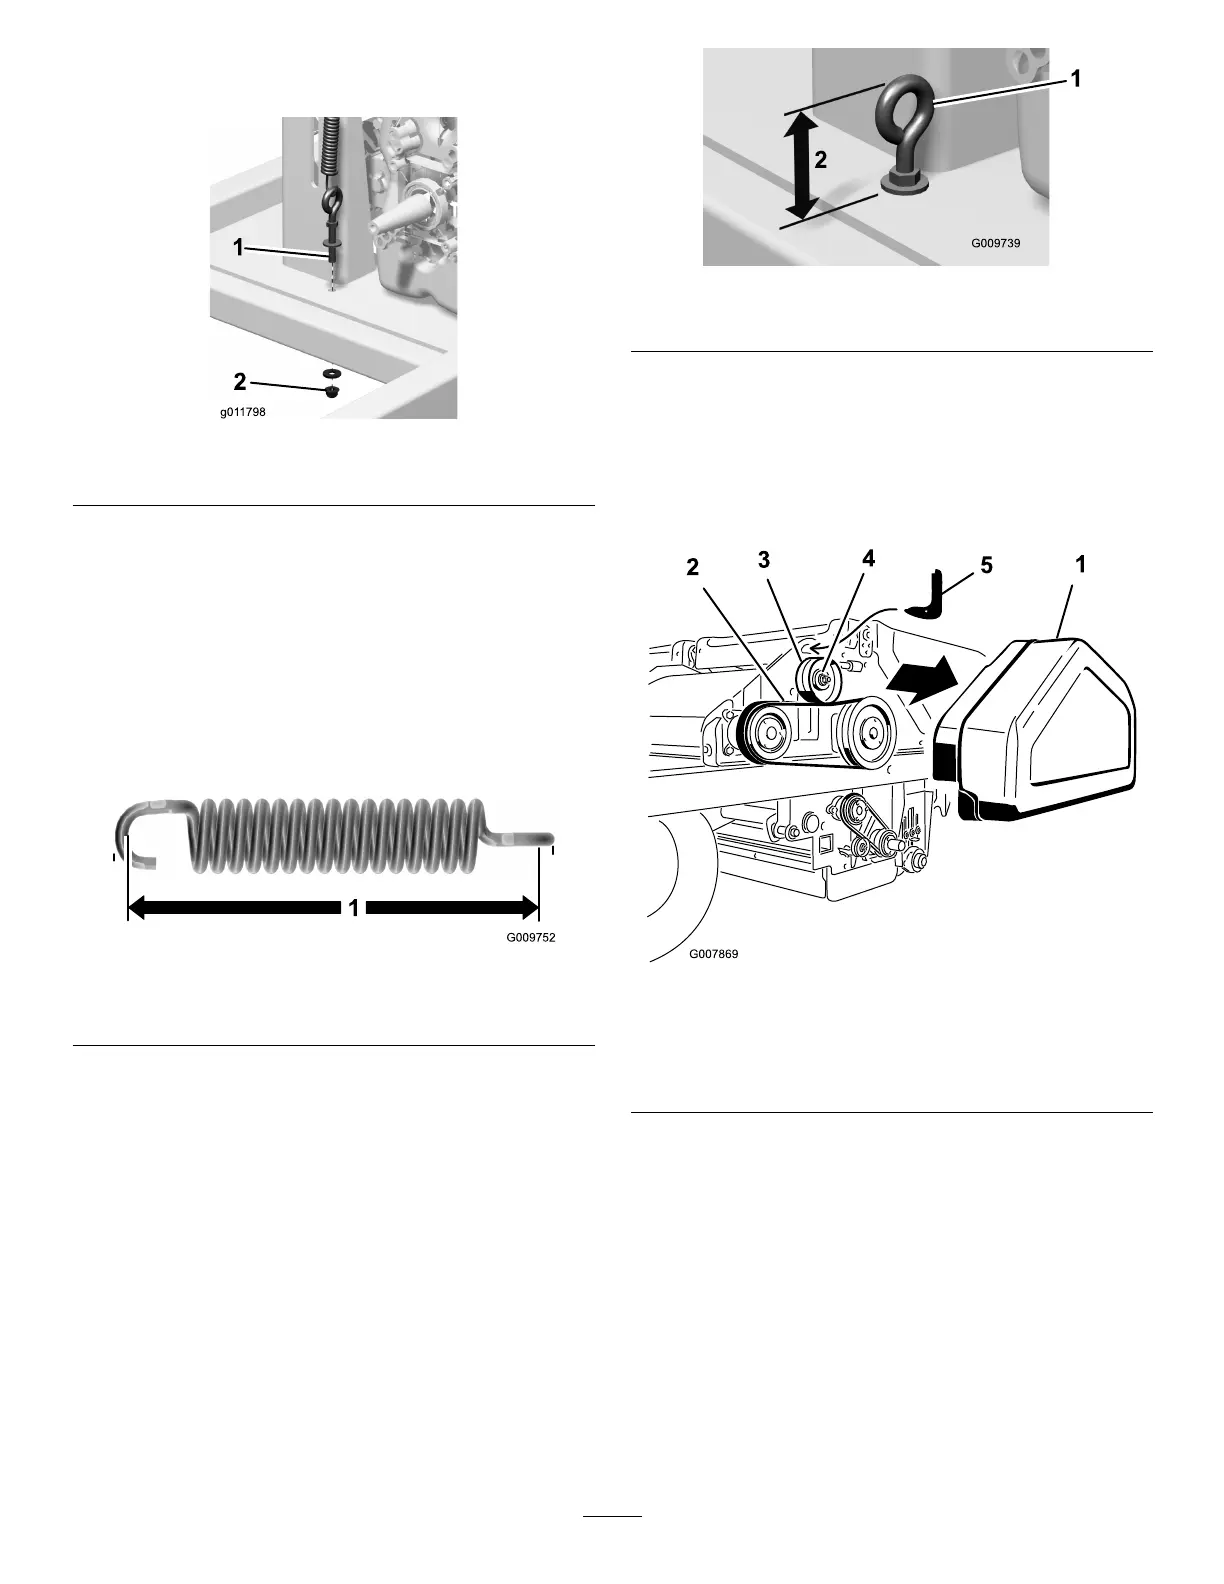
Figure58
1.Eyebolt2.Eyeboltheight
5.Installthebeltcover.
JackshafttoChopperBelt
Tocheckthebelttensionproceedasfollows:
1.Removethebeltcover(Figure59).
Figure59
1.Jackshafttochopperbelt
cover
4.Nut
2.Jackshafttochopperbelt
5.Belttensioningtool
3.Idlerpulley
2.Loosenthenutontheidlerpulley(Figure59).
3.Insertthehookendofbelttensioningtoolinto
theholeabovetheidlepulley(Figure59).Restthe
curvedbottomofthetoolontheidlerpulley.
4.Insertthedriveofa1/2inchtorquewrenchintothe
holeinthebelttensioningtool(Figure59).
5.Rotatethetooltowardyouuntilthetorqueof50
inch-poundsinachieved,then,whileholdingthe
torque,tightentheidlerpulleynut(Figure59).
6.Removethetorquewrenchandtensioningtool.
7.Installthebeltcover.
42
 Loading...