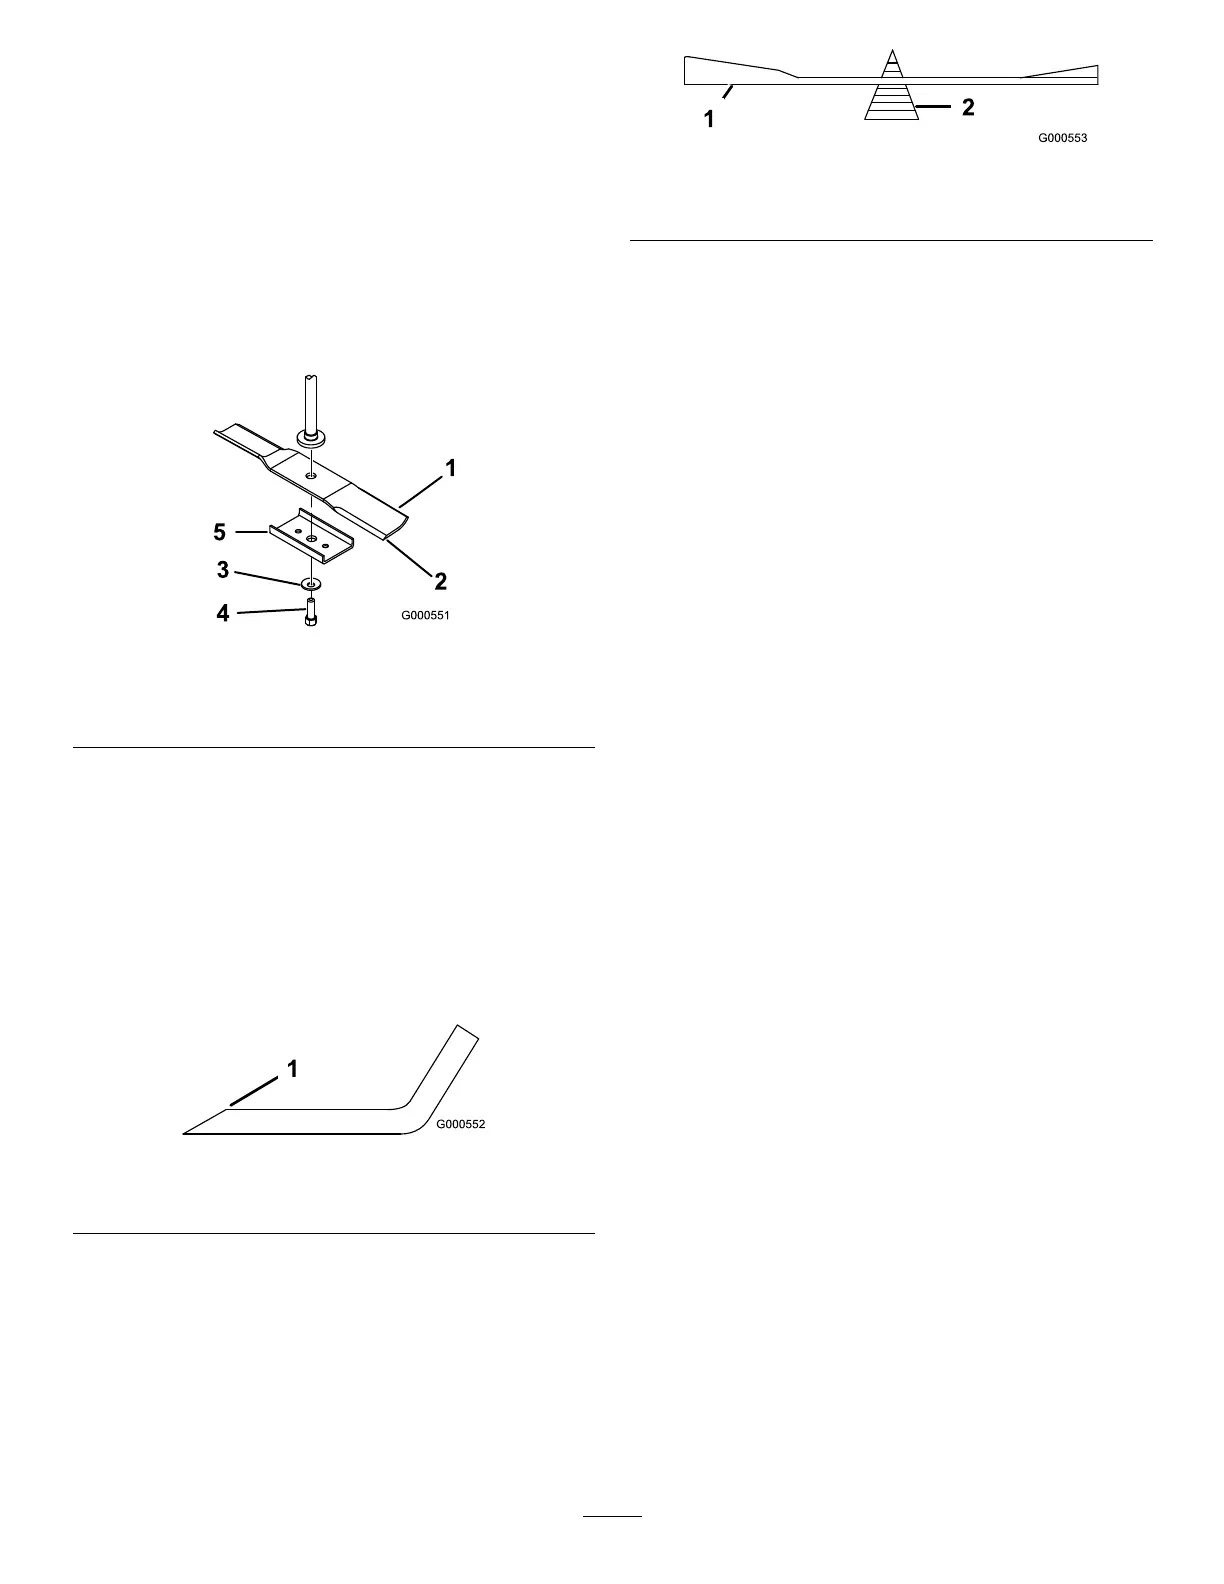
RemovingtheBlades
Replaceabladeifithitsasolidobject,iftheblade
isoutofbalance,orifthebladeisbent.Forbest
performanceandcontinuedsafetyconformanceof
themachine,usegenuineTororeplacementblades.
Replacementbladesmadebyothermanufacturers
mayresultinnon-conformancewithsafetystandards.
1.Holdthebladeendusingaragorthicklypadded
glove.
2.Removethebladebolt,curvedwasher,and
bladefromthespindleshaft(Figure49).
g000551
Figure49
1.Sailareaoftheblade3.Curvedwasher
2.Blade4.Bladebolt
SharpeningtheBlades
1.Usealetosharpenthecuttingedgeatboth
endsoftheblade(Figure50).
Note:Maintaintheoriginalangle.
Note:Thebladeretainsitsbalanceifyou
removethesameamountofmaterialfromboth
cuttingedges.
g000552
Figure50
1.Sharpenattheoriginalangle.
2.Checkthebalanceofthebladebyputtingitona
bladebalancer(Figure51).
Note:Ifthebladestaysinahorizontalposition,
thebladeisbalancedandreadytouse.
Note:Ifthebladeisnotbalanced,lesome
metaloffonlytheendofthesailarea(Figure50).
g000553
Figure51
1.Blade2.Balancer
3.Repeatthisprocedureuntilthebladeis
balanced.
InstallingtheBlades
1.Installthebladeontothespindleshaft(Figure
49).
Important:Thecurvedpartoftheblade
mustpointupwardtowardtheinsideofthe
mowertoensurepropercutting.
2.Installthecurvedwasher(cuppedsidetoward
theblade)andthebladebolt(Figure49).
3.Torquethebladeboltto47to88N·m(35to
65ft-lb).
LevelingtheMowerDeck
Ensurethatthemowerdeckislevelanytimeyou
installthemowerdeckorwhenyouseeanuneven
cutonyourlawn.
Checkthemowerdeckforbentbladespriorto
leveling;removeandreplaceanybentblades;referto
CheckingforBentBlades(page41)beforecontinuing.
Levelthemowerdeckside-to-sidebeforeadjusting
thefront-to-rearslope.
Requirements:
•Themachinemustbeonalevelsurface.
•All4tiresmustbeproperlyinated;referto
CheckingtheTirePressure(page40).
LevelingfromSidetoSide
1.Parkthemachineonalevelsurfaceand
disengagetheblade-controlswitch.
2.Movethemotion-controlleversoutwardtothe
PARKposition,shutofftheengine,removethe
key,andwaitforallmovingpartstostopbefore
leavingtheoperatingposition.
3.Settheheight-of-cutlevertomiddleposition.
4.Carefullyrotatetheblade(s)sothattheyareall
sidetoside(Figure52andFigure53).
43
 Loading...