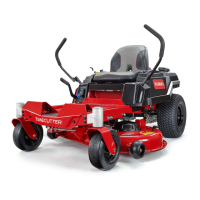
g014635
Figure74
1.Frontsupportrod3.Deckbracket
2.Lockingnut
6.Carefullylowerthefrontofthemowerdeckto
theground.
7.Liftthemowerdeckandhangerbracketsclear
oftherearliftrodandlowerthemowercarefully
totheground(Figure75).
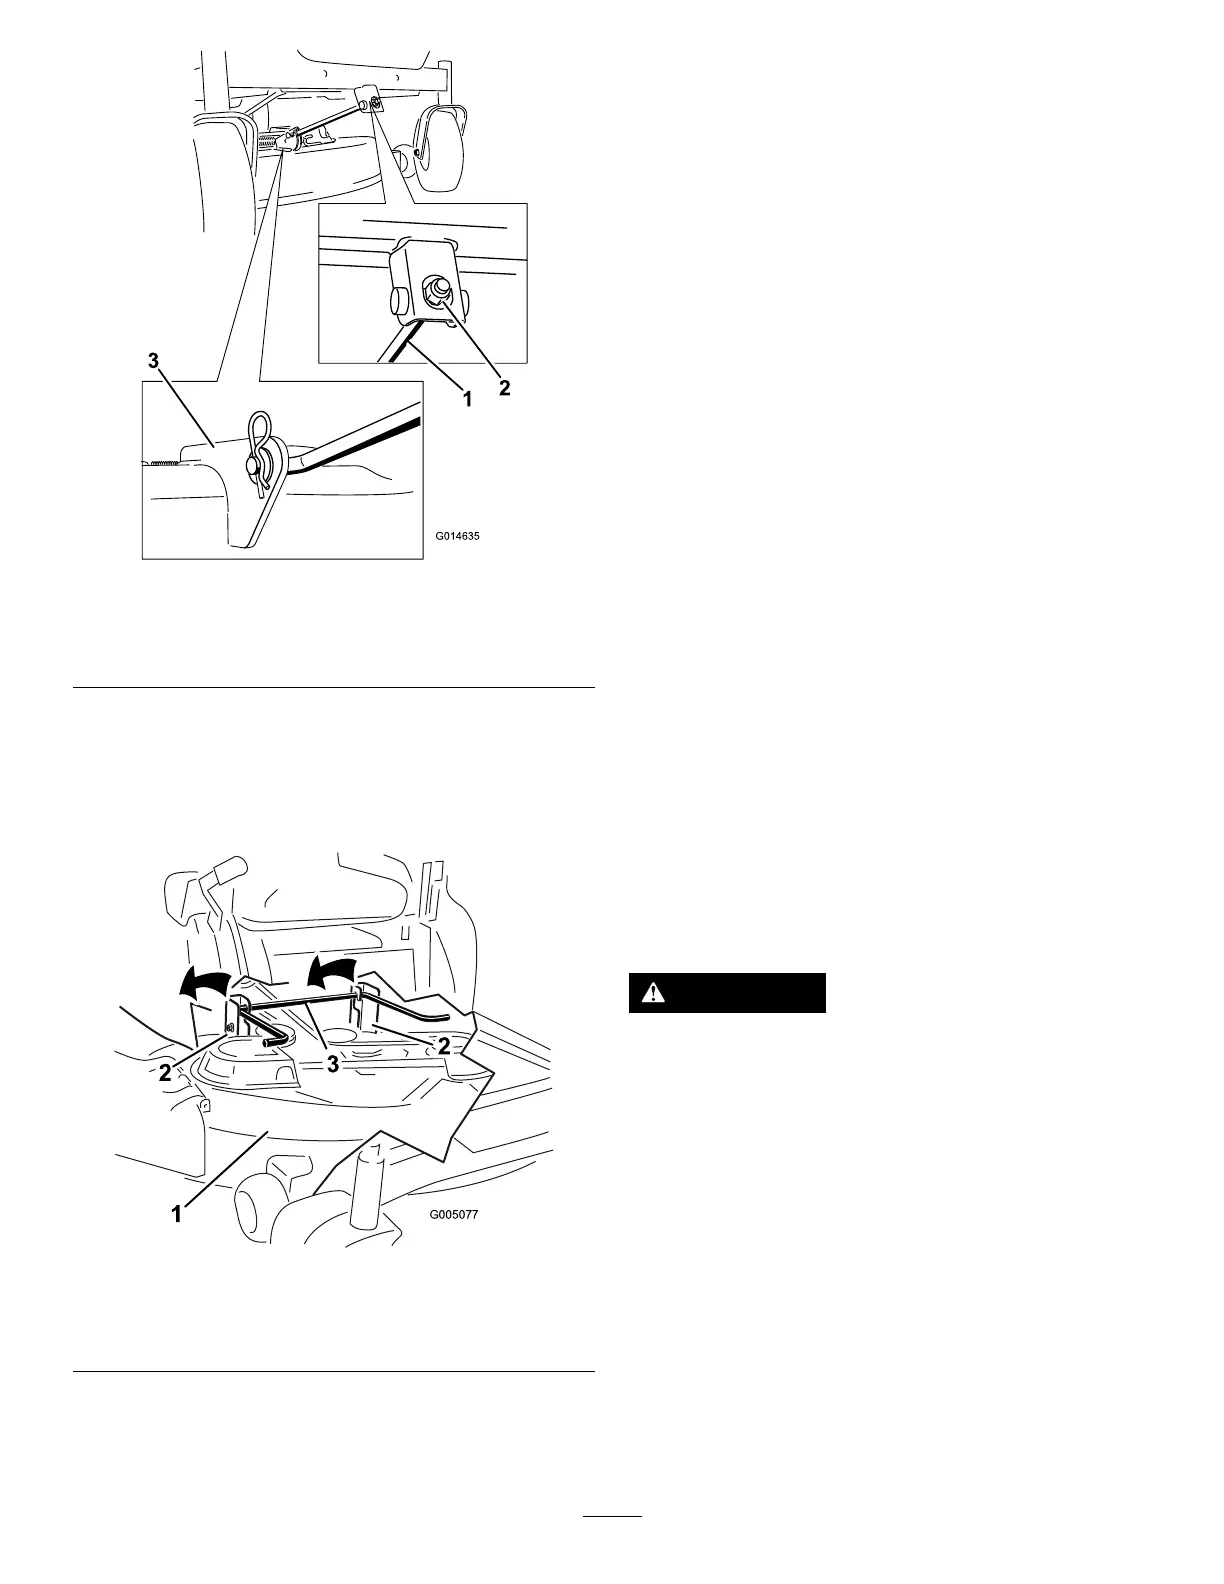
g005077
Figure75
1.Mowerdeck
3.Rearliftrod
2.Hangerbracket
8.Slidethemowerdeckrearwardtoremovethe
mowerbeltfromtheenginepulley.
9.Slidethemowerdeckoutfromunderneaththe
machine.
Note:Retainallpartsforfutureinstallation.
InstallingtheMowerDeck
1.Parkthemachineonalevelsurface,disengage
theblade-controlswitch(PTO),andengagethe
parkingbrake.
2.Shutofftheengine,removethekey,andwait
forallmovingpartstostopbeforeleavingthe
operatingposition.
3.Slidethemowerunderthemachine.
4.Lowertheheight-of-cutlevertothelowest
position.
5.Lifttherearofthemowerdeckandguidethe
hangerbracketsovertherearliftrod(Figure75).
6.Attachthefrontsupportrodtothemowerdeck
withtheclevispinandhairpincotter(Figure74).
7.Installthemowerbeltontotheenginepulley;
refertoReplacingtheMower-DeckBelt(page
49).
8.Tightenthebottom2boltsforthemower-deck
curtaintothemowerdeck;refertoReleasing
theMower-DeckCurtain(page39).
ReplacingtheGrass
Deector
ServiceInterval:Beforeeachuseordaily—Inspect
thegrassdeectorfordamage.
WARNING
Anuncovereddischargeopeningcouldallow
themachinetothrowobjectstowardyouor
bystanders,resultinginseriousinjury.Also,
contactwiththebladecouldoccur.
Neveroperatethemachinewithoutthe
grassdeector,thedischargecover,orthe
grass-collectionsysteminplace.
1.Removethenut(3/8inch)fromtherodunder
themower(Figure76).
56
 Loading...