3. Attach the bracket securely to the wall with four or more 6 mm (0.25 in.) diameter fasteners.
4. Use fasteners that are suitable for the type of wall at your site to ensure that the bracket is
securely attached to the wall. For walls that are constructed of gypsum wallboard on wood
or metal studs, use good-quality medium-capacity or high-capacity hollow-wall anchors.
5. Route the cables up the wall surface.
6. Connect the cables to the printer.
7. Attach the printer to the wall mounting bracket (see “Mounting the printer to the wall
mounting bracket (optional)” on page 13).
Mounting the printer to the wall mounting bracket (optional)
Attention: Before proceeding with this task, you must power off the printer. Touch the metal of
the printer frame with the back of your hand before making contact with the printer. See
Handling static-sensitive devices for more information regarding ESD handling procedures.
To mount the printer to the wall mounting bracket:
1. Open the paper door by pressing the blue release button.
2. Turn off the power to the printer.
3. Unplug the power cord from the external power source.
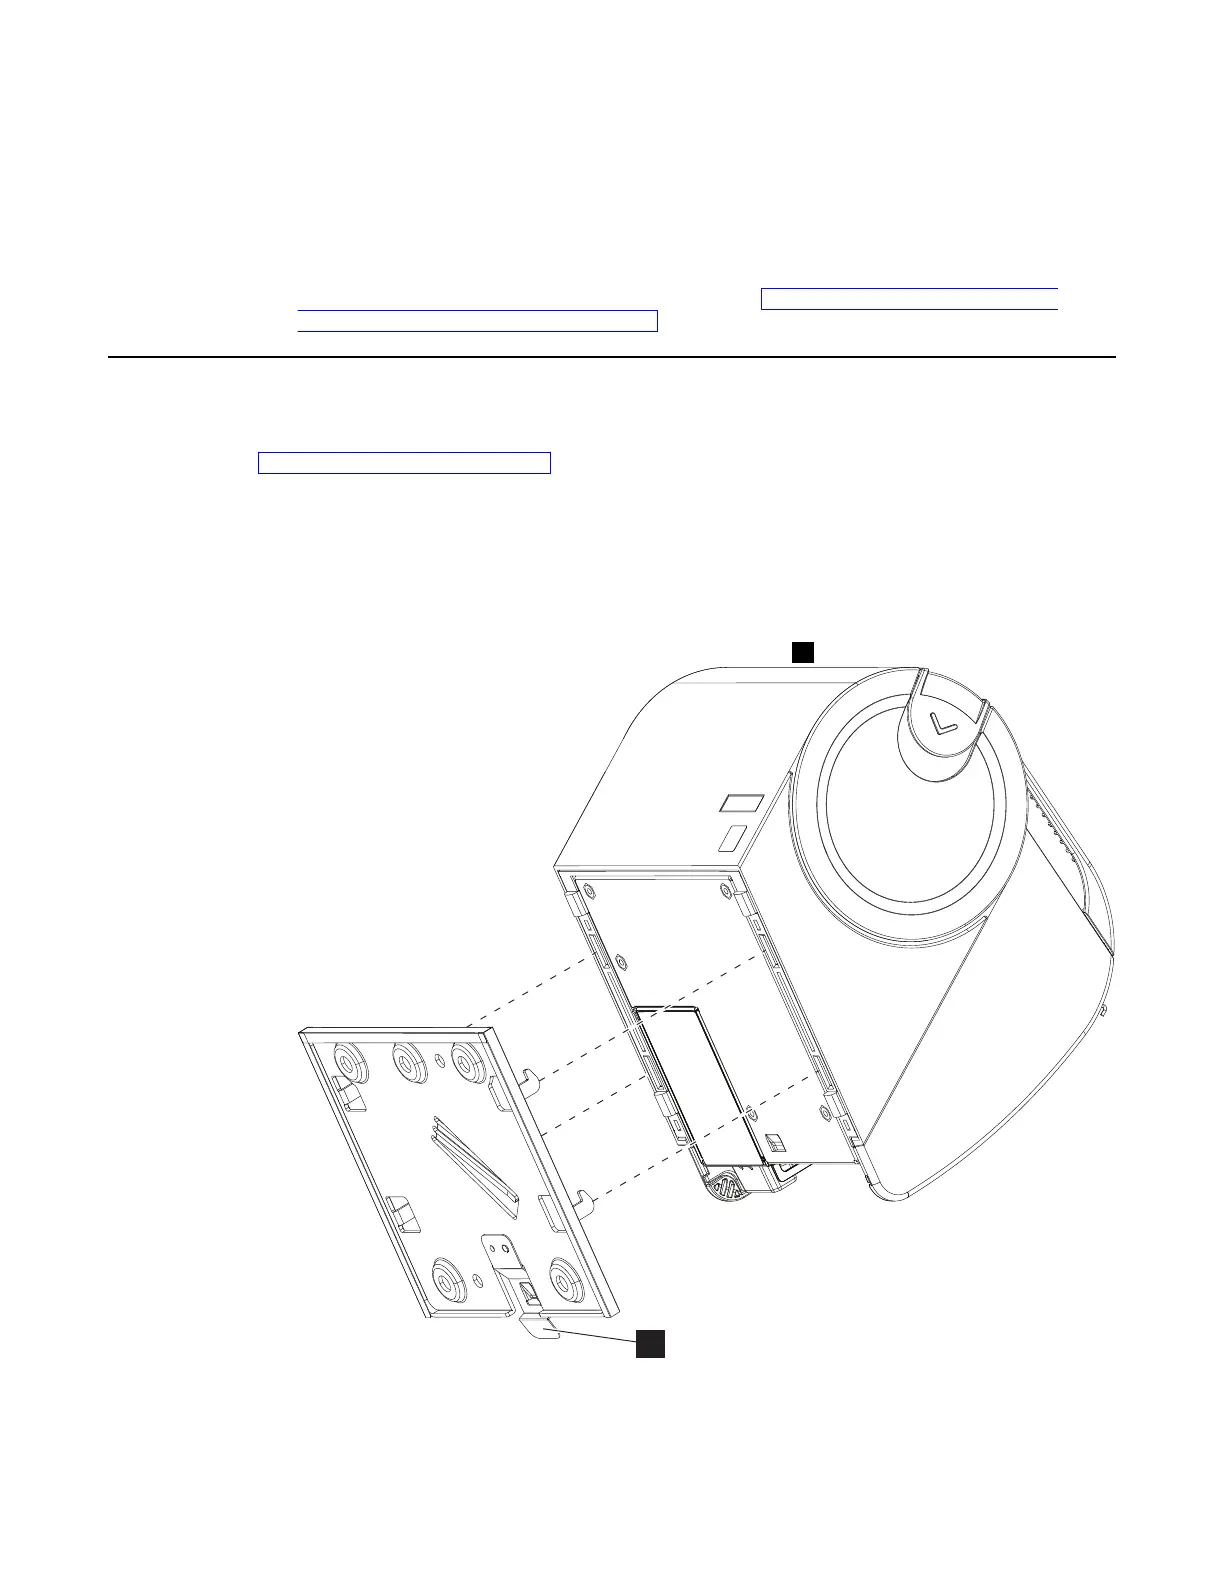
4. Align the four metal hooks on the wall mounting bracket with the four slotted openings in
the bottom of the printer.
5.
Slide the printer down until the wall mounting bracket
B release latch clicks.
Figure 4. Attaching printer to the wall mounting bracket
Chapter 1. Installing and configuring your printer 13
 Loading...