30
Adjustment of respective parts
5.Needle location
Straight needle dropping points
[Condition]
<SD>
Pattern selection dial: "6"
<2D>
Pattern selection dial: "4"
<3D>
Pattern selection dial: "3"
Stitch width lever: "0"
[Diagnosis]
1. Rotate the handweel, bring down the needle
lower than the surface of needle plate.
2. Measure the relative position (A, B) between
the needle and the slot.(Fig. 1)
[Standard]
A = B (Fig. 1)
* Make adjustment if the diagnosis result fails to
meet the standard.
[Adjustment]
1. Remove the external panels and others to
see the adjusting section. (See:page.45)
2. Turn the eccentric pin, adjust the needle
location.(Fig. 2)
Right turn moves the needle location to "Left".
Left turn moves the needle location to "Right".
* Repeat the adjustment till the standard is met.
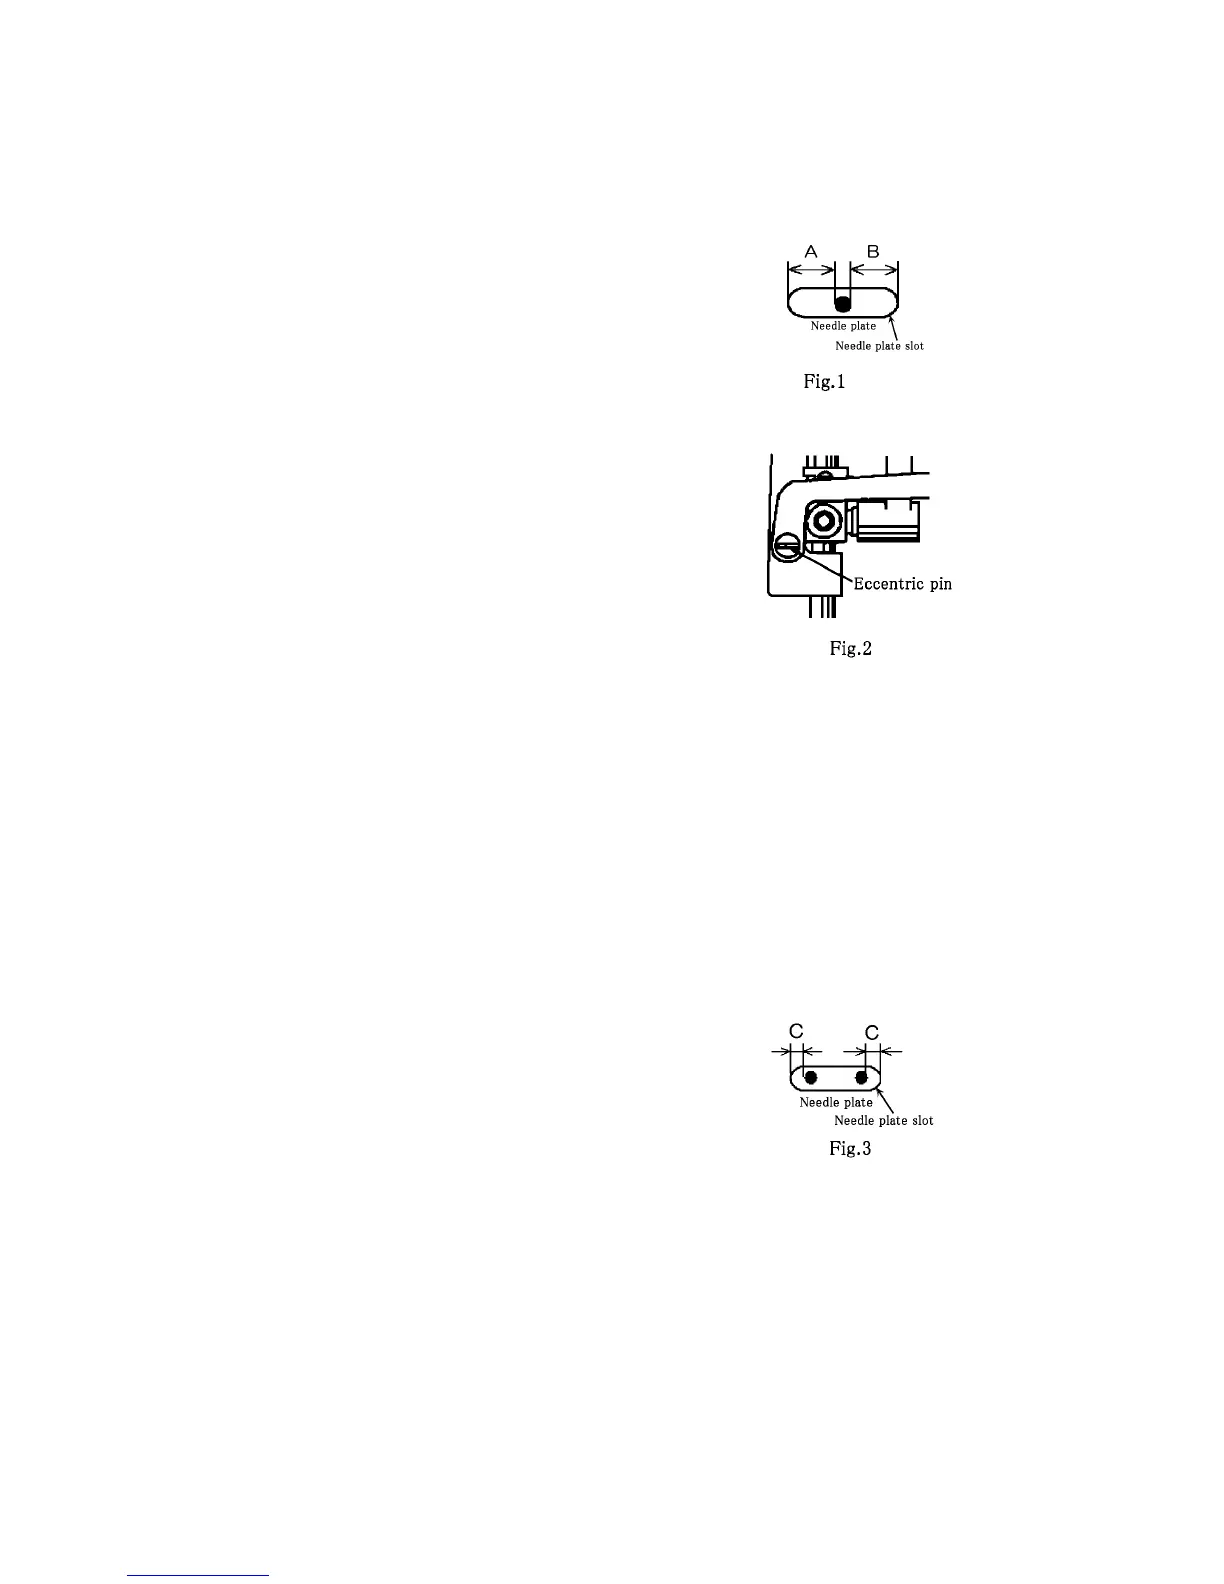
Zigzag needle dropping points
[Condition]
<SD>
Pattern selection dial: "11"
<2D>
Pattern selection dial: "7"
<3D>
Pattern selection dial: "3"
Stitch width lever: "5"
[Diagnosis]
1. Rotate the handweel, bring down the needle
lower than the surface of needle plate.
2. Measure the relative position (C) between the
needle and the slot.(Fig. 3)
[Standard]
C = 0.7 ± 0.3 mm (Fig.3)
* Make adjustment if the diagnosis result fails to
meet the standard.
 Loading...