45
Removal and reassembling of main components
4.Removal and reassembling of main components
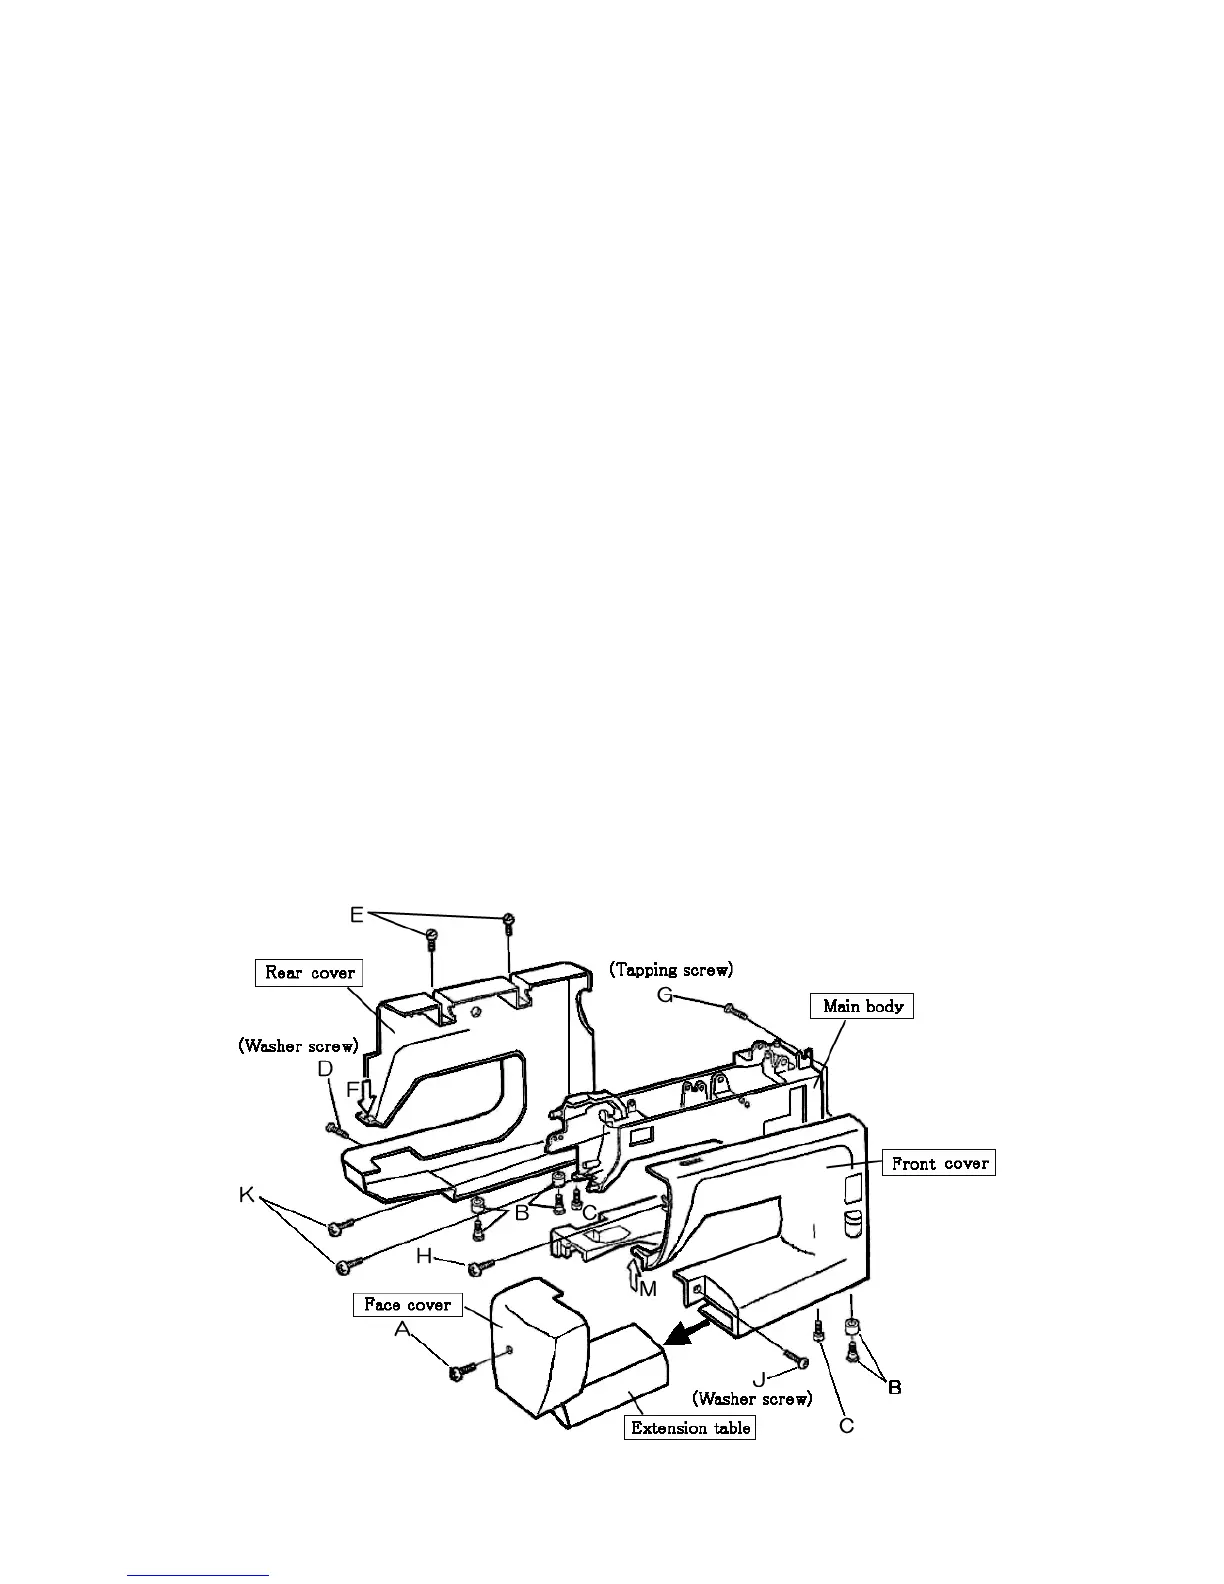
1.External panels, etc.
[Note] Use a magnetic screwdriver in order to prevent screws from dropping in the sewing machine.
1. Remove the face cover
(1)Remove the screw (A).
(2)Remove the face cover.(Bring up to left top.)
2. Remove the rear cover
(1)Slide the extension table to left and remove.
(2)Remove the pattern selection dial.
(3)Remove 3 pieces of rubber foot and a pair of screws (C).
(4)Remove a pair of screws (E) and a piece of screw (D) at the rear part of main body.
(5)Lift the presser foot lever, tilt the main body forward.
(6)Pull out the spool pin from the main body.
(7)While pushing downward the section (F), remove the rear cover.
3. Remove the front cover
(1)Remove a piece of screw (G).
(2)Raise the main body.
(3)Loosen a piece of screw (H).(Front coner set screw)
(4)Remove a piece of screw (J).
(5)Remove a pair of screws (K).(Thread guide plate set screw)
(6)Lower the presser foot lever and tilt the main body backward.
(7)Disengage the stopper at the section (M). While expanding the lower part (bottom) of panel and
the right side face outward, bring up and remove the front cover.
[Caution] Pay attention not to cut fingers with the cover edges.
* Install the panel in the reverse order of removal.
 Loading...